Hyundai Accent: Restraint / SRSCM
Components and Components Location
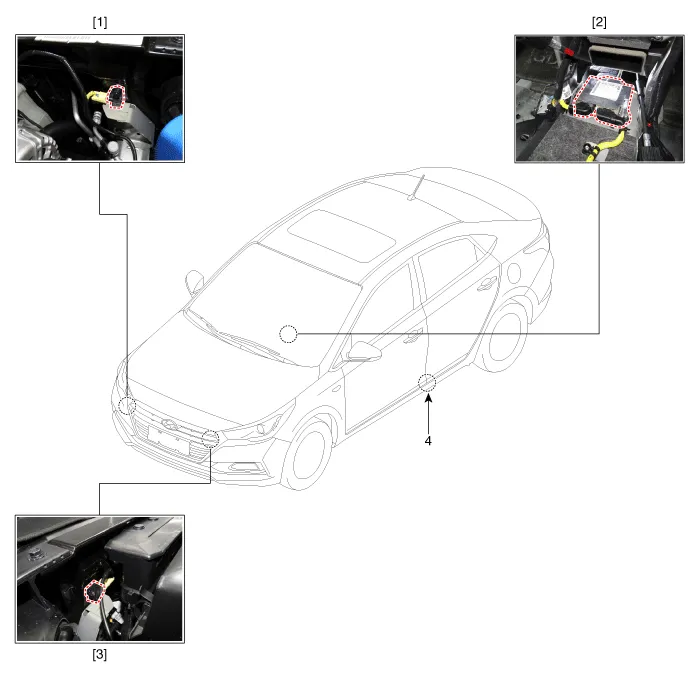
1. Front right Impact Sensor (FIS)
2. Supplemental Restraint System Control Module (SRSCM)
3. Front left Impact Sensor (FIS)
4. Gravity Side Impact Sensor (G-SIS)
Schematic Diagrams
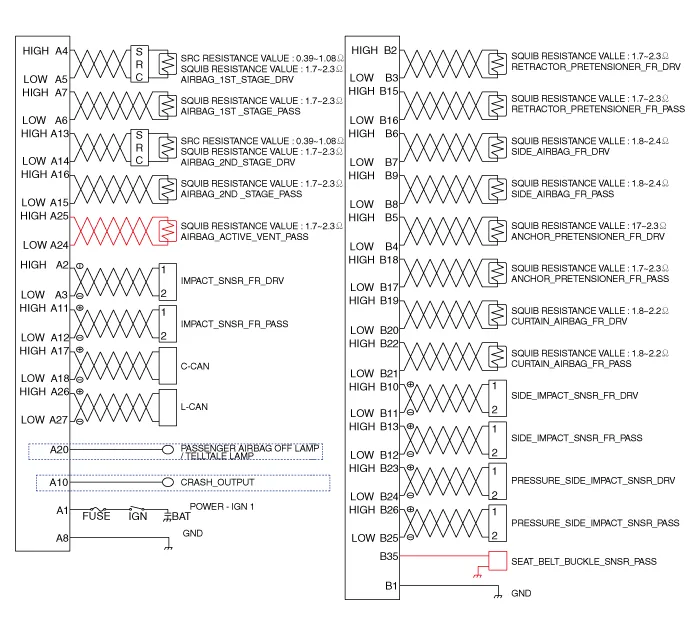
SRS Control Module (SRSCM) ➤
Front Impact Sensor (FIS)
• The front impact sensors (FIS) are installed on the upper of the side panel in Front End Module (FEM). They are remote sensors that detect acceleration due to a collision at their mounting locations.
• The primary purpose of the Front Impact Sensor (FIS) is to provide an indication of a collition. The Front Impact Sensor (FIS) sends acceleration data to the SRSCM.
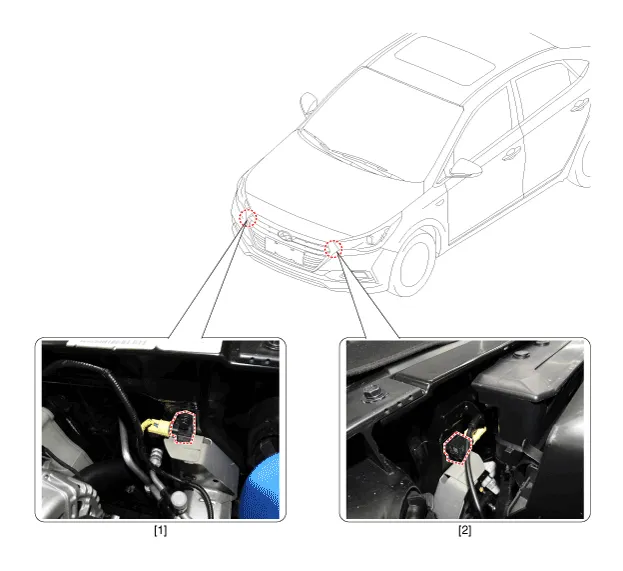
1. Front right Impact Sensor (FIS)
2. Front left Impact Sensor (FIS)

• Removal of the airbag must be performed according to the precautions/ procedures described previously.
• Before disconnecting the front impact sensor connector, disconnect the front airbag connector(s).
• Do not turn the ignition switch ON and do not connect the battery cable while replacing the front impact sensor.
1.Disconnect the battery negative cable, and wait for at least three minutes before beginning work.
2.Disconnect the front impact sensor connector (A).
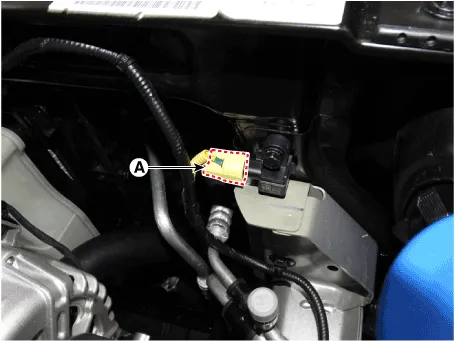
3.Remove the front impact sensor (A) after loosening the mounting bolt.
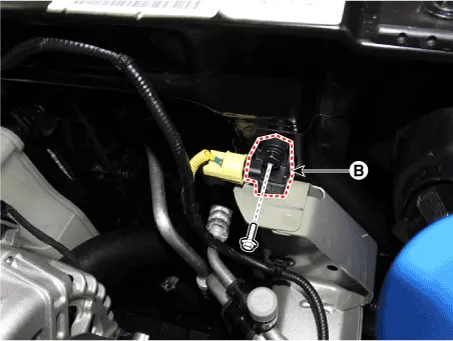

• Do not turn the ignition switch ON and do not contact the battery cable while replacing the front impact sensor.
1.Install the new front impact sensor.
2.Connect the front impact sensor connector.
3.Install the front impact sensor mounting bolt.
Tightening torque : 7.8 - 9.8 N.m (0.8 - 1.0 kgf.m, 5.8 - 7.2 lb-ft)
4.Reconnect the battery negative cable.
5.After installing the Front Impact Sensor, confirm proper system operation :
• Turn the ignition switch ON; the SRS indicator light should be turned on for about six seconds and then go off.
Side Impact Sensor (SIS)
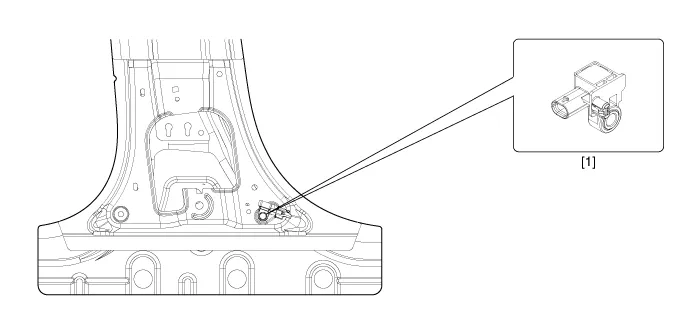
1. Side Impact Sensor (SIS)
1.Disconnect the battery negative cable and wait for at least three minutes before beginning work.
2.Remove the door scuff trim. (Refer to the Body group - "Interior trim")
3.Remove the center pillar trim. (Refer to the Body group - "Interior trim")
4.Loosen the side impact sensor mounting bolt (A) and remove the side impact sensor.
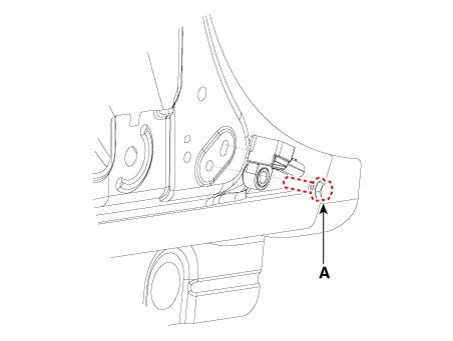

• Do not turn the ignition switch ON and do not connect the battery cable while replacing the side impact sensor.
1. Install the new side impact sensor with the bolt (A) then connect the side impact sensor connector.
Tightening torque : 7.0 - 9.0 N.m (0.71 - 0.92 kgf.m, 5.2 - 6.6 lb-ft)
2.Install the center pillar trim.(Refer to Body - "Interior tirm")
3.Install the door scuff trim. (Refer to Body - "Interior tirm")
4.Reconnect the battery negative cable.
5.After installing the Side Impact Sensor, confirm proper system operation :
• Turn the ignition switch ON; the SRS indicator light should be turned on for about six seconds and then go off.
Occupant Classification System (OCS) ➤
Other information:
Hyundai Accent (HC) (2017 - 2022) Service Manual: Description and Operation
- OBD-II Review 1. Overview The California Air Resources Board (CARB) began regulation of On Board Diagnostics (OBD) for vehicles sold in California beginning with the 1988 model year. The first phase, OBD-I, required monitoring of the fuel metering system, Exhaust Gas Recirculation (EGR) system and additional emission related components.Hyundai Accent (HC) (2017 - 2022) Service Manual: Troubleshooting
- Troubleshooting Trouble symptomSuspect areaRemedy Clutch slipping • Car will not respond to engine speed during acceleration • Insufficient vehicle speed • Lack of power during uphill driving Insufficient pedal free playAdjust Clogged hydraulic systemCorrect or replace parts Excessive wear of clutch disc facingReplace Hardened clutch disc facing, or oil on surfaceReplace Damaged pressure plate or flywheelReplace Weak or broken pressure springReplace Diff
Contents
- Components and Components Location
- Schematic Diagrams
- SRS Control Module (SRSCM)
- Front Impact Sensor (FIS)
- Side Impact Sensor (SIS)
- Occupant Classification System (OCS)
Categories
- Manuals Home
- Hyundai Accent Owners Manual
- Hyundai Accent Service Manual
- New on site
- Most important about car


