Hyundai Accent: Motor Driven Power Steering / Steering Gear Box
1.Loosen the wheel nuts slightly.Raise the vehicle, and make sure it is securely supported.
2.Remove the front wheel and tire (A) from the front hub.
Tightening torque :107.9 - 127.5 N.m (11.0 - 13.0 kgf.m, 79.6 - 94.0 lb-ft)
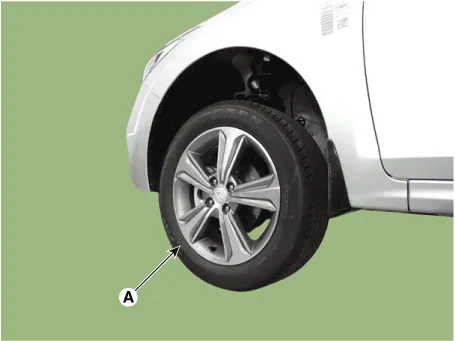

• Be careful not to damage the hub bolts when removing the front wheel and tire.
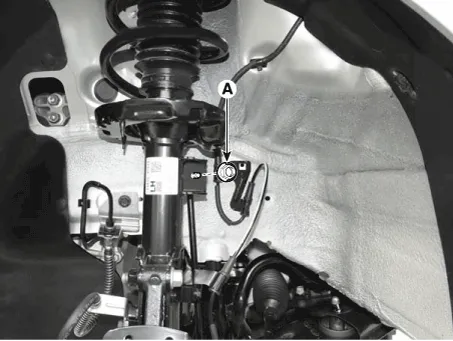
3.Disconnect the stabilizer link with the front strut assembly after loosening the nut (A).
Tightening torque :98.1 - 117.7 N.m (10.0 - 12.0 kgf.m, 72.3 - 86.8 lb-ft)
4.Remove the tie rod end ball joint.
(1)Remove the split pin (C).
(2)Loosen the nut (B).
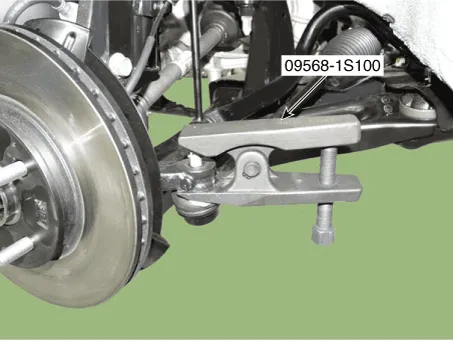
(3)Using SST(09568-1S100), separate the ball joint (A) from the knuckle.
Tightening torque :24.5-34.3 N.m (2.5 - 3.5 kgf.m, 18.1 - 25.3 lb-ft)
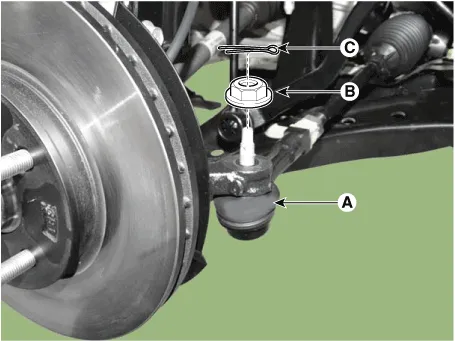

• Do not reuse the split pin (C).
5.Loosen the lower arm nut (A) and then remove the lower arm ball joint by using SST(09568-1S100).
Tightening torque : 58.8 - 70.6 N.m (6.0 - 7.2 kgf.m, 43.4 - 52.1 lb-ft)
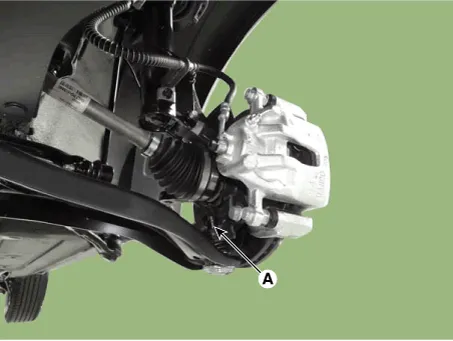
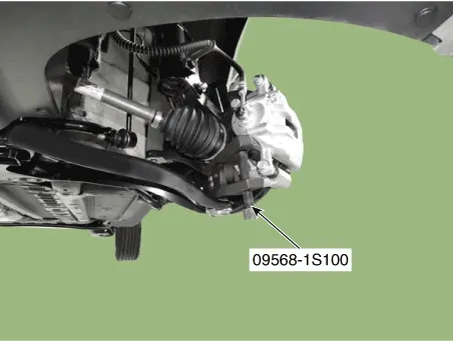

• Do not reuse the lower arm lock nut (A).
6.Loosen the bolt (A) and then disconnect the universal joint assembly from the pinion of the steering gear box.
Tightening torque : M8 BOLT : 32.4 - 37.3 N.m (3.3 - 3.8 kgf.m, 23.9 - 27.5 lb-ft)M10 BOLT : 49.0 - 58.8 N.m (5.0 - 6.0 kgf.m, 36.2 - 43.4 lb-ft)
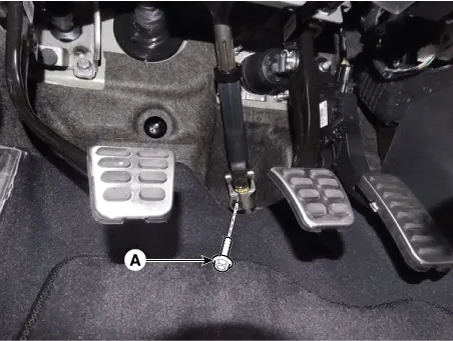

• Do not reuse the bolt.
• Lock the steering wheel in the straight ahead position to prevent the damage of the clock spring inner cable.
• When assembling, insert the shark pin into the universal joint york slot as the illustration below.
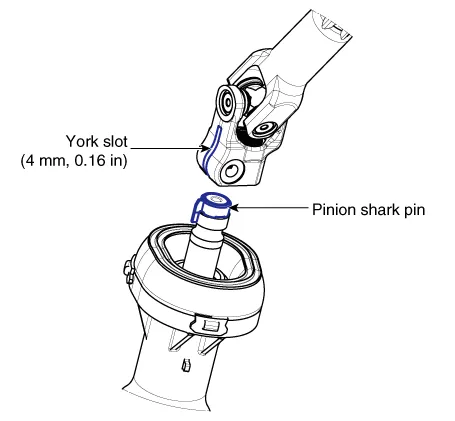
7.Remove the roll rod stopper by loosening the bolt and nut.
Tightening torque :107.9 - 127.5 N.m (11.0 - 13.0 kgf.m, 79.6 - 94.0 lb-ft)
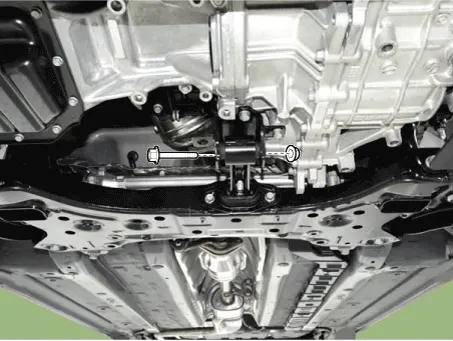
8.Remove the muffler rubber hanger (A).
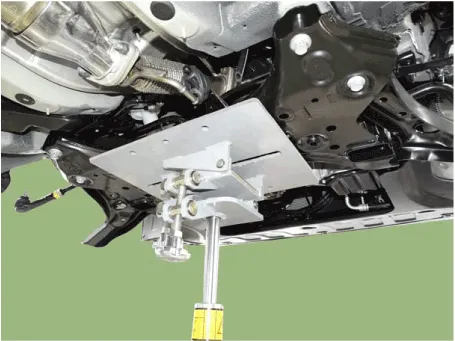
9.Remove the subframe by loosening the mounting bolts and nuts.
Tightening torque Sub frame mounting bolts and nut : 156.9 - 176.5 N.m (16.0 - 18.0 kgf.m, 115.7 - 130.2 b-ft)
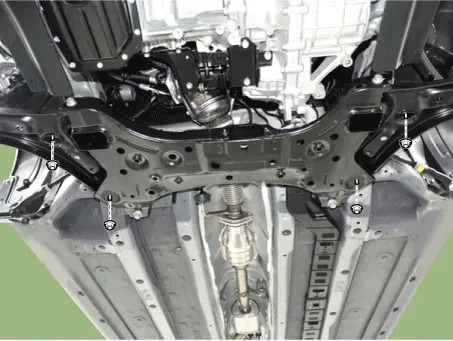

• Set a transmission jack for safety.
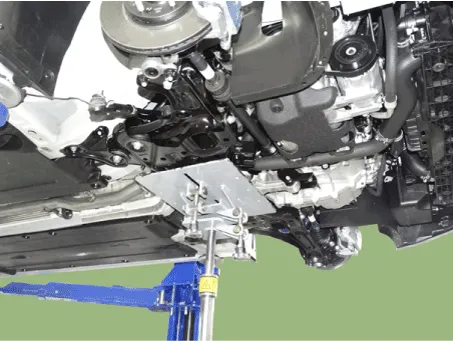
10.Remove the protector (A).
Tightening torque : 6.9 - 10.8 N.m (0.7 - 1.1 kgf.m, 5.1 - 8.0 lb-ft)
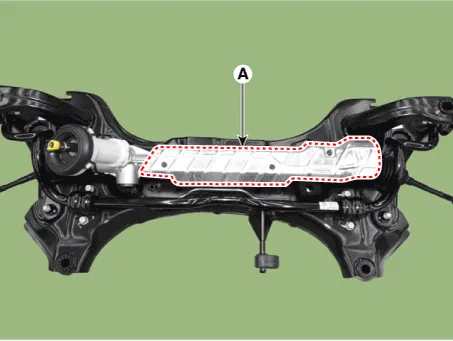
11.Remove the steering gearbox from the front sub frame by loosening the mounting bolts.
Tightening torque : 88.2 - 107.8 N.m (9.0 - 11.0 kgf.m, 65.0 - 79.5 lb-ft)
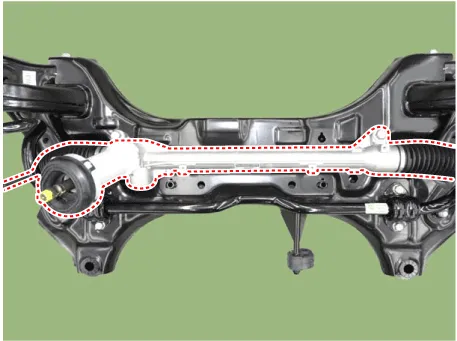
12.To install, reverse the removal procedure.
13.Check the front alignment.(Refer to Suspension System - "Front Alignment")

• Do not disassembly the steering gear box.
• If disassembly the steering gear box, the quality (Noise / cleanliness / functions) is not guaranteed.

Tie rod end
1.Remove the tie rod end after loosening the nut.
Tightening torque :49.0 - 53.9 N.m (5.0 - 5.5 kgf.m, 36.2 - 39.8 lb-ft)
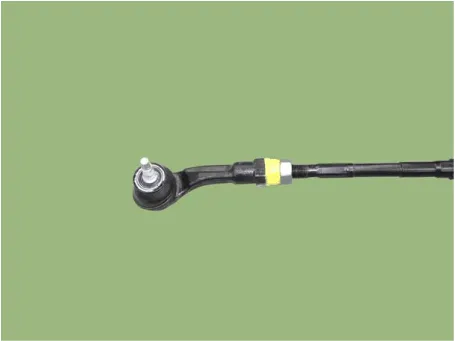

• Before removing the tie rod end, note by measuring the length of the thread or marked with paint.
2.Replace with new parts.
3.Check the alignment.(Refer to Tires/ Wheels - "Alignment")
Other information:
Hyundai Accent (HC) (2017 - 2022) Service Manual: MDPS Assembly
- Removal 1.Disconnect the battery negative cable and wait for at least three minutes before beginning work. 2.Put a flat tool (Ø4mm) into a guide hole located in the bottom of steering wheel and press a spring. • When put a tool into a hole, make sure not to damage an airbag cusion by a tool. 3.Turn a steering wheel anti-clockwise, so make a guide hole (A) shown on the rightside.Hyundai Accent (HC) (2017 - 2022) Service Manual: Repair procedures
- Replacement [Removal] • Put on gloves to prevent hand injuries. • Use seat covers to avoid damaging any surfaces. 1.Remove the roof garnish.(Refer to Body Side Molding - "Roof Garnish") 2.Remove the front pillar trim.(Rear to Interior Trim - "Front Pillar Trim") 3.Remove the inside rear view mirror assembly.
Categories
- Manuals Home
- Hyundai Accent Owners Manual
- Hyundai Accent Service Manual
- New on site
- Most important about car


