Hyundai Accent: Brake System / Brake Oil
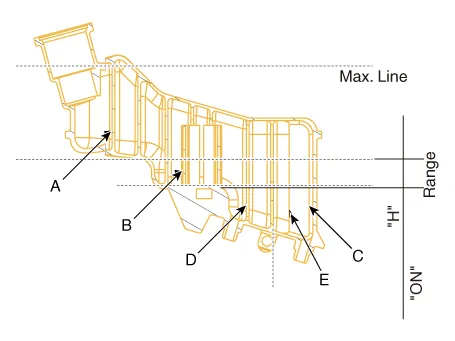
Brake oil : DOT 3 or DOT 4
| Reservoir capacity (cc) | ||
| MAX LEVEL | A + B + C + D + E | 409 ± 20 |
| ON LEVEL (MIN LEVEL) (H = 23 ± 1.5 mm) | B + C + D | 138 ± 10 |
| PARTIAL LEVEL | C (PRI) | 28 |
| D (SEC) | 31 | |
| CLUTCH LEVEL | E | 12 |
1.Disconnect the battery (-) terminal.
2.Remove the brake fluid level sensor connector.
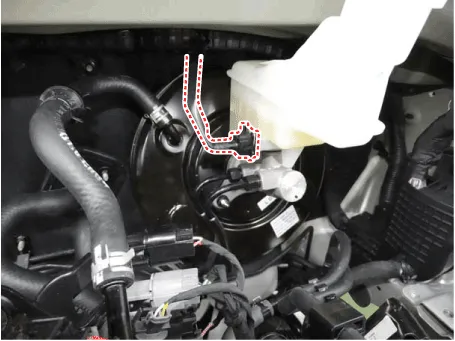
3.Remove the reservoir cap and remove the brake fluid from the reservoir tank using the cleaner.

• Be careful so that the brake fluid may not come in contact with the vehicle or human body. If it did, wipe out immediately.
• Make sure to remove any foreign substances around the reservoir and the reservoir cap before opening the reservoir cap.
4.Loosen the bleed screw (A) and have an assistant press the brake
pedal several times to remove any remaining brake fluid from the brake
tube.
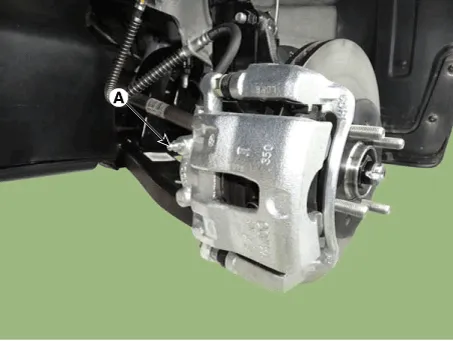
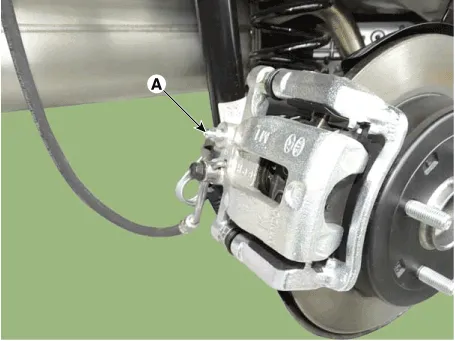
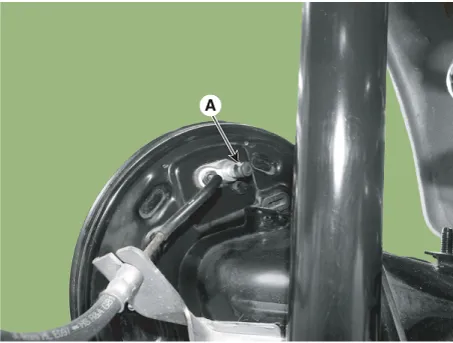

• The steps should be performed in the order of rear right, front left, rear left and front right.
• Be careful so that the brake fluid may not come in contact with the vehicle or human body. If it did, wipe out immediately.
5.Loosen the bleed screw (A) and have an assistant press the brake
pedal several times to remove any remaining brake fluid from the brake
tube.
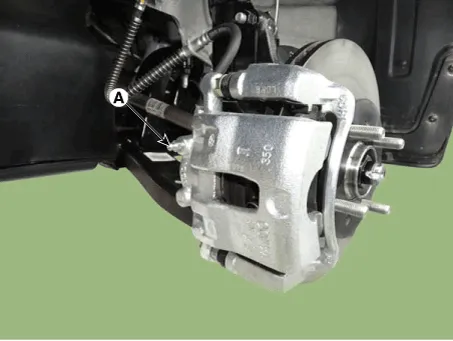
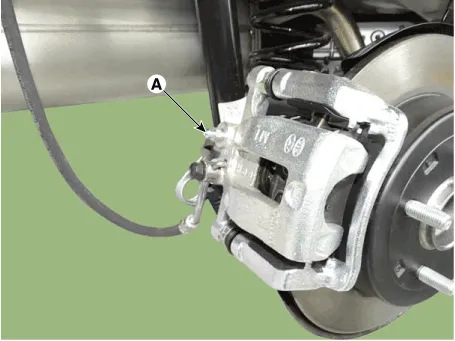
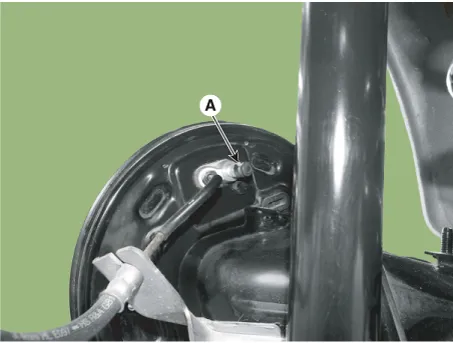

• The steps should be performed in the order of rear right, front left, rear left and front right.
• Be careful so that the brake fluid may not come in contact with the vehicle or human body. If it did, wipe out immediately.
6.Tighten the bleed screw and fill up to the 'MAX' line of the reservoir with the brake fluid.
7.Connect the battery (-) terminal.
8.Connect the brake fluid level sensor connector.
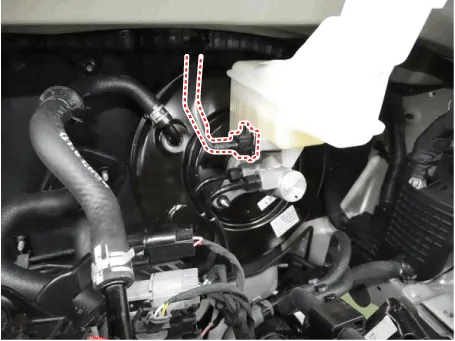
9.Loosen the bleed screw (A) and have an assistant press the brake
pedal several times until the brake fluid reaches the caliper cylinder.
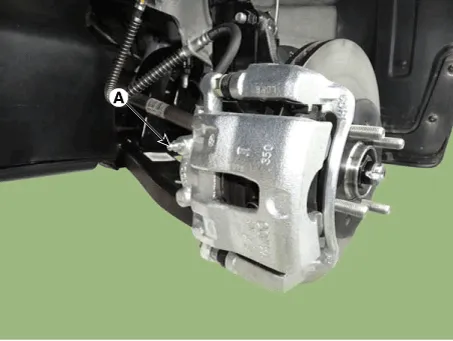
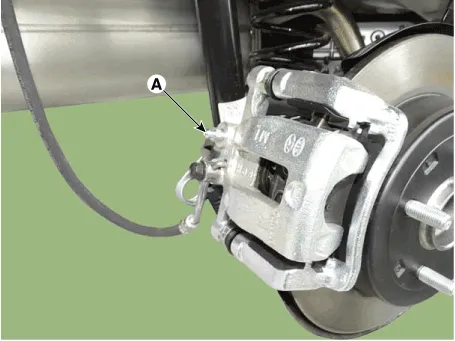
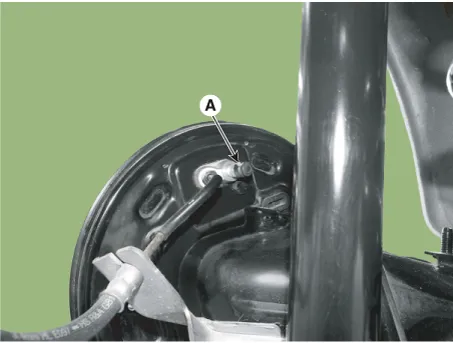

• The steps should be performed in the order of rear right, front left, rear left and front right.
• Be careful so that the brake fluid may not come in contact with the vehicle or human body. If it did, wipe out immediately.
• Make sure the brake fluid of the reservoir tank does not go below the MIN level.
10.Tighten the bleed screw.
11.Have an assistant press the brake pedal several times to pressurize it and keep it pressed.
12.While the assistant is pressing down on the brake pedal, loosen the bleed screw to remove air and quickly tighten it again.
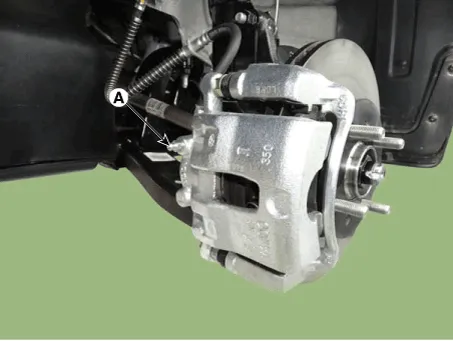
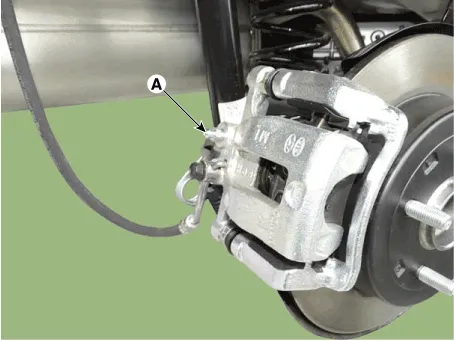
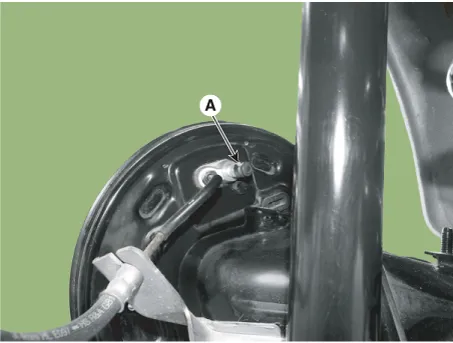

• The steps should be performed in the order of rear right, front left, rear left and front right.
• Be careful so that the brake fluid may not come in contact with the vehicle or human body. If it did, wipe out immediately.
• Make sure the brake fluid of the reservoir tank does not go below the MIN level.
13.Repeat the above steps until all bubbles are completely removed.
Other information:
Hyundai Accent (HC) (2017 - 2022) Service Manual: Description and Operation
- Function NoItemDescription 1Washer Linked Wiper – If the washer switch is pressed ON for 0.06 second with the vehicle mode in IGN2, the wiper relay is turned ON after washer switch ON, and then the wiper relay is turned OFF after wiper parking signal ON. 2MIST Linked Wiper – If the wiper mist switch is pressed ON for 0.6 second with the vehicle mode in IGN2, the wiper relay is turned ON, and then OFF after wiper parking signal ON.Hyundai Accent (HC) (2017 - 2022) Service Manual: Specifications
- Specifications ItemSpecification TypeElectric Power Steering System Steering gearTypeRack & Pinion Rack stroke150 mm (5.90 in.) ± 1 (0.3937 in.) Steering angle(Max.)Inner39.5°(+0.5°/-1.5°) Outer32.6° - Tightening Torques ItemTightening torque (kgf.m) N.mkgf.mlb-ft Hub nuts107.9 - 127.511.0 - 13.079.6 - 94.0 Steering wheel lock bolt44.
Categories
- Manuals Home
- Hyundai Accent Owners Manual
- Hyundai Accent Service Manual
- New on site
- Most important about car


