Hyundai Accent: Brake System (ABS/ESC) / Brake System
Repair procedures
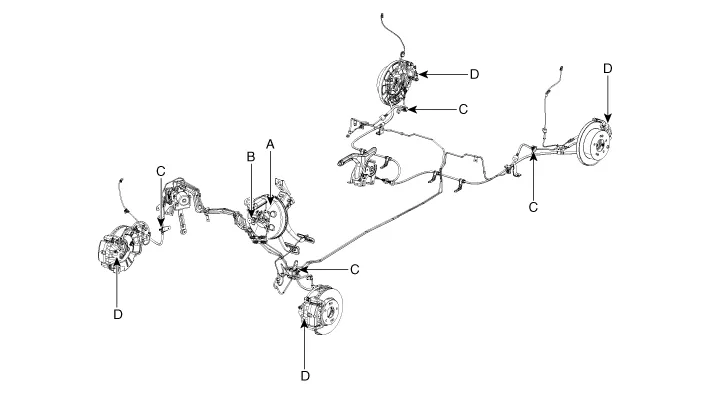
| Component | Procedure | ||||
| Brake Booster (A) | Check brake operation by applying the brakes during a test drive. If the brakes do not work properly, check the brake booster. Replace the brake booster as an assembly if it does not work properly or if there are signs of leakage. | ||||
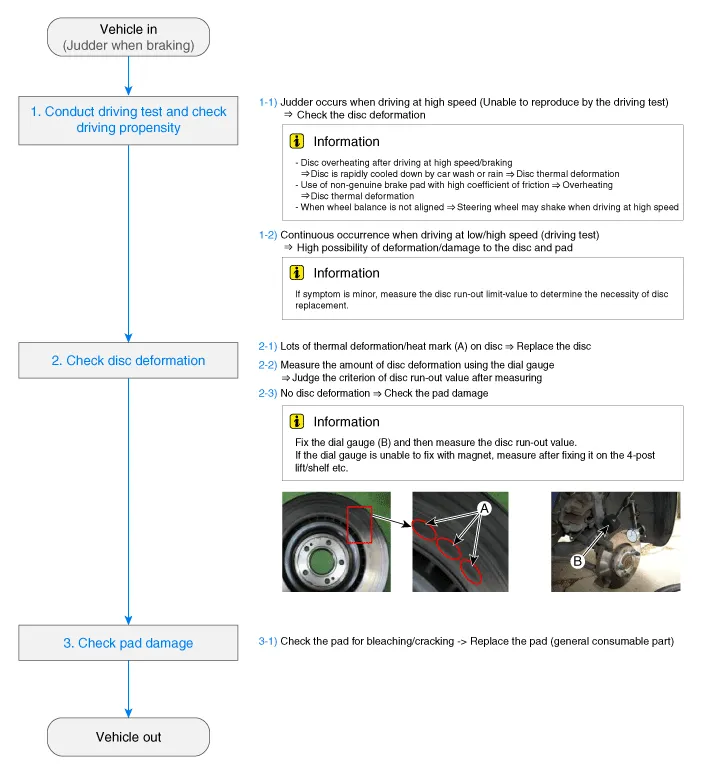
| Piston cup and pressure cup inspection (B) |
| ||||
| Brake hoses (C) | Look for damage or signs of fluid leakage. Replace the brake hose with a new one if it is damaged or leaking. | ||||
| Caliper piston seal and piston boots (D) | Check brake operation by applying the brakes. Look for damage or signs of fluid leakage. If the pedal does not work properly, the brakes drag, or there is damage or signs of fluid leakage, disassemble and inspect the brake caliper. Replace the boots and seals with new ones whenever the brake caliper is disassembled. |
Brake Booster
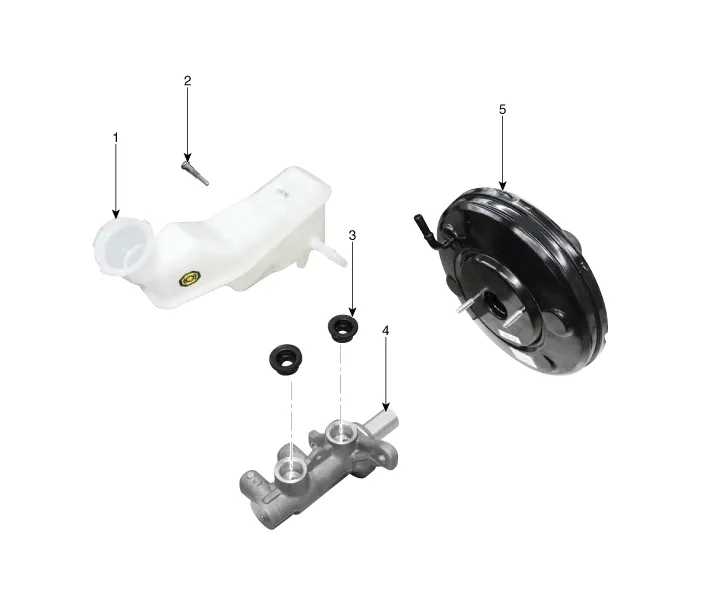
1. Reservoir
2. Reservoir pin
3. Grommet
4. Master cylinder
5. Booster
1.Run the engine for one or two minutes, and then stop it. If the pedal depresses fully the first time but gradually becomes higher when depressed succeeding times, the booster is operating properly, if the pedal height remains unchanged, the booster is inoperative.
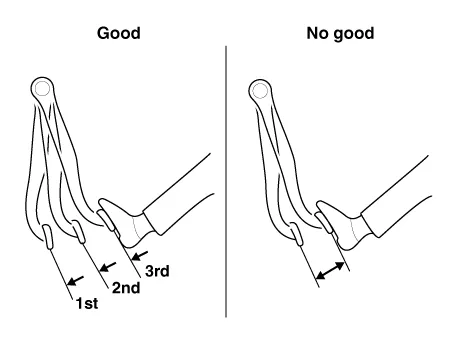
2.With the engine stopped, step on the brake pedal several times.Then step on the brake pedal and start the engine. If the pedal moves downward slightly, the booster is in good condition. If there is no change, the booster is inoperative.
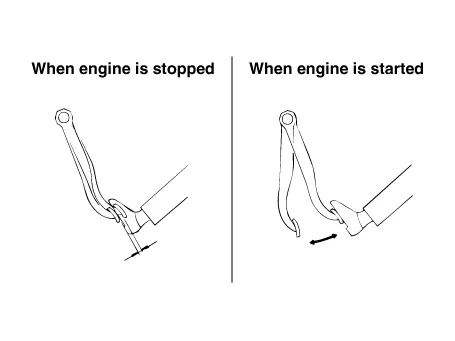
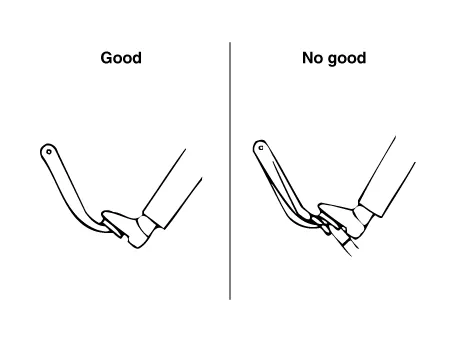
3.With the engine running, step on the brake pedal and then stop the engine.Hold the pedal depressed for 30 seconds. If the pedal height does not change, the booster is in good condition, if the pedal rises, the booster is inoperative.If the above three tests are okay, the booster performance can be determined as good.Even if one of the above three tests is not okay, check the check valve, vacuum hose and booster for malfunction.
1.Turn ignition switch OFF and disconnect the negative (-) battery cable.
2.Remove the battery.(Refer to Engine Electrical System - "Battery")
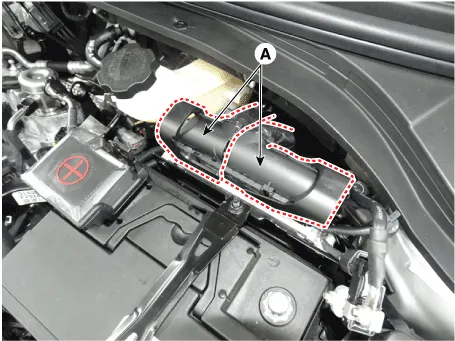
3.Remove the ECM (A).
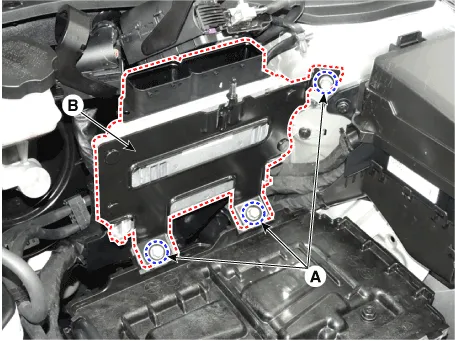
4.Loosen the mounting bolts (A) and then remova the ECM bracket (B).
5.Disconnect the brake fluid level switch connector.
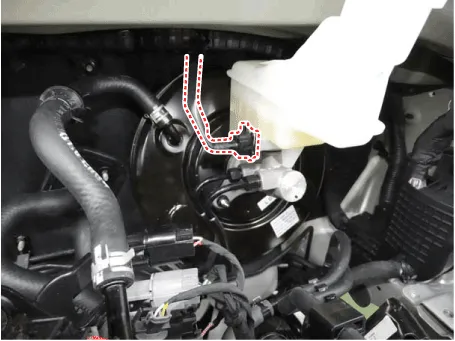
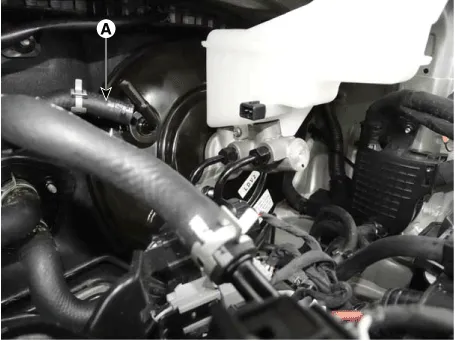
6.Remove the vacuum hose (A).
7.Remove the brake fluid from the master cylinder reservoir with a syringe.

• Do not spill brake fluid on the vehicle, it may damage the paint; if brake fluid does contact the paint, wash it off immediately with water.
8.Remove the master cylinder. (Refer to Brake System - "Master Cylinder")
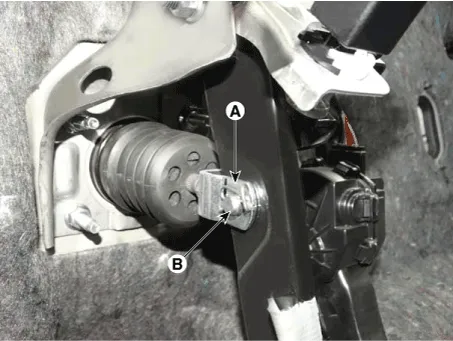
9.Remove the snap pin (A) and clevis pin (B).
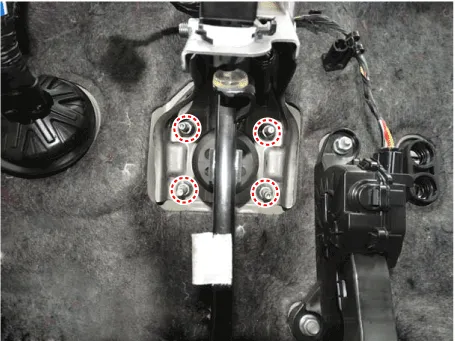
10.Remove the mounting nuts.
Tightening torque :16.7 - 25.5 N.m (1.7 - 2.6 kgf.m, 12.3 - 18.8 lb-ft)
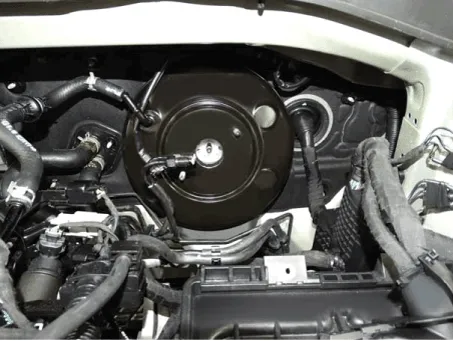
11.Remove the brake booster.
1.Inspect the vacuum hose.
2.Check the boot for damage.
1.To install, reverse the removal procedure.

• Before installing the pin, apply the grease to the joint pin.
• Use a new snap pin whenever installing.
2.After installing, bleed the brake system. (Refer to Brake System - "Brake System Bleeding")(Refer to Brake System - "ABS System Bleeding")(Refer to Brake System - "ESP System Bleeding")
Master Cylinder
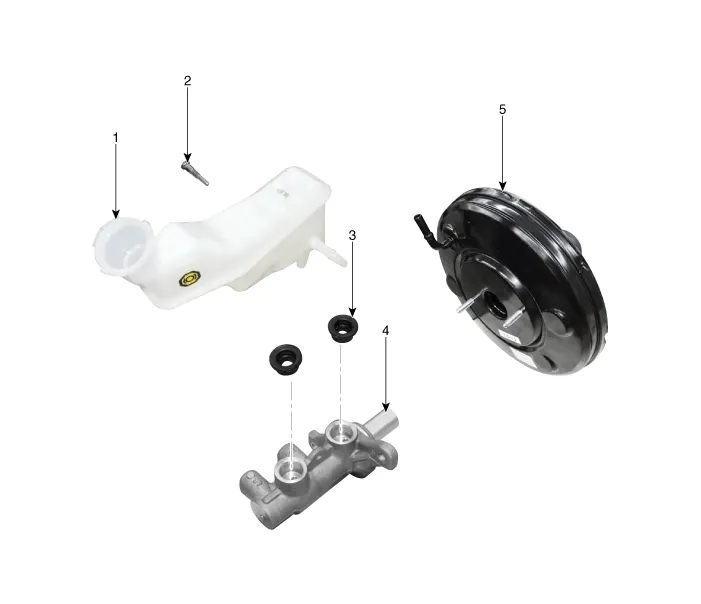
1. Reservoir
2. Reservoir pin
3. Grommet
4. Master cylinder
5. Booster
1.Turn ignition switch OFF and disconnect the negative (-) battery cable.
2.Disconnect the brake fluid level switch connector.
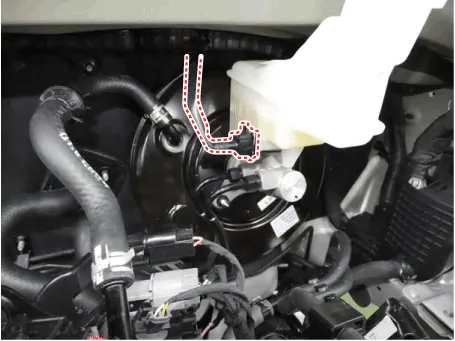
3.Remove the brake fluid from the master cylinder reservoir with a syringe.

• Do not spill brake fluid on the vehicle, it may damage the paint; if brake fluid does contact the paint, wash it off immediately with water.
4.Disconnect the brake tube from the master cylinder after loosening the tube flare nut.
Tightening torqueESP : 18.6 - 22.6 N.m (1.9 - 2.3 kgf.m, 13.7 - 16.6 lb-ft)ABS : 13.7 - 16.7 N.m (1.4 - 1.7 kgf.m, 10.1 - 12.3 lb-ft)
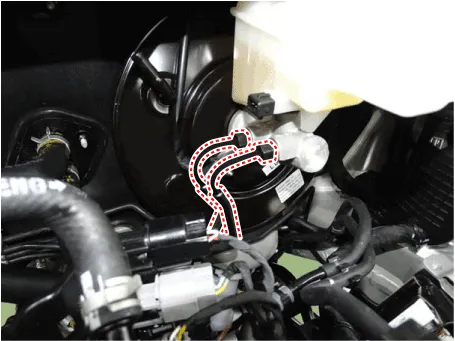
5.Remove the master cylinder from the brake booster after loosening the mounting nuts.
Tightening torque :9.8 - 15.9 N.m (1.0 - 1.6 kgf.m, 7.2 - 11.6 lb-ft)
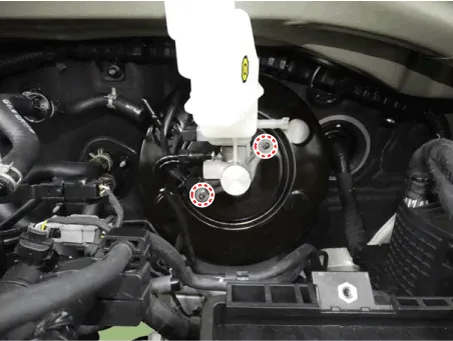
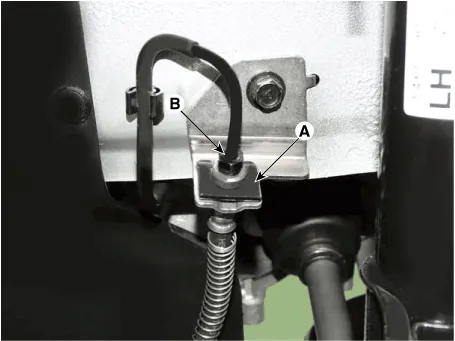
6.Remove the reservoir by loosening the screw.
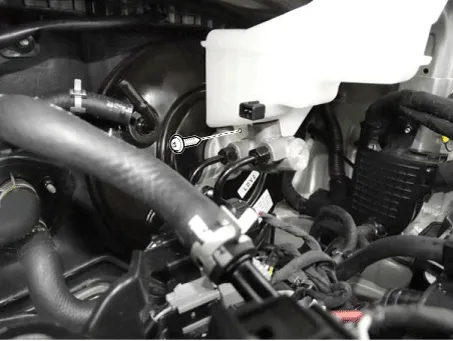
1.To install, reverse the removal procedure.
2.After installing, bleed the brake system. (Refer to Brake System - "Brake System Bleeding")(Refer to Brake System - "ABS System Bleeding")(Refer to Brake System - "ESP System Bleeding")
Brake Line ➤
Brake Oil ➤
Brake Pedal
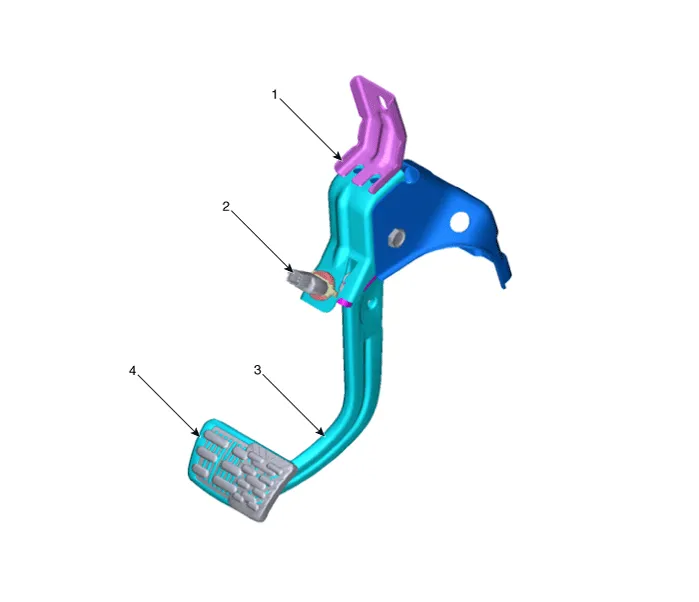
1. Brake pedal member assembly
2. Stop lamp switch
3. Brake pedal arm
4. Pedal pad
1.Turn ignition switch OFF and disconnect the negative (-) battery cable.
2.Remove the crash pad lower panel.(Refer to Body - "Crash Pad")
3.Disconnect the stop lamp switch connector (A).
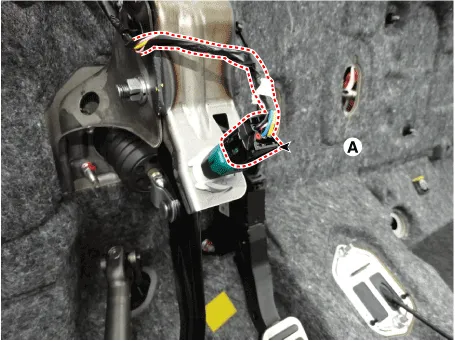
4.Remove the snap pin (A) and clevis pin (B).
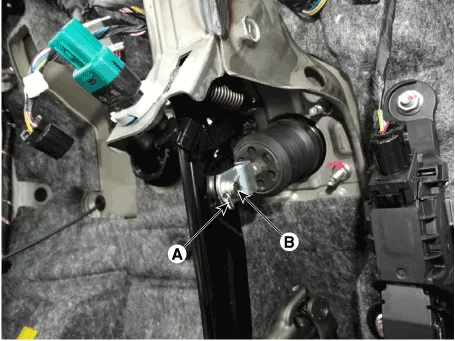
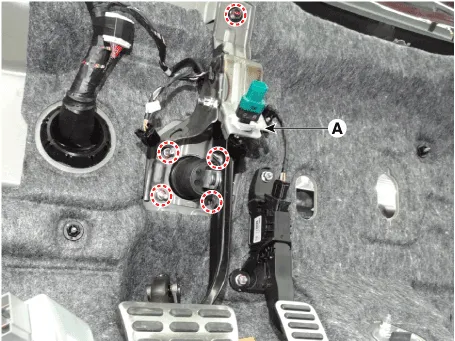
5.Remove the brake pedal assembly (A) after loosening the bolt and nut.
Tightening torque :16.7 - 25.5 N.m (1.7 - 2.6 kgf.m, 12.3 - 18.8 lb-ft)
1.Check the brake pedal for bending or twisting.
2.Check the brake pedal return spring for damage.
3.Check the stop lamp switch.
Front Disc Brake ➤
Rear Disc Brake ➤
Rear Drum Brake ➤
Stop Lamp Switch ➤
Other information:
Hyundai Accent (HC) (2017 - 2022) Service Manual: Cowl Cross Bar Assembly
- Component Location 1. Cowl cross bar assembly - Replacement • Put on gloves to prevent hand injuries. • When removing with a flat - tip screwdriver or remover, wrap protective tape around the tools to prevent damage to components. • Use a plastic panel removal tool to remove interior trim pieces without marring the surface.Hyundai Accent (HC) (2017 - 2022) Service Manual: Timing Chain Cover
- Removal • Use fender covers to avoid damaging painted surfaces. • To avoid damage, unplug the wiring connectors carefully while holding the connector portion. • Mark all wiring and hoses to avoid misconnection. 1.Disconnect the battery negative terminal. 2.Remove the engine cover.(Refer to Engine and Transaxle Assembly - "Engine Cover") 3.
Contents
- Repair procedures
- Brake Booster
- Master Cylinder
- Brake Line
- Brake Oil
- Brake Pedal
- Front Disc Brake
- Rear Disc Brake
- Rear Drum Brake
- Stop Lamp Switch
Categories
- Manuals Home
- Hyundai Accent Owners Manual
- Hyundai Accent Service Manual
- New on site
- Most important about car


