Hyundai Accent (HC): Restraint / Seat Belt Pretensioner
Contents:
Seat Belt Pretensioner (BPT)

• Never attempt to measure the circuit resistance of the Seat Belt Pretensioner (BPT) even if you are using the specified tester. If the circuit resistance is measured with a tester, the pretensioner will be ignited accidentally. This will result in serious personal injury.
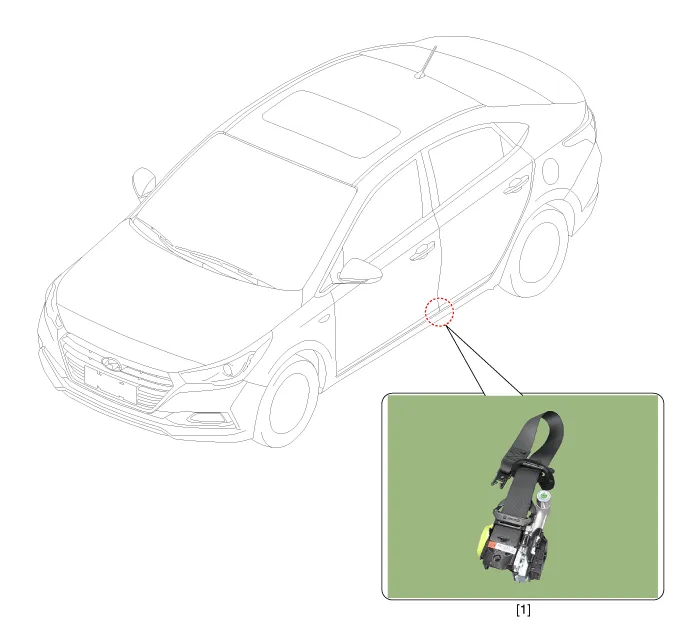
1. Seat Belt Pretensioner (BPT)
1.Disconnect the battery negative cable, and wait for at least three minutes before beginning work.
2.Remove the door scuff trim.(Refer to Body - "Interior Trim")
3.Remove the center pillar trim.(Refer to Body - "Interior Trim")
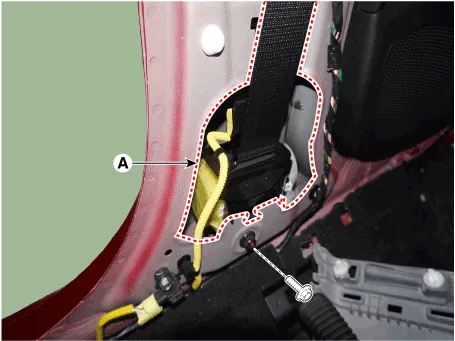
4.Remove the front seat belt upper anchor bolt.

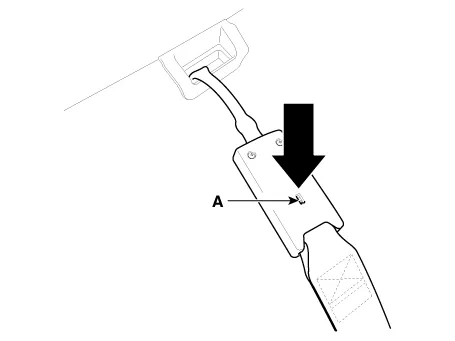
5.Disconnect the front seat belt pretensioner connector (A).

6.Remove the seat belt pretensioner (A) after loosening the seat belt pretensioner mounting bolts.

1.Remove the ignition key from the vehicle.
2.Disconnect the battery negative cable and wait for at least three minutes.
3.Install the seat belt pretensioner.
Tightening torque : Bolt A : 39.2 - 53.9 N.m (4.0 - 5.5 kgf.m, 28.9 - 39.8 lb-ft)
4.Connect the seat belt pretensioner connector.

• Make sure the lock pin is connected in properly.
5.Install the front seat belt upper anchor bolt.
Tightening torque : 39.2 - 53.9 N.m (4.0 - 5.5 kgf.m, 28.9 - 39.8 lb-ft)
6.Install the center pillar trim.(Refer to Body - "Interior Trim")
7.Install the door scuff trim.(Refer to Body - "Interior Trim")
8.Reconnect the battery negative cable.
9.After installing the seat belt pretensioner, confirm proper system operation:
• Turn the ignition switch ON; the SRS indicator light should be turned on for about six seconds and then go off.
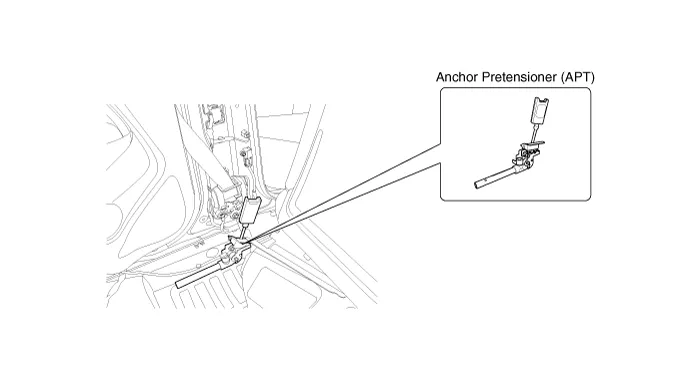
Anchor Pretensioner (APT)

• Never measure resistance of anchor pretensioner directly, current of measuring device may cause unexpected airbag deploy.
1.Disconnect the battery negative cable, and wait for at least thirty seconds before beginning work.
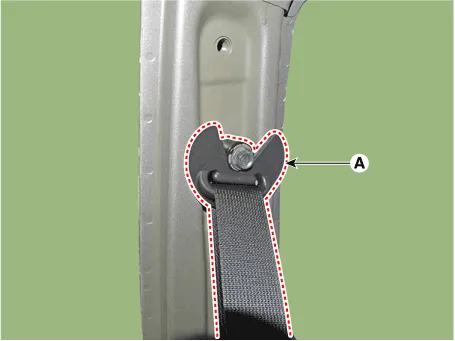
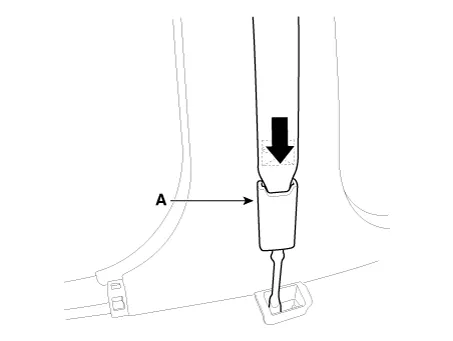
2.Remove the seat belt after pushing the lock pin (A).
3.Remove the door scuff trim. (Refer to Body - "Interior Trim")
4.Remove the center pillar trim. (Refer to Body - "Interior Trim")
5.Disconnect the anchor pretensioner connector (A).

6.Loosen the anchor pretensioner mounting bolt (B) and remove the anchor pretensioner.
1.Remove ignition key from the vehicle.
2.Disconnect the negative (-) cable from battery and wait for at least thirty seconds.
3.Install the anchor pretensioner with a bolt.
Tightening torque :39.2 - 53.9 N.m (4.0 - 5.5 kgf.m, 28.9 - 39.8 lb-ft)
4.Connect the anchor pretensioner connector.
5.Install the center pillar trim. (Refer to Body - "Interior Trim")
6.Install the door scuff trim. (Refer to Body - "Interior Trim")
7.Insert the seat belt to the anchor pretensioner (A).

• Make sure the lock pin is connected in properly.
8.Reconnect the battery negative cable.
9.After installing the anchor pretensioner, confirm proper system operation :
• Turn the ignition switch ON; the SRS indicator light should be turned on for about six seconds and then go off.


Other information:
Hyundai Accent (HC) (2017 - 2022) Service Manual: Tires and wheels
WARNING Tire failure may cause loss of vehicle control resulting in an accident. To reduce risk of SERIOUS INJURY or DEATH, take the following precautions: Inspect your tires monthly for proper inflation as well as wear and damage. The recommended cold tire pressure for your vehicle can be found in this manual and on the tire label located on the driver's side center pillar.Hyundai Accent (HC) (2017 - 2022) Service Manual: Description and Operation
- Description System Overview The System offers the following features: – Human machine interface through a 1-stage button, for terminal switching and engine start. – Control of external relays for ACC / IGN1 / IGN2 terminal switching and STARTER, without use of mechanical ignition switch. – Steering column locking with an ESCL device; Monitoring of the vehicle status to insure safe activation of the ESCL.
Contents
Categories
- Manuals Home
- Hyundai Accent Owners Manual
- Hyundai Accent Service Manual
- Questions & Answers
- Video Guides
- Useful Resources
- New on site
- Most important about car
- Privacy Policy

0.0104