Hyundai Accent (HC): Body Electrical System / Windshield Wiper/Washer
Contents:
Components and Components Location
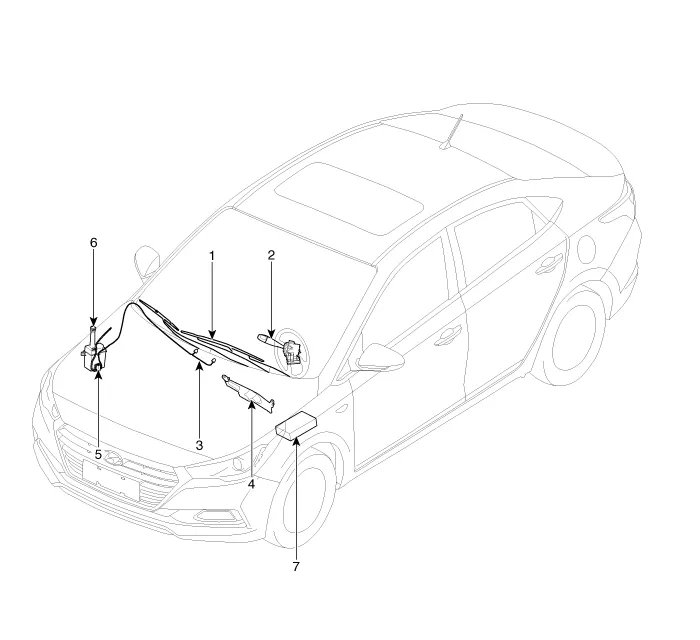
1. Windshield wiper arm & blade
2. Wiper & washer switch
3. Windshield washer hose
4. Windshield wiper motor & linkage
5. Washer motor
6. Washer reservoir
7. Front wiper relay
Windshield Wiper-Washer Switch
1.Disconnect the negative (-) battery terminal.
2.Remove the steering wheel.(Refer to Steering System - "Steering Wheel")
3.Remove the steering column upper and lower shrouds after loosening the screws.(Refer to Body - "Steering Column Shroud Panal")
4.Remove the clock spring.(Refer to Restraint - "Driver Airbag (DAB) Module and Clock Spring")
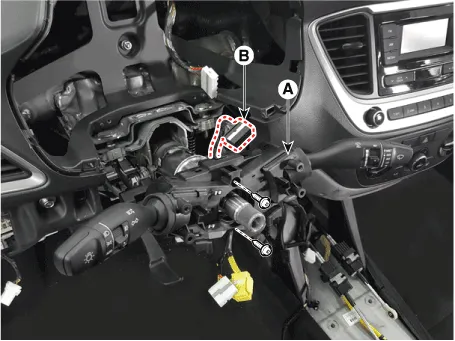
5.Remove the multifunction switch assembly (A) after loosening the screws and disconnecting the connector (B).
1.Install the multifunction switch.
2.Install the clock spring.
3.Install the steering column upper and lower shrouds.
4.Install the steering wheel.
1.Check for continuity between the terminals in each switch position according to the table.
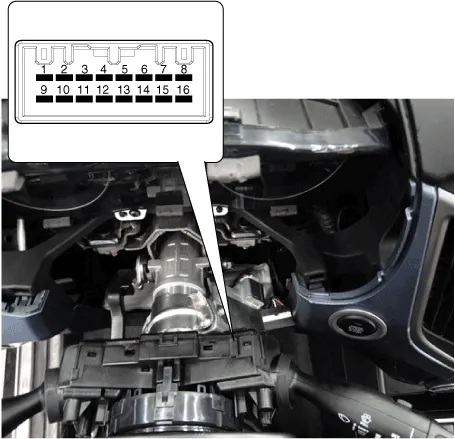
| Switch | Switch position | Switch terminal | Resistance (Ω, ±3.5%) |
| Front wiper switch | MIST | 1-11 | 330 |
| OFF | ∞ | ||
| Intermittent (AUTO) | 800 | ||
| LOW | 1800 | ||
| HIGH | 5700 | ||
| Wiper intermittent volume | Volume 1 | 7-11 | 330 |
| Volume 2 | 690 | ||
| Volume 3 | 1310 | ||
| Volume 4 | 2610 | ||
| Volume 5 | 7310 | ||
| Rear wiper switch | OFF | 11-16 | ∞ |
| LOW | 910 | ||
| HIGH | 2910 |
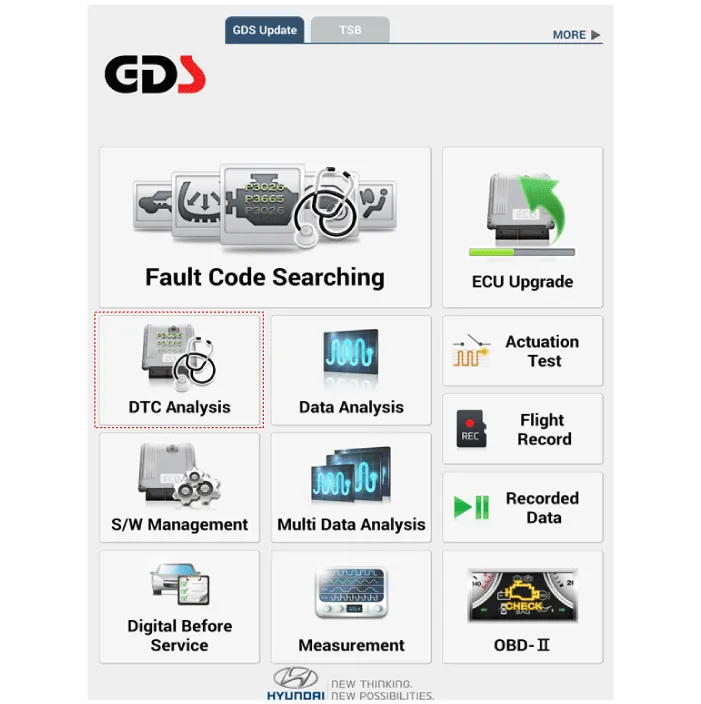
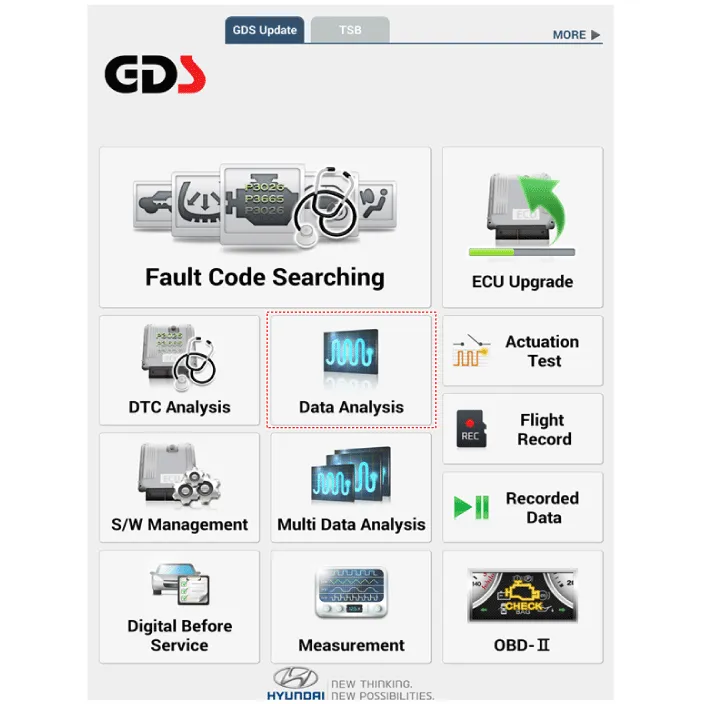
1.In the body electrical system, failure can be quickly diagnosed by using the vehicle diagnostic system (Diagnostic tool).The diagnostic system (Diagnostic tool) provides the following information.
(1)Fault Code Searching : Checking failure and code number (DTC)
(2)Data Analysis : Checking the system input/output data state
(3)Actuation test : Checking the system operation condition
(4)S/W Management : Controlling other features including system option setting and zero point adjustment
2.If diagnose the vehicle by Diagnostic tool, select "DTC Analysis" and "Vehicle".
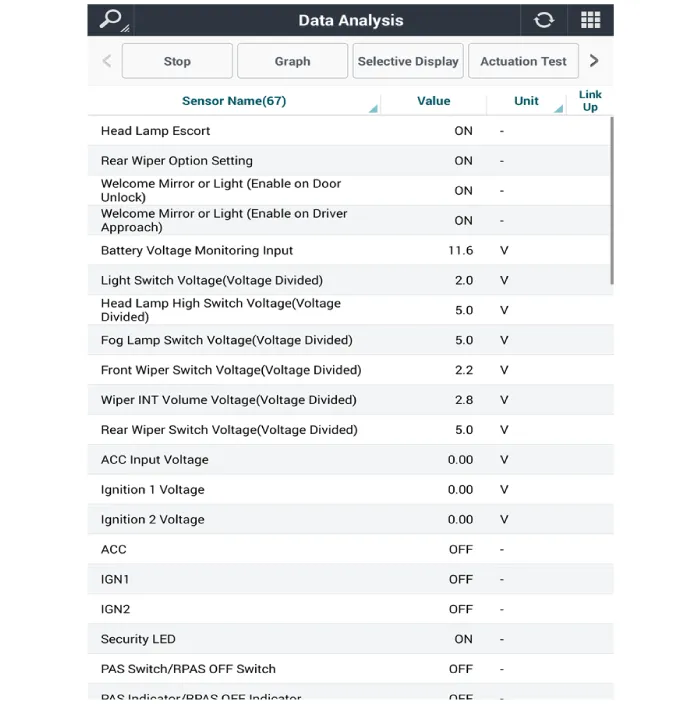
3.If check current status, select the "Data Analysis" .
4.Select the 'IBU_BCM' to search the current state of the input/output data.

Front Wiper Motor
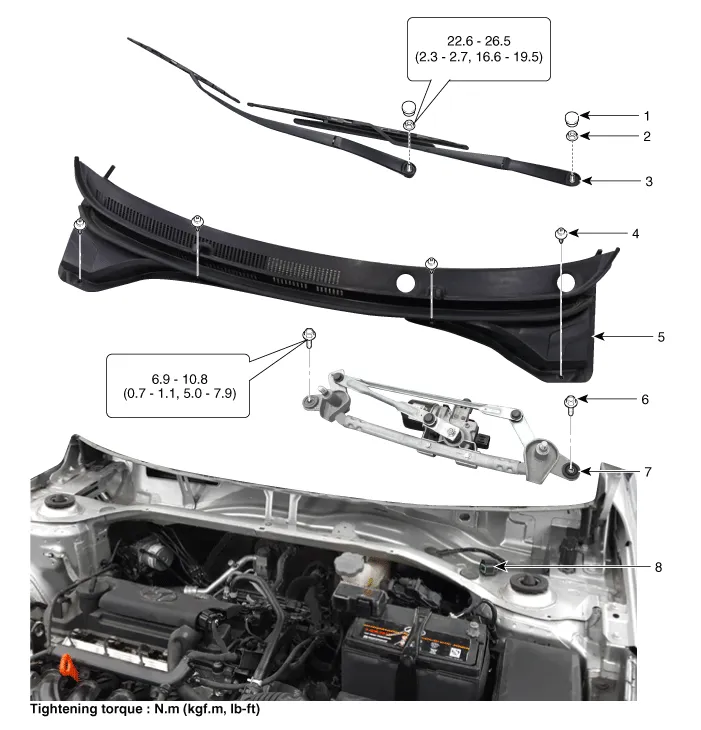
1. Cap
2. Nut
3. Wiper arm & blade
4. Rivet
5. Cowl top cover
6. Bolt
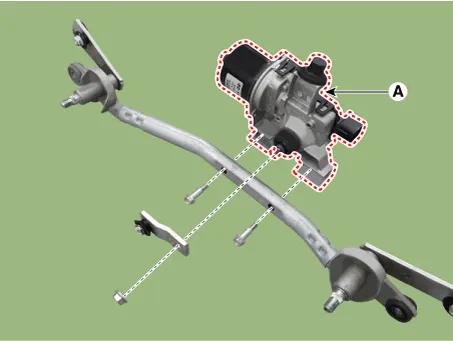
7. Wiper motor & linkage assembly
8. Wiper motor connector
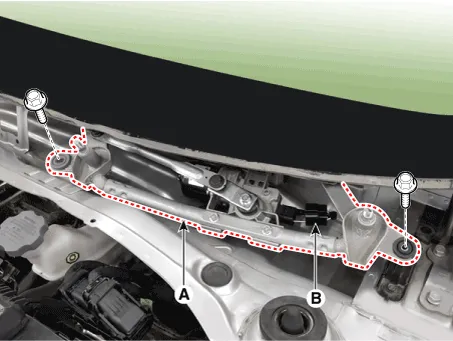
1.Loosen the windshield wiper arm nut after removing a wiper cap (A).
2.Remove the windshield wiper arm and blade (B)

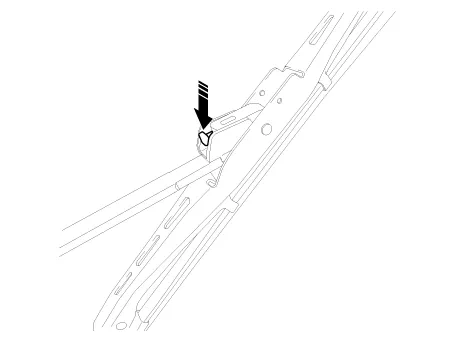
3.If necessary, release the wiper blade fixing clip by pulling up and remove the wiper blade from the inside radius of wiper arm.
4.Remove the cowl top cover.(Refer to Body - "Cowl Top Cover")
5.Remove the windshield wiper motor and linkage assembly (A) after loosening the bolts and disconnecting the wiper motor connector (B).
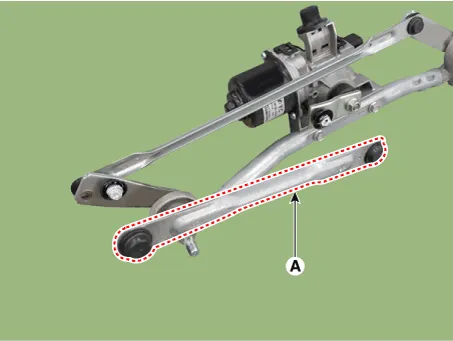
6.Hold the wiper motor crank arm and remove the upper linkage (A) from the wiper motor crank arm.

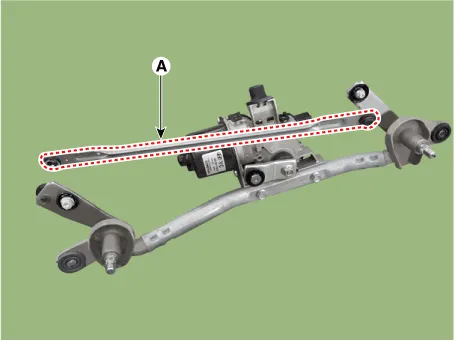
7.Remove the lower linkage (A) from the wiper motor crank arm.

8.Remove the wiper motor (A) from the tube after removing the mounting bolts.
1.Install the wiper motor.
2.Install the crank arm.

3.Install the lower and upper linkage to the wiper motor crank arm.

4.Install the wiper motor and linkage assembly and then connect the wiper motor connector.
Tightening torque:6.9 - 10.8 Nm (0.7 - 1.1 kgf.m, 5.0 - 7.9 lbf.ft)
5.Install the cowl top cover.
6.Install the windshield wiper arm and blade.
Tightening torque:22.5 - 26.5 Nm (2.3 - 2.7 kgf.m, 16.6 - 19.5 lbf.ft)

– The windshield wiper motor must be cycled to make sure that it is in the park position.If necessary, adjust the wiper arm and blade.
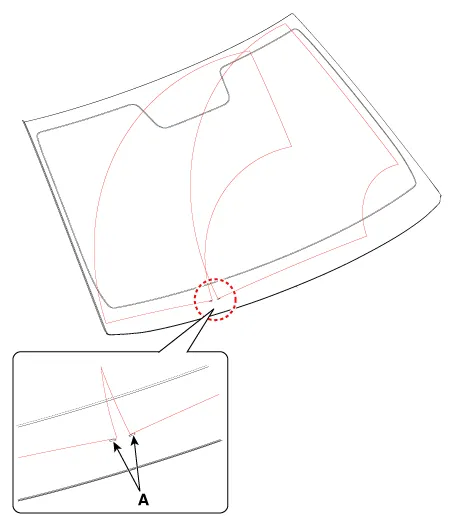
7.Install the wiper arm and blade to the specified position.A: Auto stop position (Blade)
1.Disconnect the connector (A) from the wiper motor.
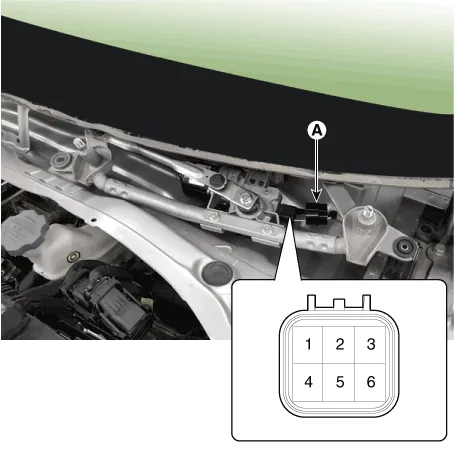
2.Check that the motor operates at low or high speed as below table.


Front Washer Motor
1.With the washer motor connected to the reservoir tank, fill the reservoir tank with water.

2.Check that the motor operates normally and the washer motor runs and water sprays from the front nozzles.
3.If they are abnormal, replace the washer motor.
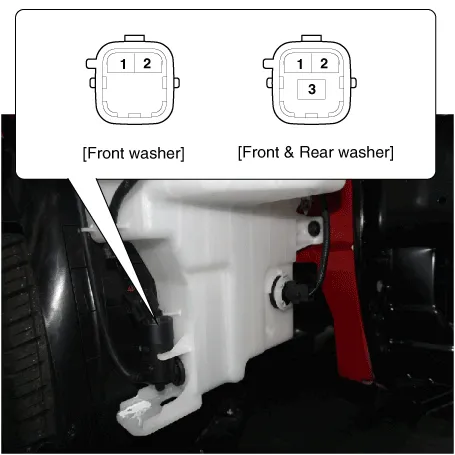
| No | Description |
| 1 | Ground |
| 2 | Windshield washer (+) |
| 3 | Rear washer (+) |
1.Disconnect the negative (-) battery terminal.
2.Drain the washer fluid less than 700 cc.
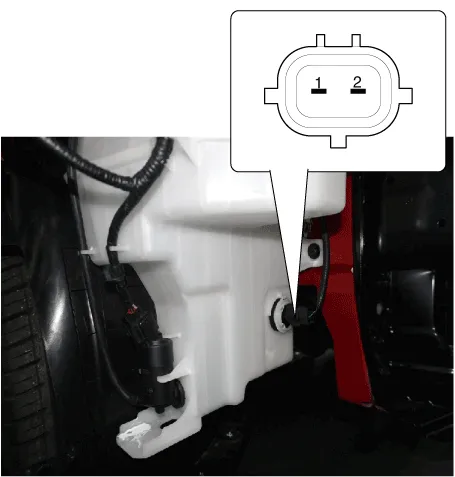
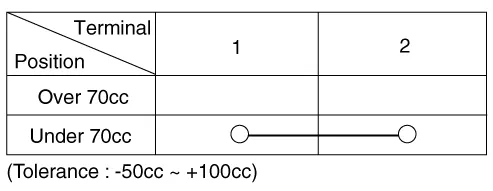
3.Check for continuity between the No. 1 and No.2 terminal in each float position.There should be continuity when the float is down.There should be no continuity when the float is up.If the continuity is not as specified, replace the washer fluid level switch.

– When servicing the washer pump, be careful not to damage the washer pump seal.
– Do not operate the washer pump before filling the washer reservoir.Failure to do so could result in premature pump failure.
1.Disconnect the negative (-) battery terminal.
2.Remove the front right wheel guard.(Refer to Body - "Front Wheel Guard")
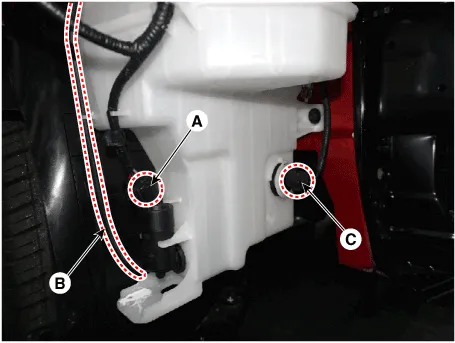
3.Disconnect the washer motor connector (A) and washer hose (B) and washer level sensor connector (C).
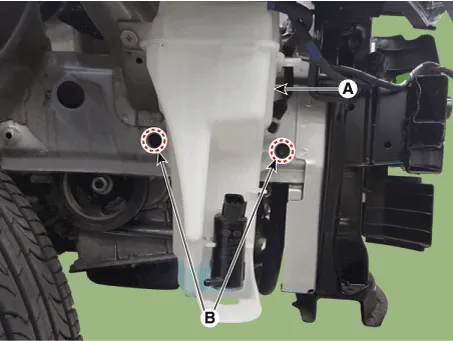
4.Remove the washer reservoir (A) after loosening the mounting bolts (B).
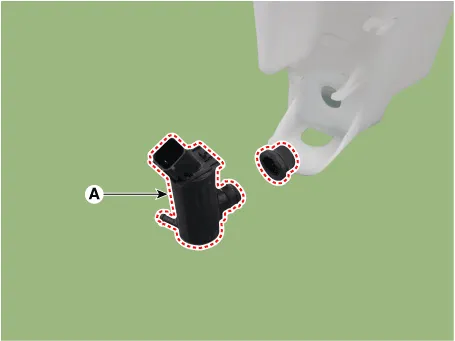
5.Remove the washer motor (A) from the washer reservoir.
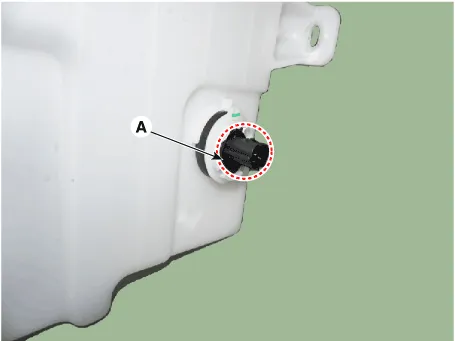
6.Remove the washer level sensor switch (A).
1.Reassemble the washer reservoir.

2.Connect the washer motor connector and washer hose.
3.Reassemble the front bumper cover.


Other information:
Hyundai Accent (HC) (2017 - 2022) Service Manual: Smart Key
Some Hyundai Accent models use a Smart Key, which you can use to lock or unlock a door (and trunk) and start the engine. For best performance, keep the Smart Key close to you and avoid storing it near strong electromagnetic sources. 1. Door Lock 2. Door Unlock 3. Trunk Unlock 4. Panic Locking To lock your Hyundai Accent using the Smart Key system: 1.Hyundai Accent (HC) (2017 - 2022) Service Manual: Description and Operation
- Function NoItemDescription 1Washer Linked Wiper – If the washer switch is pressed ON for 0.06 second with the vehicle mode in IGN2, the wiper relay is turned ON after washer switch ON, and then the wiper relay is turned OFF after wiper parking signal ON. 2MIST Linked Wiper – If the wiper mist switch is pressed ON for 0.6 second with the vehicle mode in IGN2, the wiper relay is turned ON, and then OFF after wiper parking signal ON.
Contents
Categories
- Manuals Home
- Hyundai Accent Owners Manual
- Hyundai Accent Service Manual
- Questions & Answers
- Video Guides
- Useful Resources
- New on site
- Most important about car
- Privacy Policy

0.0088