Hyundai Accent: Body (Interior and Exterior) / Roof Trim
Components and Components Location
[General Type]
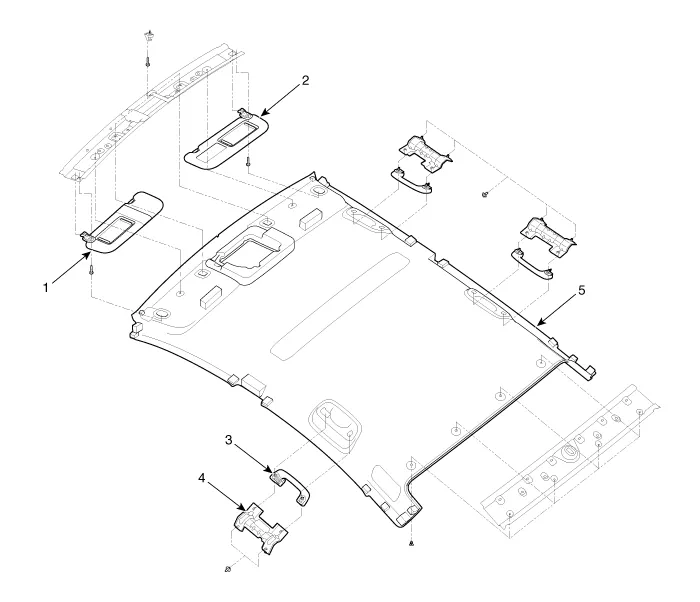
1. Sunvisor [LH]
2. Sunvisor [RH]
3. Assist handle
4. Assist handle bracket
5. Roof trim
[Sunroof Type]
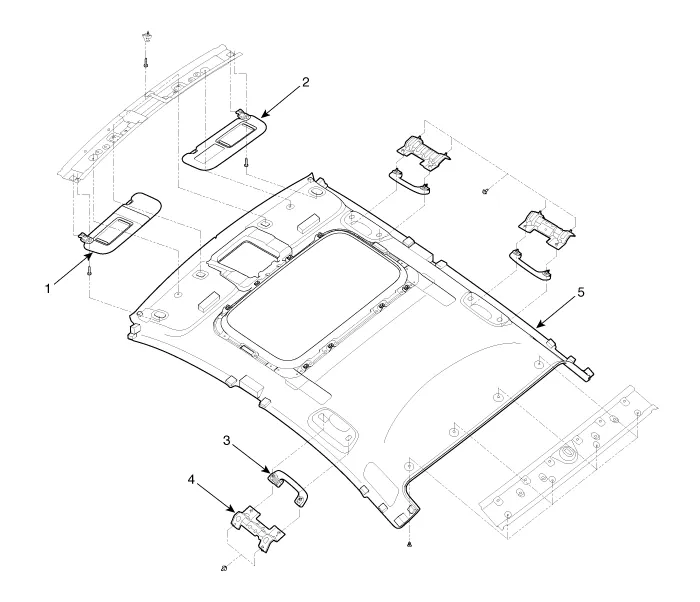
1. Sunvisor [LH]
2. Sunvisor [R H]
3. Assist handle
4. Assist handle bracket
5. Roof trim
Sunvisor
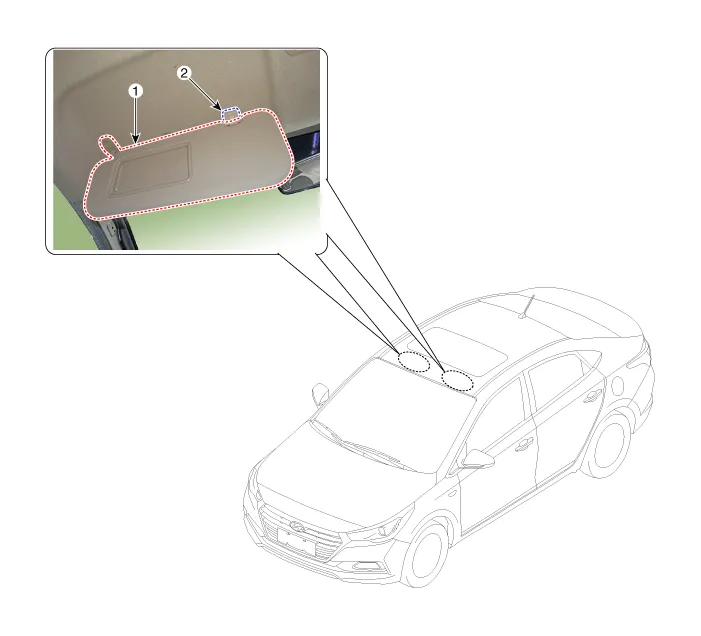
1. Sunvisor
2. Retainer

• Put on gloves to prevent hand injuries.

• When removing with a flat-tip screwdriver or remover, wrap protective tape around the tools to prevent damage to components.
• When removing the interior trim pieces, use a plastic panel removal tool not to damage the surface.
• Take care not to bend or scratch the trim and panels.
1.Loosen the mounting screw and seperate the sunvisor (A).
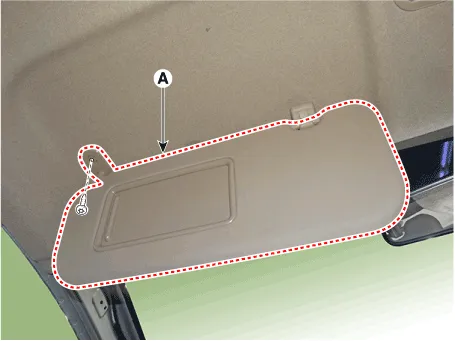
2.Loosen the mounting screws and remove the retainer (A).
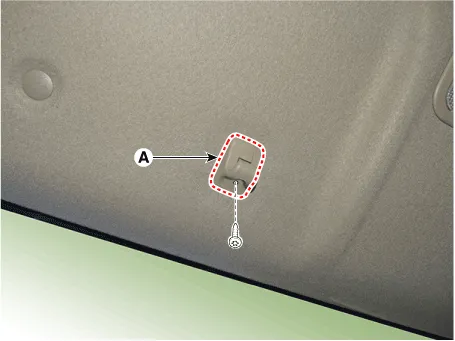
3.To install, reverse the removal procedure.

• Replace any damaged clips (or pin - type retainers).
Assist Handle
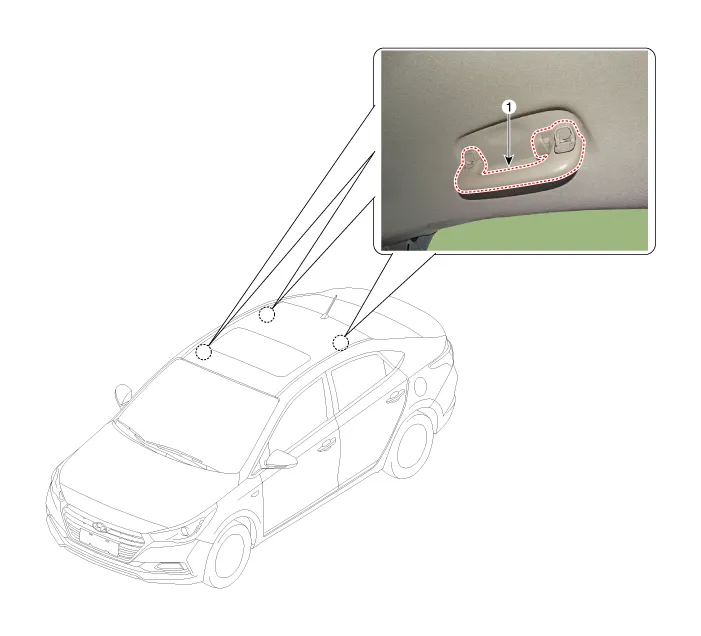
1. Assist handle

• Put on gloves to prevent hand injuries.

• When removing with a flat-tip screwdriver or remover, wrap protective tape around the tools to prevent damage to components.
• When removing the interior trim pieces, use a plastic panel removal tool not to damage the surface.
• Take care not to bend or scratch the trim and panels.
1.After lifting up the assist handle caps and loosening the mounting screws, remove the assist handle (A).
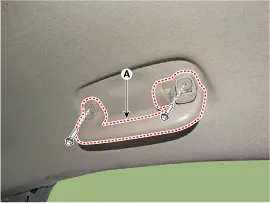
2.To install, reverse the removal procedure.
Roof Trim Assembly
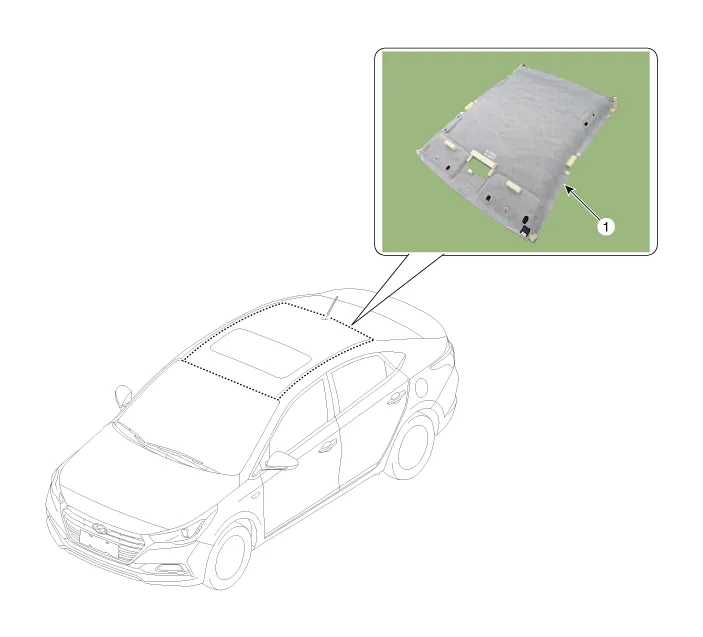
1. Roof Trim Assembly

• Put on gloves to prevent hand injuries.

• When removing with a flat - tip screwdriver or remover, wrap protective tape around the tools to prevent damage to components.
• When removing the interior trim pieces, use a plastic panel removal tool not to damage the surface.
• Take care not to bend or scratch the trim and panels.
1.Remove the door weatherstrip.
2.Remove the front seat. (Refer to Front Seat - "Front Seat Assembly")
3.Remove the rear seat. (Refer to Rear Seat - "Rear Seat Assembly")
4.Remove the front pillar trim.(Rear to Interior Trim - "Front Pillar Trim")
5.Remove the center pillar lower trim.(Rear to Interior Trim - "Center Pillar Trim")
6.Remove the center pillar upper trim.(Rear to Interior Trim - "Center Pillar Trim")
7.Remove the rear pillar trim.(Rear to Interior Trim - "Rear Pillar Trim")
8.Remove the sunvisor and retainer.(Rear to Roof Trim - "Sunvisor")
9.Remove the assist handle.(Rear to Roof Trim - "Assist Handle")
10.Remove the overhead console lamp.(Rear to Body Electrical System - "Overhead Console Lamp")
11.Remove the room lamp.(Rear to Body Electrical System - "Room Lamp")
12.Remove the rear window glass.(Refer to Body(Interior and Exterior) - "Rear Window Glass")
13.Remove the roof trim mounting clip and remove the roof trim assembly (A).

• Be careful not to wrinkle on the roof trim.
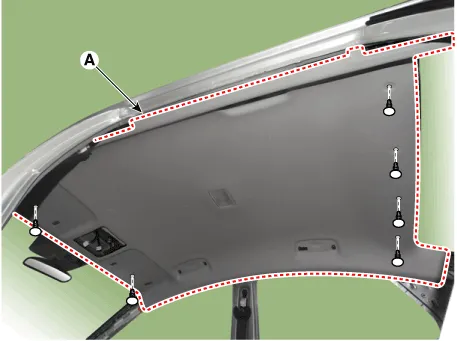
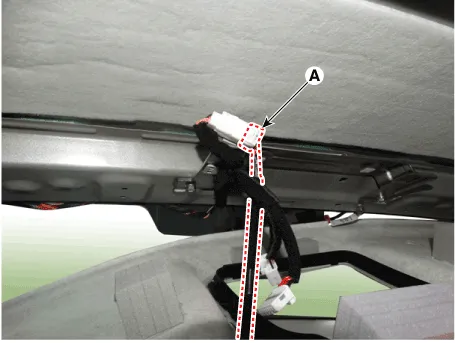
14.Disconnect the roof connector (A).
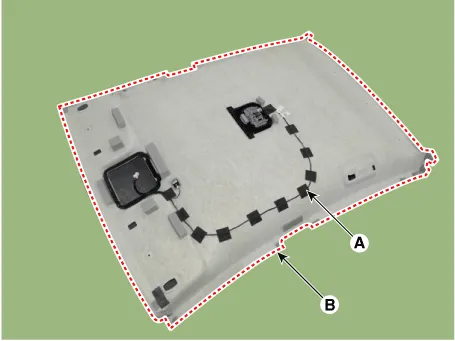
15.Remove roof trim wiring harness (A) from the roof trim (B).
16.To install, reverse the removal procedure.

• Make sure the connector is connected in properly.
• Replace any damaged clips.
Other information:
Hyundai Accent (HC) (2017 - 2022) Service Manual: Position Switch
- Specifications ItemSpecification Power supply (V)4.5 - 5.5V Output typePWM (S1, S2), ON/OFF (Ps, Ns) - Component Location 1. Position switch2. Manual control lever - Circuit Diagram - Inspection • Inspect the connector thoroughly for looseness, poor connection, bending, corrosion, contamination, deformation, or damage. - Specifications Drive Pulley Speed Sensor ItemSpecification TypeHall sensor Output voltage (V)High : 1.18 - 1.68 (Nor : 1.4) Low : 0.59 - 0.84 (Nor : 0.7) Turbine Speed Sensor ItemSpecification TypeHall sensor Output voltage (V)High : 1.18 - 1.68 (Nor : 1.4) Low : 0.59 - 0.84 (Nor : 0.7) Oil Temperature Sensor ItemSpecification Type*NTC thermistor Temp.
Contents
Categories
- Manuals Home
- Hyundai Accent Owners Manual
- Hyundai Accent Service Manual
- New on site
- Most important about car


