Hyundai Accent: Suspension System / Tires/Wheels
Tire
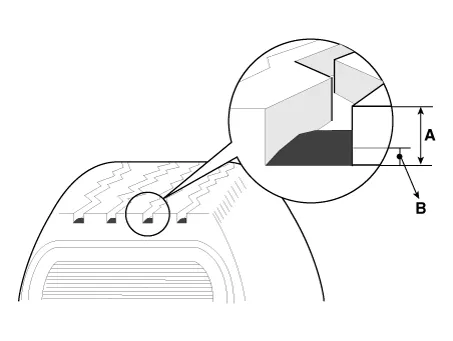
1.Measure the tread depth of the tires.
Tread depth [limit] : 1.6 mm (0.063 in)
2.If the remaining tread depth (A) is less than the limit, replace the tire.

• When the tread depth of the tires is less than 1.6 mm(0.063 in), the wear indicators (B) will appear.
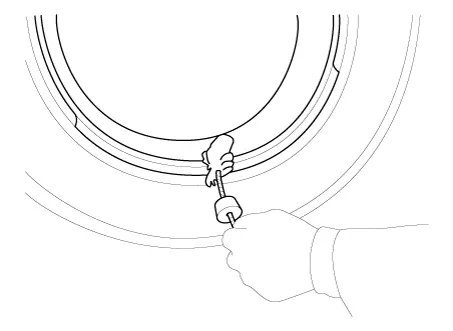
1.Remove valve core and deflate the tire.
2.Remove the side of the tire bead area from the wheel using tire changing machine.
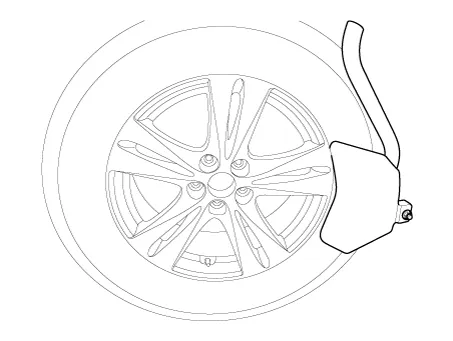

• The tire bead should be broken approx. 90° from the valve side of the wheel. The bead breaker should not be set too deep.
• Avoid tire / tool contact with the valve on dismount.
• Dismount should end near the valve.
3. Rotate the wheel clockwise.
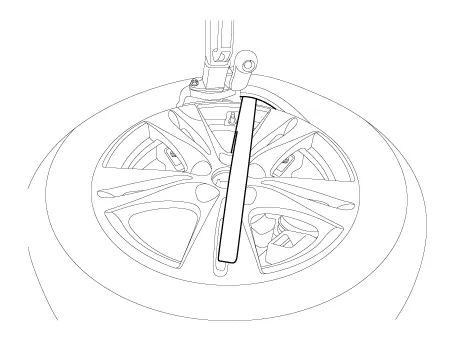
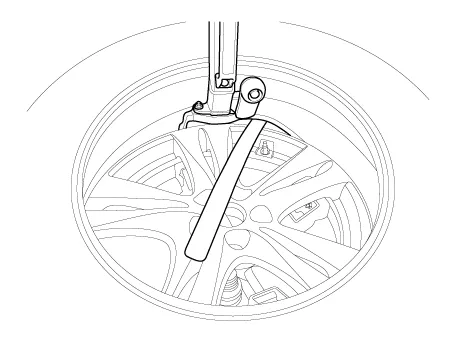
1. Apply tire soap or lubrication to the top and bottom tire beads.
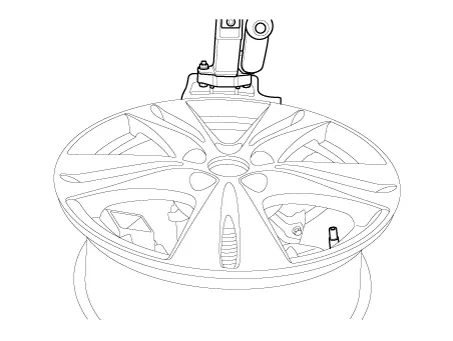
2.To fit the bottom bead, position the valve at the 5 o’clock position relative to the head on the tire changing machine.
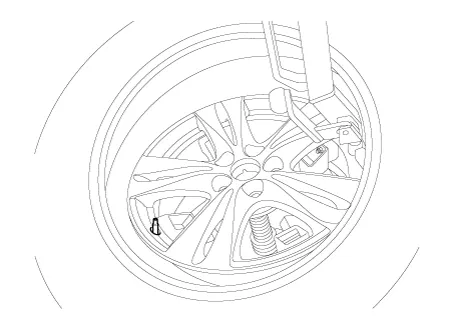
3. Place the tire on the rim so the bottom bead touches the edge of the rim after the valve (6 o’clock). Rotate the rim clockwise, and push down on the tire at the 3 o’clock position to fit bottom bead.
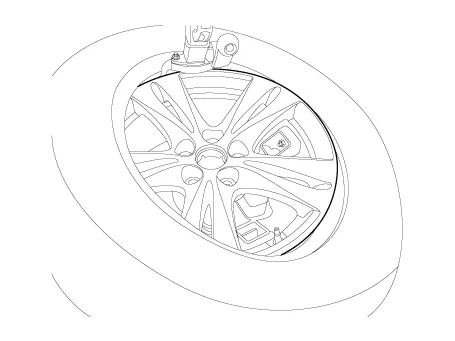
4.After bottom bead is on tire, rotate the rim until the valve is at the 5 o’clock position relative to the head on the tire changing machine. Push down on the tire at the 3 o’clock position and rotate the rim clockwise to fit the top bead.
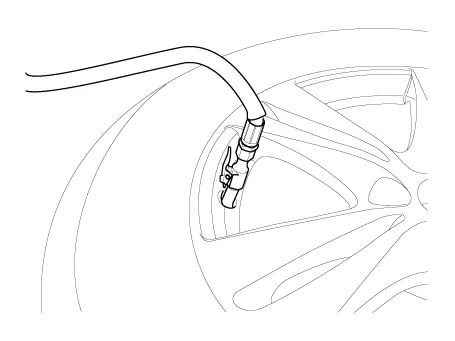
5.Inflate the tire until both beads seat.
Recommended Tire pressure : 230 kPa (33 psi)
1.Rotate the front right and front left tires, and perform a road test in order to confirm vehicle stability.

2.If the steering pulls to the opposite side, rotate the front and rear tires, and perform a road test again.
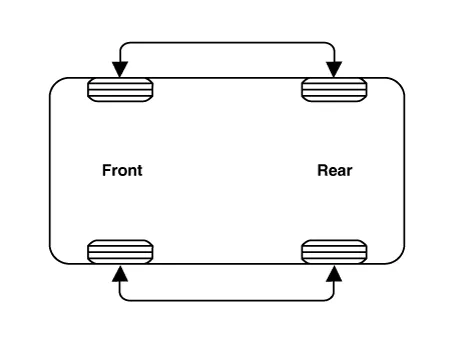
3.If the steering continues to pull to one side, rotate the front right and left tires again, and perform a road test.
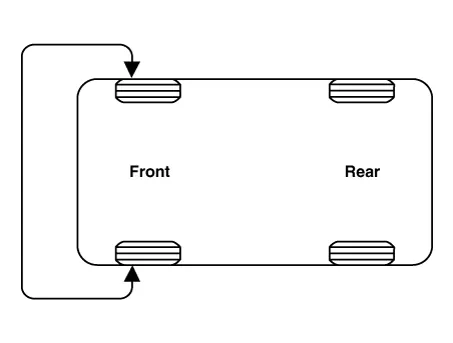
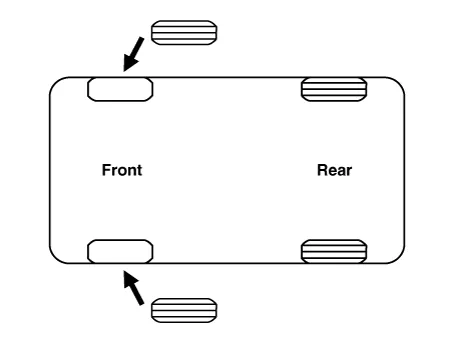
4.If the steering continues to pull to the opposite side, replace the front wheels with new ones.
Wheel
1.Tighten the hub nuts as follows.
Tightening torque :107.9 - 127.5 N.m (11.0 - 13.0 kgf.m, 79.6 - 94.0 lb-ft)
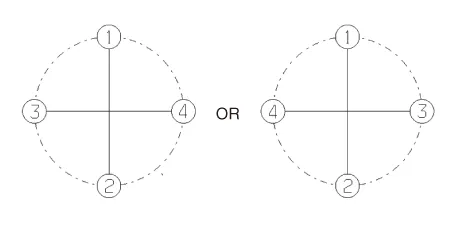
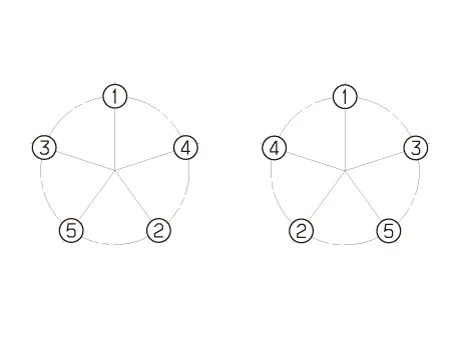

• When using an impact gun, final tightening torque should be checked using a torque wrench.
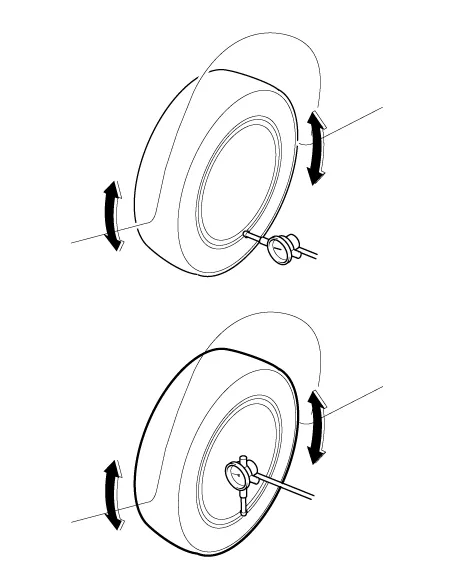
1.Jack up the vehicle.
2.Measure the wheel Run-out by using a dial indicator as illustration below.
| Run-out | Aluminum |
| Radial mm (in.) | Below 0.3 (0.0118) |
| Lateral mm (in.) | Below 0.3 (0.0118) |
3.If measured value exceeds the standard value, replace the wheel.
Alignment

• When using a commercially available computerized wheel alignment equipment to inspect the front wheel alignment, always position the vehicle on a level surface with the front wheels facing straight ahead.
• Prior to inspection, make sure that the front suspension and steering system are in normal operating condition and that the tires are inflated to the specified pressure.

B - A > 0 : Toe in (+)B - A < 0 : Toe out (-)
1.Loosen the tie rod end lock nut.
2.Remove the bellows clip to prevent the bellows from being twisted.
3.Adjust the toe by screwing or unscrewing the tie rod. Toe adjustment should be made by turning the right and left tie rods by the same amount.
Toe-inTotal : 0.15˚ ± 0.2˚Individual : 0.075˚ ± 0.1˚
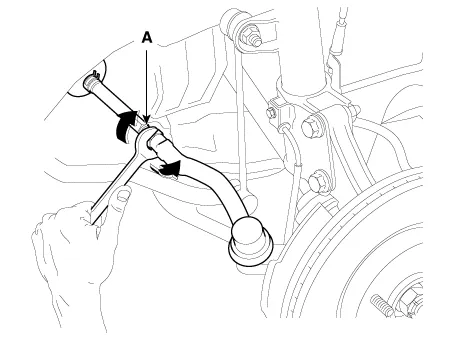
4.When completing the toe adjustment, install the bellows clip and tighten the tie rod end lock nut to specified torque.
Tightening torque :49.0 - 53.9 N.m (5.0 - 5.5 kgf.m, 36.2 - 39.8 lb-ft)
| Camber angle | -0.5˚ ± 0.5˚ |
Caster angle : 4.64˚ ± 0.5˚
King-pin : 13.23˚ ± 0.5˚
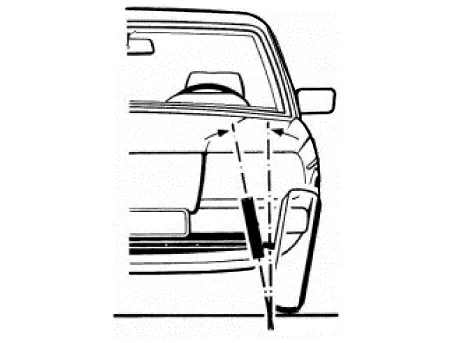

• The worn loose or damaged parts of the front suspension assembly must be replaced prior to measuring front wheel alignment.
• Caster are pre-set to the specified value at the factory and don't need to be adjusted.
• If the caster are not within specifications, replace bent or damaged parts.
• The difference of left and right wheels about the the caster must be within the range of 0° ± 0.5°.

• When using a commercially available computerized wheel alignment equipment to inspect the rear wheel alignment, always position the vehicle on a level surface.
• Prior to inspection, make sure that the rear suspension system is in normal operating condition and that the tires are inflated to the specified pressure.
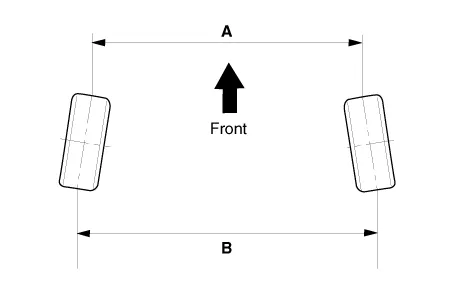
B - A > 0 : Toe in (+)B - A < 0 : Toe out (-)
Toe is pre-set at the factory, so it does not need to be adjusted. If the toe is not within the standard value, replace or repair the damaged parts and then inspect again.| Toe-in | Total | 0.3° ± 0.3° |
| Individual | 0.15° ± 0.15° |
Camber angle : -1.5˚ ± 0.5˚
Other information:
Hyundai Accent (HC) (2017 - 2022) Service Manual: Specifications
- Specification ItemResistance (Ω) Driver Airbag (DAB) 2.2 - 6.0 Passenger Airbag (PAB) 1.6 - 6.0 Side Airbag (SAB) 1.6 - 6.0 Curtain Airbag1.6 - 6.0 Seat Belt Pretensioner (BPT) 1.6 - 6.0 Tightening Torques ItemN.mkgf.mlb-ft Supplemental Restraint System Control Module 8 - 100.8 - 1.0 5.8 - 7.2 Passenger Air Bag 3.9 - 5.9 0.4 - 0.Hyundai Accent (HC) (2017 - 2022) Service Manual: Instrument Cluster
- Components Standard Supervision Connector Pin Information NoDescriptionNoDescription Connector AConnector BConnector AConnector B 1Ground signal 3Turnsignal lamp_Right input21Trip switch (-)Assist seat mat switch input 2Illumination (-)Turnsignal lamp_left input22Trip switch1 (+)Sunroof open switch input 3Rheostat switch (Down) inputHead lamp high (+)23Trip switch2 (+)Ground signal 1 4Rheostat switch (Up) inputHead lamp low (+)24Sport Swtich inputHeated washer nozzle outp
Contents
Categories
- Manuals Home
- Hyundai Accent Owners Manual
- Hyundai Accent Service Manual
- New on site
- Most important about car


