Hyundai Accent: Body (Interior and Exterior) / Front Seat
Components and Components Location
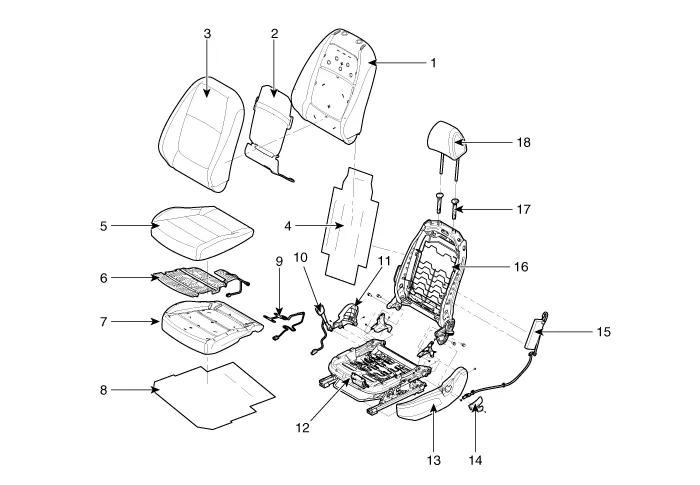
1. Front seat back pad
2. Front seat back heater
3. Front seat back covering
4. Front seat back silence cloth
5. Front seat cushion covering
6. Front seat cushion heater
7. Front seat cushion pad
8. Front seat cushion silence cloth
9. SBR mat
10. Front seat belt buckle
11. Front seat inner shield cover
12. Front seat cushion frame
13. Front seat outer shield cover
14. Front seat recliner knob
15. Front seat side airbag (SAB) module
16. Front seat back frame
17. Front seat headrest guide
18. Front seat headrest
Front Seat Assembly
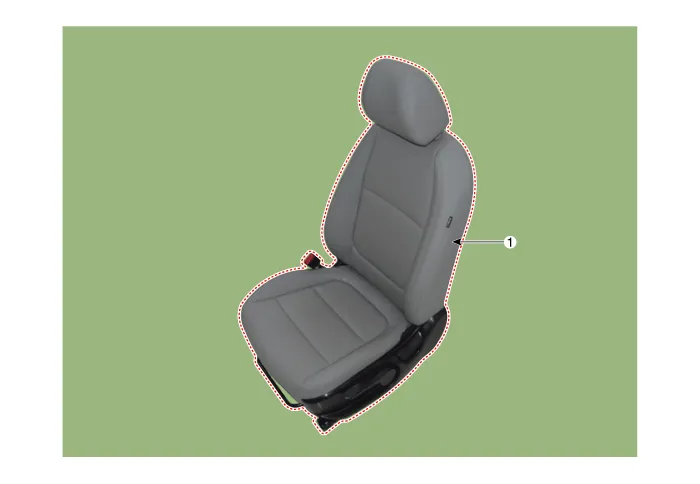
1. Front seat assembly
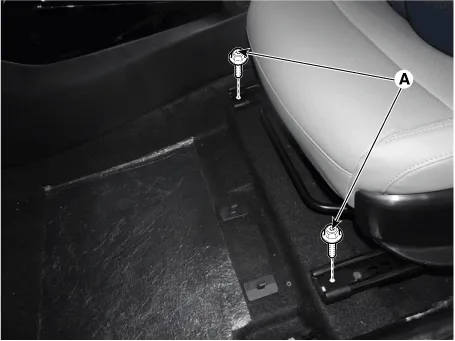
1.Loosen the front seat mounting bolts (A).
Tightening torque :44.1 - 58.8 N·m (4.5 - 6.0 kgf·m, 32.5 - 43.4 lb·ft)
[Front]
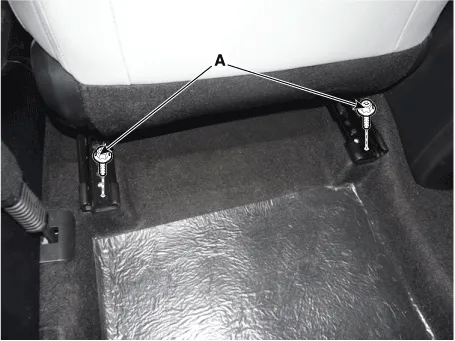
2.Disconnect the airbag connector (A), seat warmer & power seat switch connector (B), front seat belt buckle connector (C), heater seat unit connector (D).[Driver's]
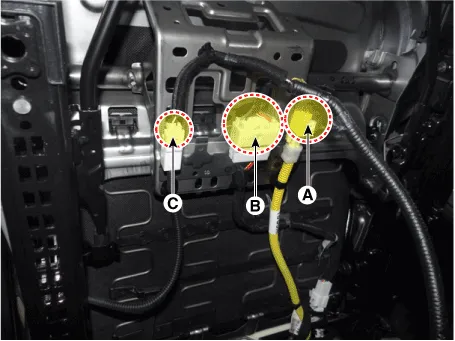
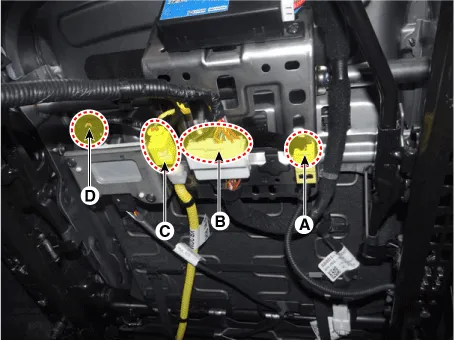
3.Install in the reverse order of removal.

• Set the seat into the most rearward position. Check that each slide is locked, and then tighten the front mounting bolt temporarily.
• Set the seat into the foremost position. Check that each slide is locked, and then tighten the rear mounting bolt completely.
• Set the seat into the rearmost position. Check that the front mounting bolt is tightened completely.
• Check that the seat operates to and fro smoothy and the locking portion locks properly.
Front Seat Shield Outer Cover
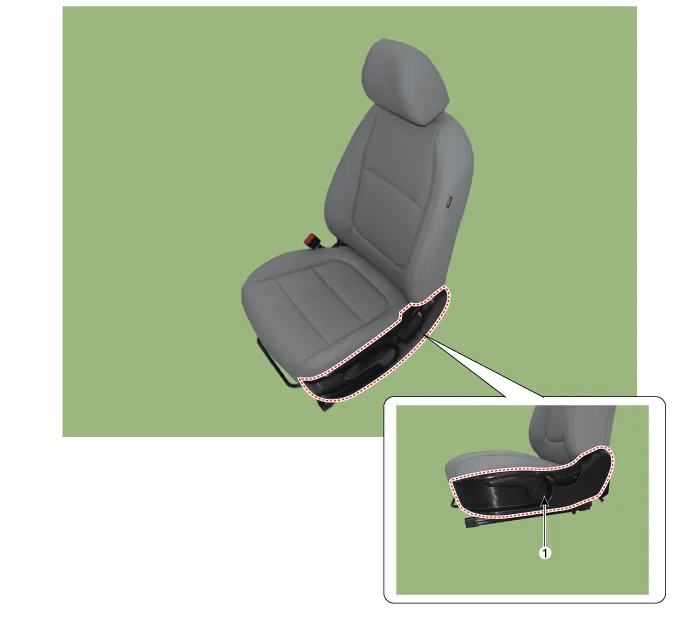
1. Front seat shield outer cover


• Use a plastic panel removal tool to remove interior trim pieces without marring the surface.
• Take care not to bend or scratch the trim and panels.
1.Remove the front seat assembly. (Refer to Front Seat - "Front Seat Assembly")
2.Remove the recliner handle (A) after loosening the screw.

• Correctly remove the front seat shield outer cover to the removal procedure and direction.
• Be careful not to damage the mounting bracket and hook when removing the cover.
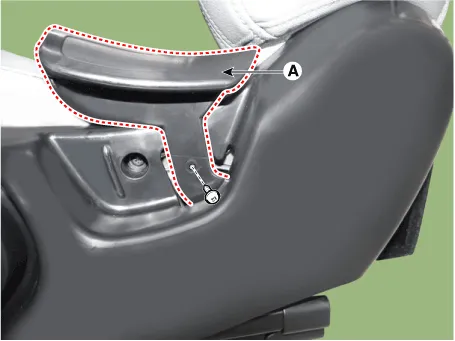
3.Remove the pumping lever cap (A).
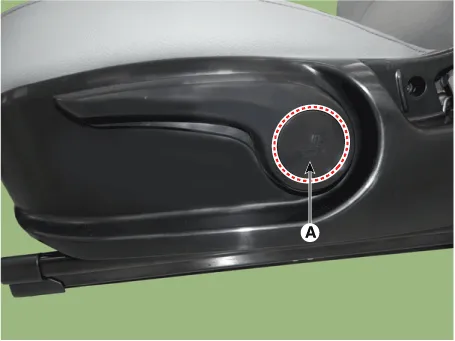
4.Remove the pumping lever (A).
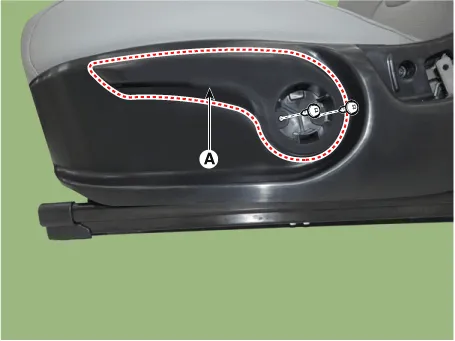
5.Remove the front seat shield outer cover (A) after loosening the mounting screws.
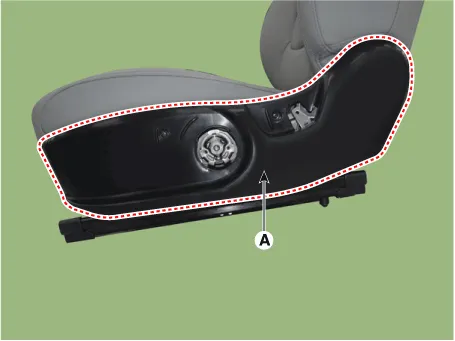
6.Install in the reverse order of removal.

• Make sure the fuel filler door locks/unlocks and opens/closes properly.
• Replace any damaged clips.
Front Seat Shield Inner Cover
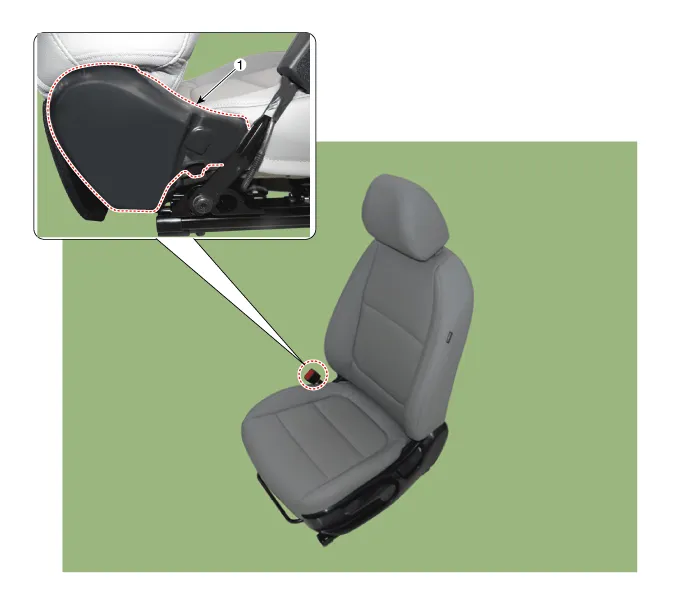
1. Front seat shield inner cover


• Use a plastic panel removal tool to remove interior trim pieces without marring the surface.
• Take care not to bend or scratch the trim and panels.
1.Remove the front seat assembly. (Refer to Front Seat - "Front Seat Assembly")
2.Using a remover, remove the front seat shield inner cover (A).
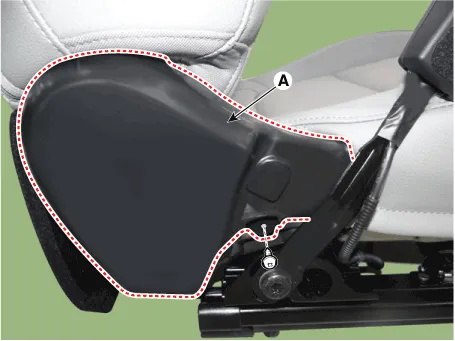
3.Install in the reverse order of removal.

Front Seat Back Cover
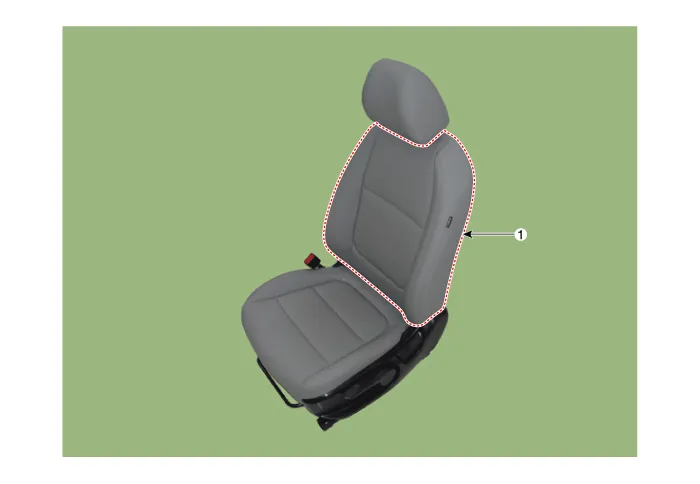
1. Front seat back cover


• Use a plastic panel removal tool to remove interior trim pieces without marring the surface.
• Be careful not to bend or scratch the trim and panels.
1.Remove the front seat outer shield cover.(Refer to Front Seat - "Front Seat Outer Shield Cover")
2.Remove the front seat inner shield cover.(Refer to Front Seat - "Front Seat Inner Shield Cover")
3.Pull up the front seat headrest (A).
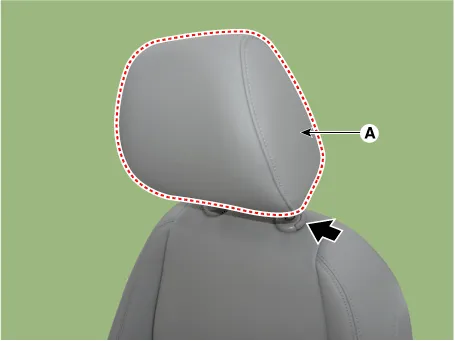
4.Remove the front seat back cover lower protector (A).
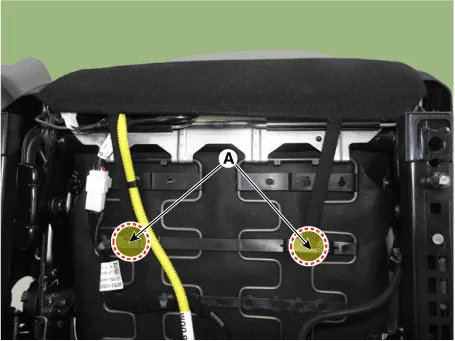
5.Remove the front seat back cover hog-ring.
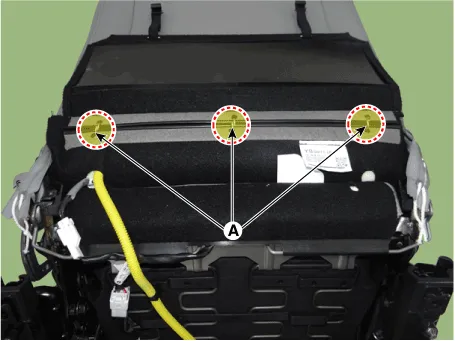
6.Zipper open the front seat back cover (A) and then pull it up.
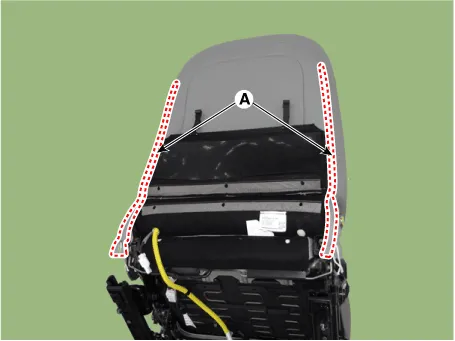
7.Disconnect the front seat back cover lower protector.
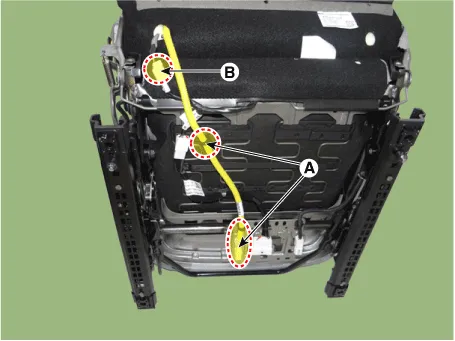
8.Disconnect the airbag connector mounting clip (A) and heater connector (B).
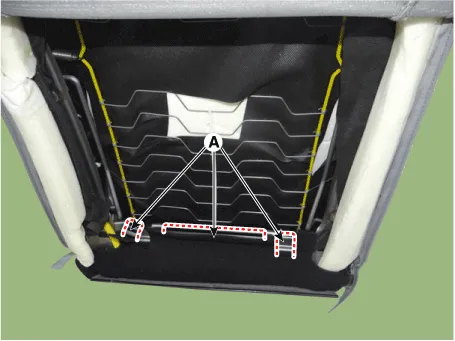
9.Turn the front seat back cover inside out. Then pull out and remove the headrest guides (A) while pinching both sides of the lower part of the guides.
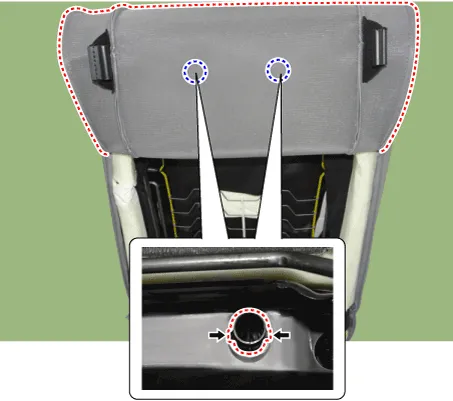
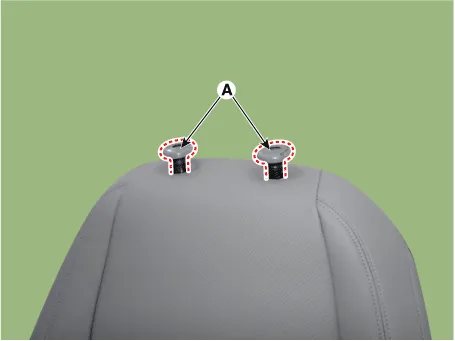
10.Remove the front seat back cover (A) from the front seat back frame.
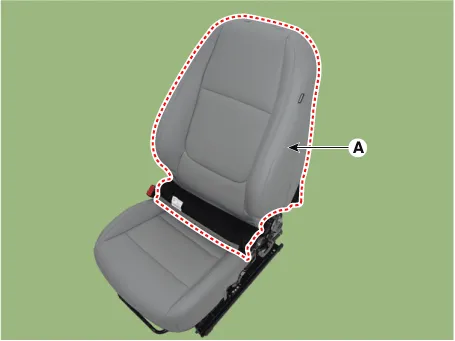
11.Remove the front seat back cover (C) from the front the seat back frame after removing the velcro tape (A) and hog-ring clips (B).
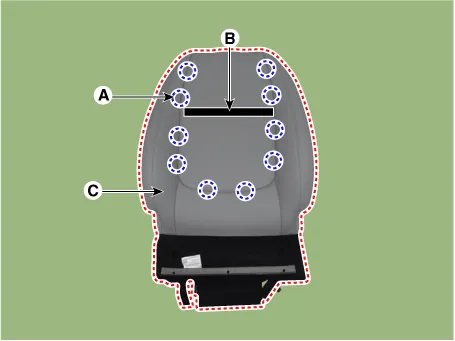
12.Install in the reverse order of removal.

• Make sure that the connectors are connected completely.
• Replace any damaged clips (or pin - type retainers).
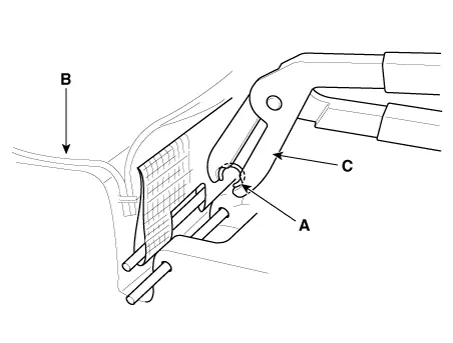
• To prevent wrinkles, make sure that the cover (B) is stretched evenly before connecting the hog - ring clips (A).
• Replace the hog-ring clips with new ones using special tool (C) (09880 - 4F000).
Front Seat Cushion Cover
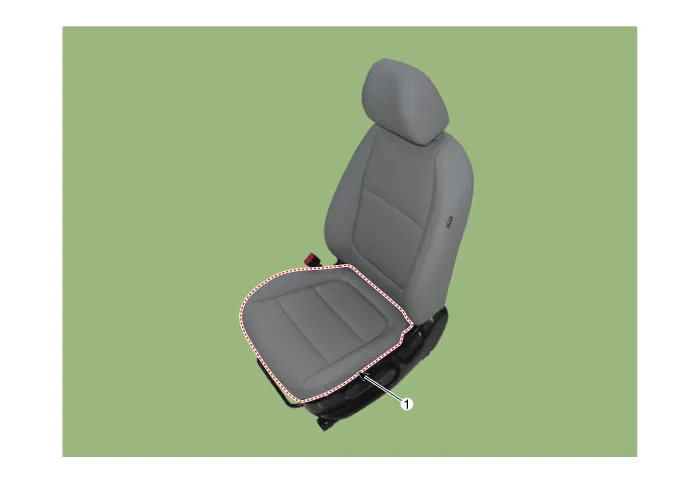
1. Front seat cushion cover


• Use a plastic panel removal tool to remove interior trim pieces without marring the surface.
• Be careful not to bend or scratch the trim and panels.
1.Remove the front seat outer shield cover.(Refer to Front Seat - "Front Seat Outer Shield Cover")
2.Remove the front seat inner shield cover.(Refer to Front Seat - "Front Seat Inner Shield Cover")
3.Remove the front seat back cover lower protector (A).
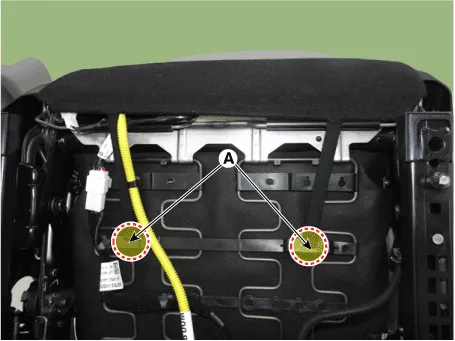
4.Disconnect the heater connector (A).
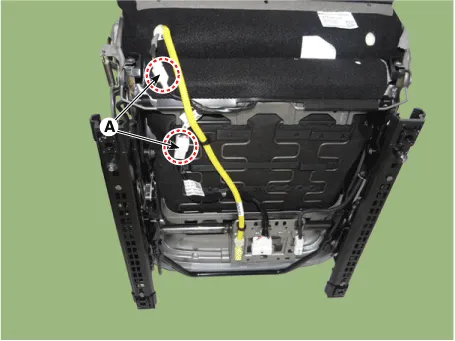
5.Pull out the protectors (A), and then front seat cushion cover from the front seat cushion frame.[lower]
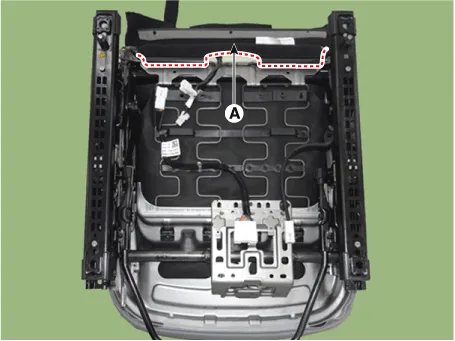
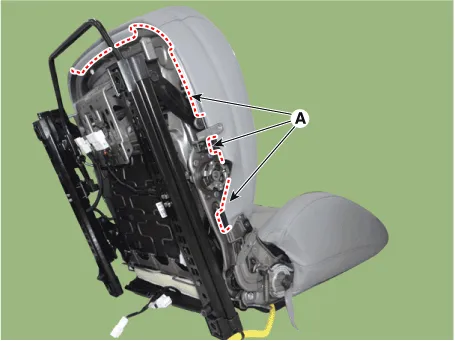
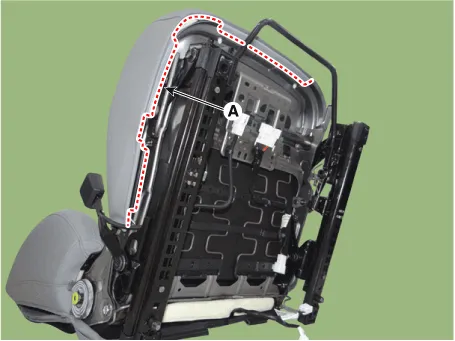
6.Remove the front seat cushion cover (A) from the front seat cushion frame.
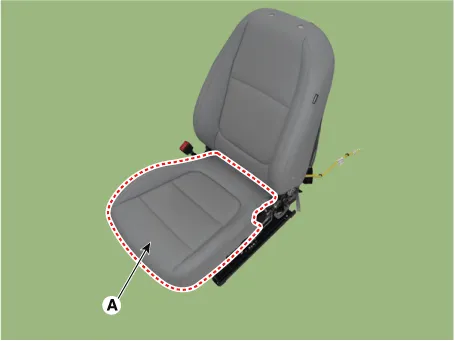
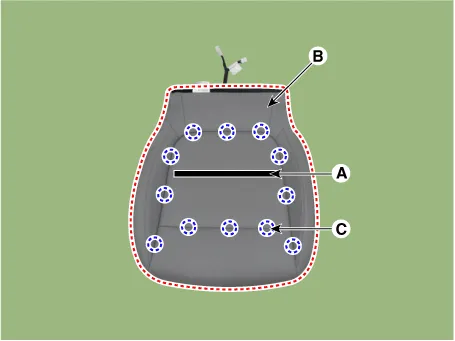
7.Remove the front seat cushion cover (C) from the front the seat cushion frame after removing the velcro tape (A) and hog-ring clips (B).
8.Install in the reverse order of removal.

• Make sure that the connectors are connected completely
• Replace any damaged clips (or pin - type retainers).
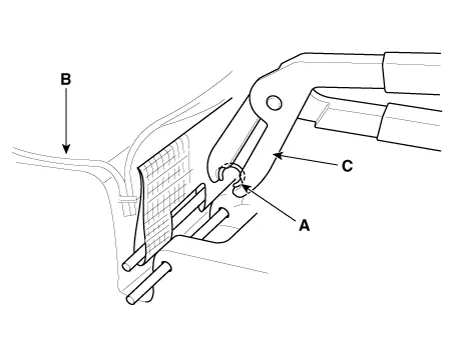
• To prevent wrinkles, make sure that the cover (B) is stretched evenly before connecting the hog - ring clips (A).
• Replace the hog-ring clips with new ones using special tool (C) (09880 - 4F000).
Front Seat Frame Assembly
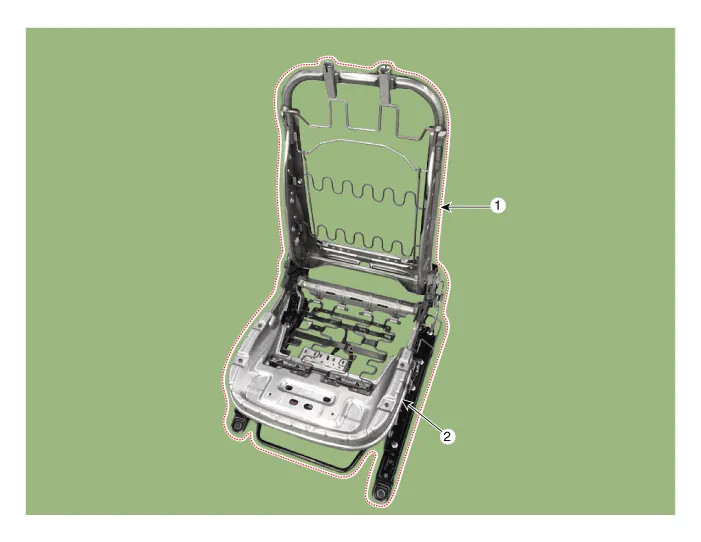
1. Front seat back frame assembly
2. Front seat cushion frame assembly


• Use a plastic panel removal tool to remove interior trim pieces without marring the surface.
• Take care not to bend or scratch the trim and panels.
1.Remove the front seat back cover.(Refer to Front Seat - "Front Seat Back Cover")
2.Remove the front seat cushion cover.(Refer to Front Seat - "Front Seat Cushion Cover")
3.Remove the side airbag (SAB) module.(Refer to Airbag Module - "Side Airbag (SAB) Module")
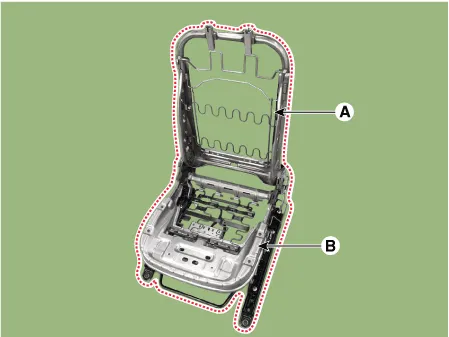
4.After loosening the mounting bolts, disconnect the front seat back frame assembly (A) and front seat cushion frame assembly (B).
Tightening torque :44.1 - 53.9 N·m (4.5 - 5.5 kgf·m, 32.5 - 39.8 lb·ft)
5.Install in the reverse order of removal.

• Remove the side air bag for replacing side air bag installation seat. (Refer to Restraint - "Side Airbag (SAB) Module")
• Before servicing, be fully aware of precautions and service procedure relevant to airbag. (Refer to Restraint - "Side Airbag (SAB) Module")
Other information:
Hyundai Accent (HC) (2017 - 2022) Service Manual: Cowl Cross Bar Assembly
- Component Location 1. Cowl cross bar assembly - Replacement • Put on gloves to prevent hand injuries. • When removing with a flat - tip screwdriver or remover, wrap protective tape around the tools to prevent damage to components. • Use a plastic panel removal tool to remove interior trim pieces without marring the surface.Hyundai Accent (HC) (2017 - 2022) Service Manual: Audio Unit
- Components [Bluetooth + Blue Link + SXM] Connector Pin Information NoConnector AConnector BConnector C 1Left rear door speaker (+)-B_CAN (HI) 2Left rear door speaker (-)Mic signal (+)C_CAN (HI)-bluelink only 3--- 4--- 5-Antenna power - 6Cameara powerIllumination (+)- 7Camera videoMM CAN (High)- 8--B_CAN (Low) 9-Alt L out (-)C_CAN (Low)-bluelink only 10AUX AudioBattery (+)- 11AUX DetectBattery (+)- 12Steearing wheel remote controllerGround- 13Left front door speaker (+)Groun
Contents
- Components and Components Location
- Front Seat Assembly
- Front Seat Shield Outer Cover
- Front Seat Shield Inner Cover
- Front Seat Back Cover
- Front Seat Cushion Cover
- Front Seat Frame Assembly
Categories
- Manuals Home
- Hyundai Accent Owners Manual
- Hyundai Accent Service Manual
- New on site
- Most important about car


