Hyundai Accent (HC): Body (Interior and Exterior) / Rear Seat
Contents:
Components and Components Location
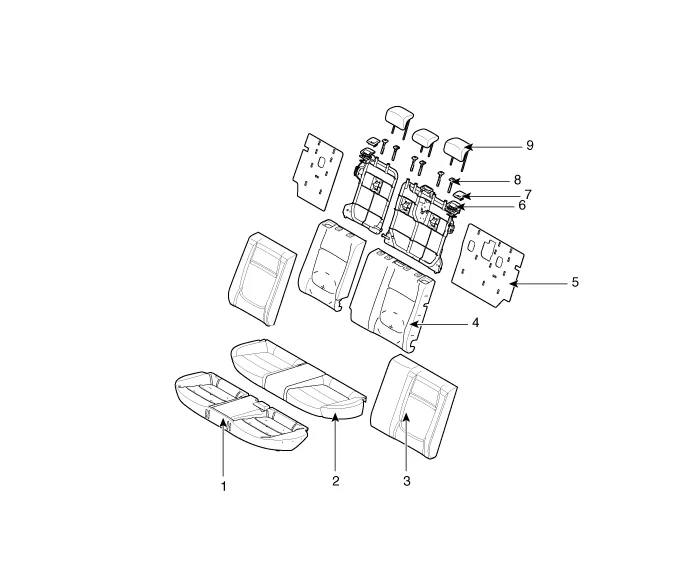
1. Rear seat cushion pad
2. Rear seat cushion covering
3. Rear seat back covering
4. Rear seat back pad
5. Rear seat back board
6. Rear seat back frame
7. Rear seat back bezel
8. Rear seat headrest guide
9. Rear seat headrest
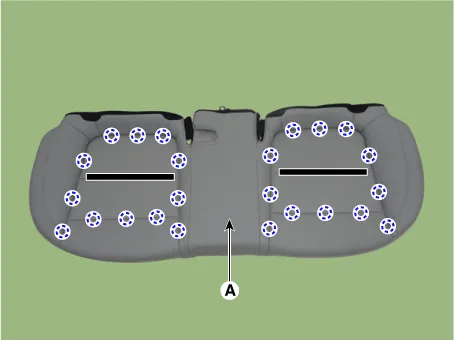
Rear Seat Assembly
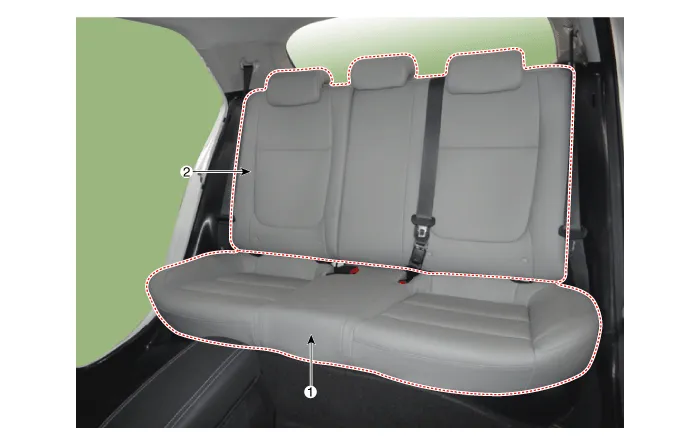
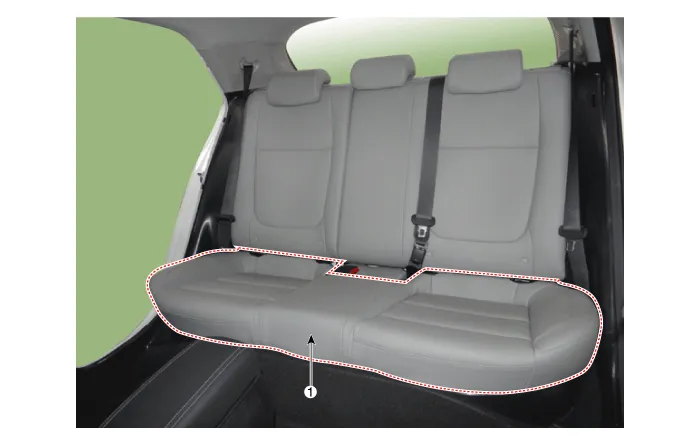
1. Rear seat cushion assembly
2. Rear seat back assembly
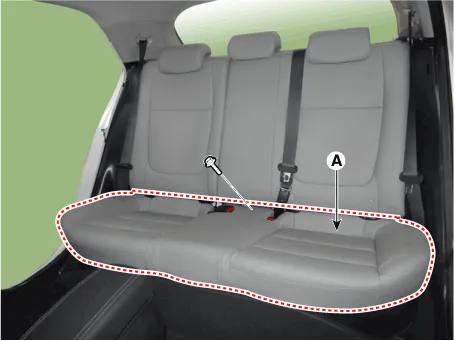
1.Remove the rear seat cushion assembly (A) after loosening the bolt.
Tightening torque : 21.6 - 31.4 N·m (2.2 - 3.2 kgf·m, 15.9 - 23.1 lb·ft)
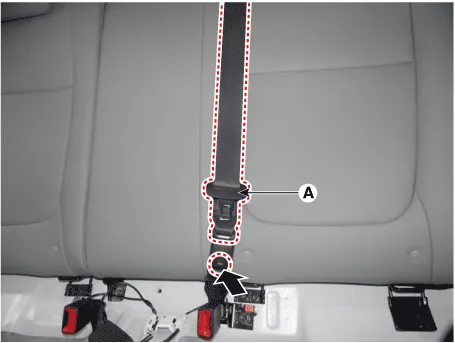
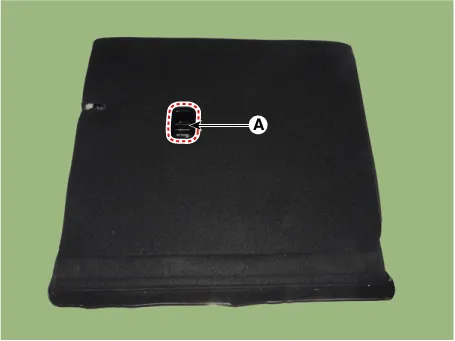
2.Disconnect the rear center seat belt (A).
3.Open the rear seat center hinge (A) after loosening the mounting bolt.
Tightening torque : 21.6 - 31.4 N·m (2.2 - 3.2 kgf·m, 15.9 - 23.1 lb·ft)
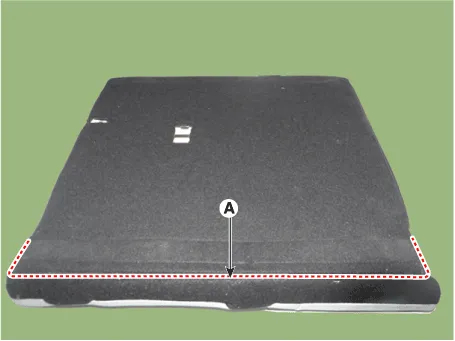
4.Remove the rear seat back assembly (A).
5.Install in the reverse order of removal.
Rear Seat Back Cover

1. Rear seat back cover [LH]
2. Rear seat back cover [RH]


• Use a plastic panel removal tool to remove interior trim pieces without marring the surface.
• Be careful not to bend or scratch the trim and panels.
1.Remove the rear seat assembly. (Refer to Rear Seat - "Rear Seat Assembly")
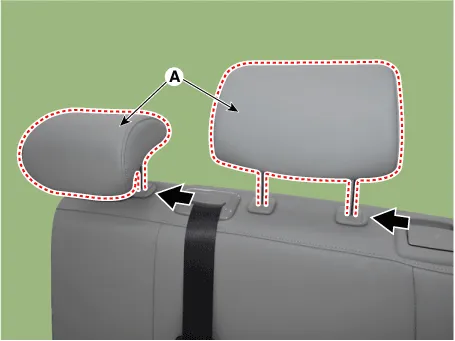
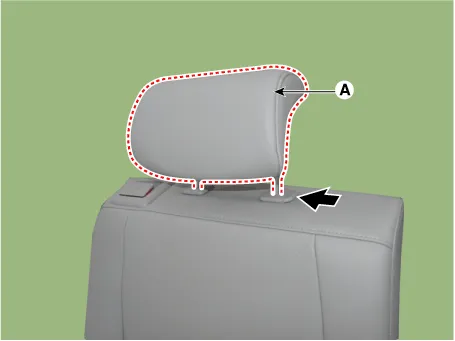
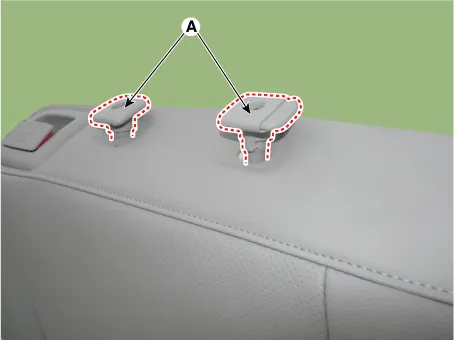
2.Push the lock pin and remove the rear seat headrest (A).
3.Remove the rear seat back webbing guide (A) by using a remover.
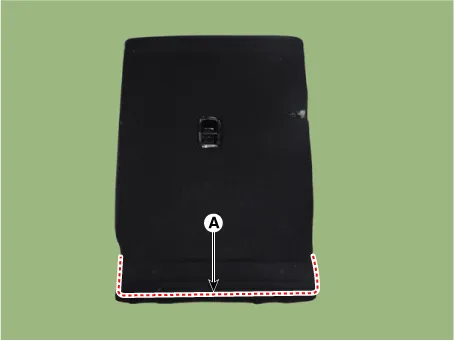
4.Remove the bezel upper cover (A) by using a remover.

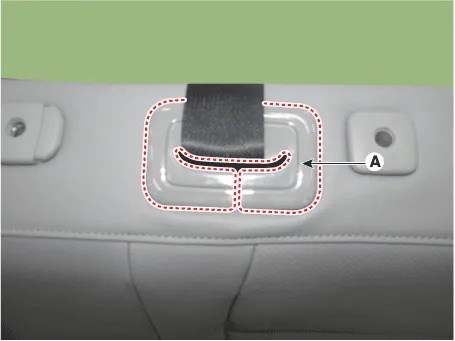
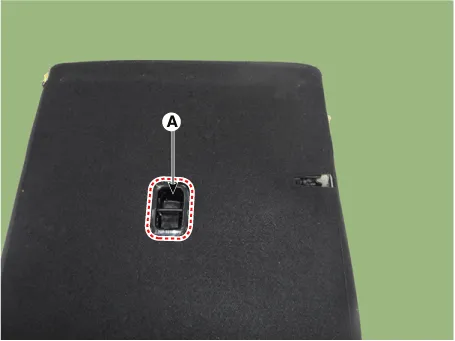
5.Remove the child anchor cover (A) by using a remover.
6.Disconnect the rear seat back dust cover (A).
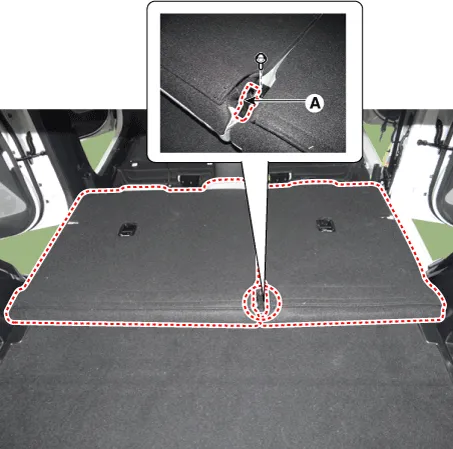
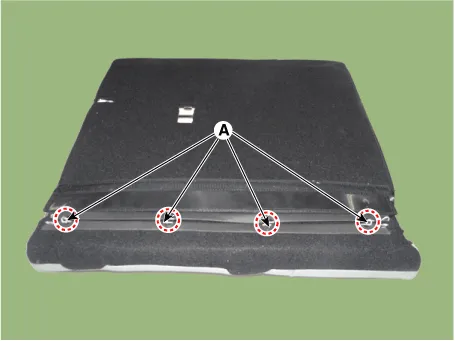
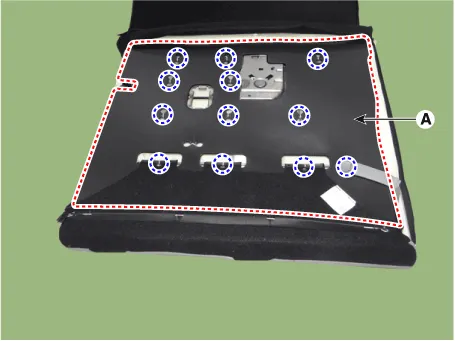
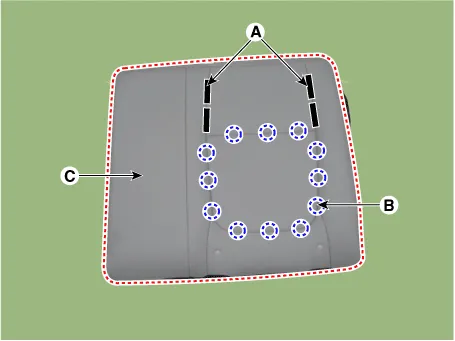
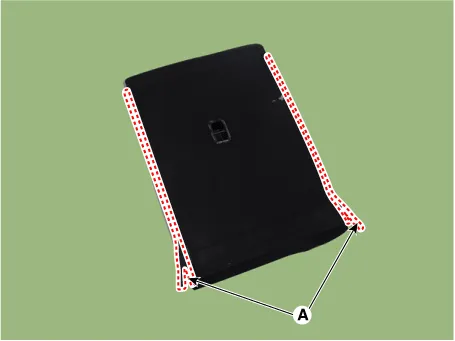
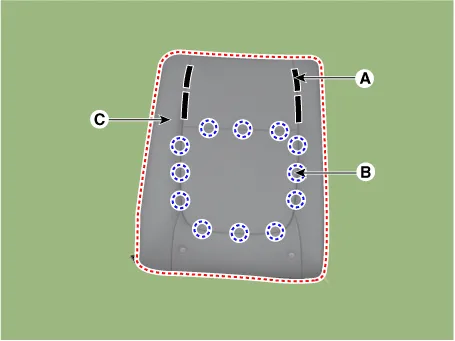
7.Remove the hog-ring clips (A).
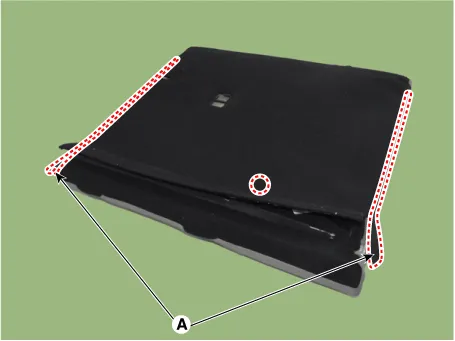
8.Open the seat back side zipper (A).
9.Remove the back board (A) after removing the hog-ring clips.
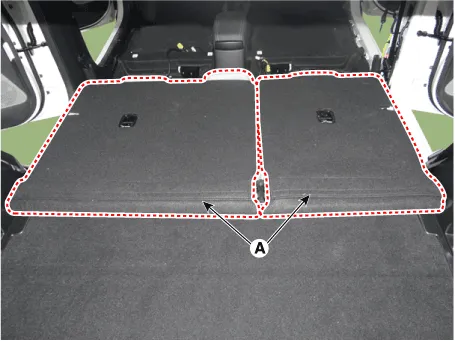
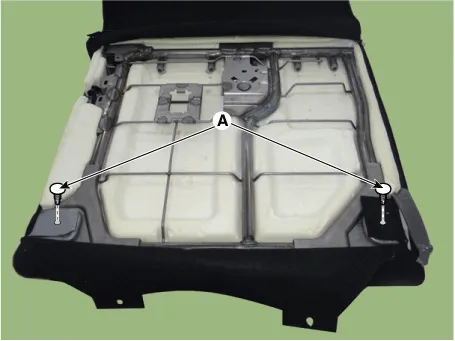
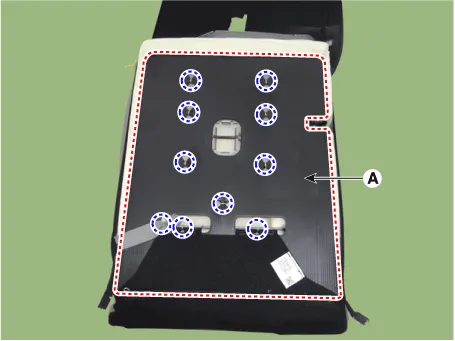
10.Remove the back cover mounting clips (A).
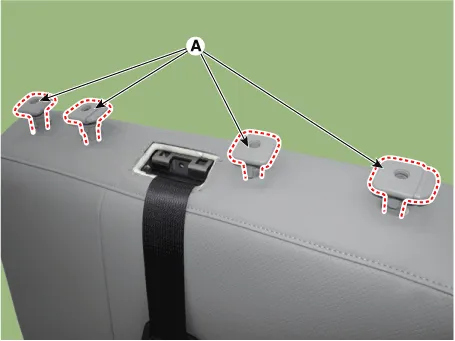
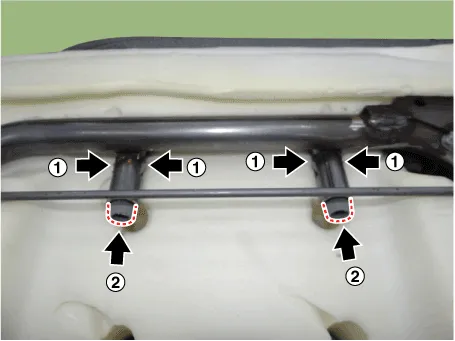
11.Push the rear seat headrest guides (A) while pinching both sides of the lower part of the guides, and remove them.
12.Remove the rear seat back cover from the frame.
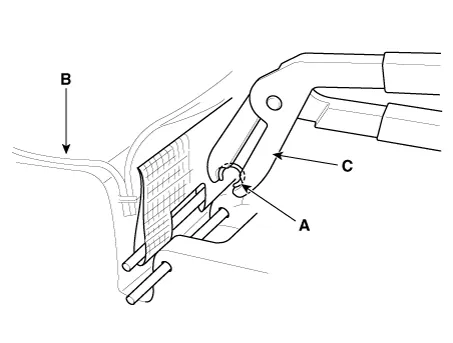
13.Remove the front seat back covering (C) after removing the velcro tape (A) and hog-ring clip (B).
14.Install in the reverse order of removal.

• Make sure that the connectors are connected completely
• Replace any damaged clips (or pin - type retainers).
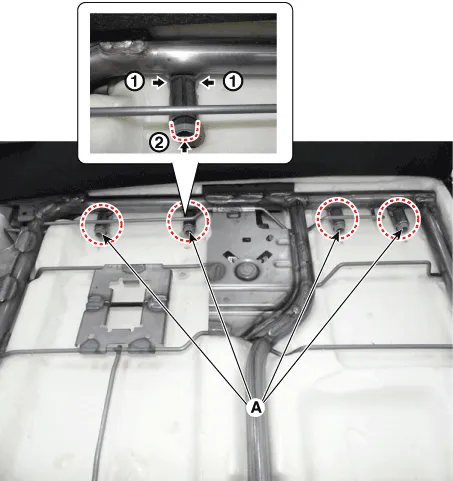
• To prevent wrinkles, make sure that the cover (B) is stretched evenly before connecting the hog - ring clips (A).
• Replace the hog-ring clips with new ones using special tool (C) (09880 - 4F000).

1.Remove the rear seat assembly. (Refer to Rear Seat - "Rear Seat Assembly")
2.Push the lock pin and remove the rear seat headrest (A).
3.Remove the bezel upper cover (A) by using a remover.

4.Remove the child anchor cover (A) by using a remover.
5.Disconnect the rear seat back dust cover (A).
6.Remove the hog-ring clips (A).

7.Open the seat back side zipper (A).
8.Remove the back board (A) after removing the hog-ring clips.
9.Remove the back cover mounting clips (A).

10.Push the rear seat headrest guides (A) while pinching both sides of the lower part of the guides, and remove them.
11.Remove the rear seat back cover from the frame.
12.Remove the front seat back covering (C) after removing the velcro tape (A) and hog-ring clip (B).
13.Install in the reverse order of removal.

• Make sure that the connectors are connected completely.
• Replace any damaged clips (or pin - type retainers).
• To prevent wrinkles, make sure that the cover (B) is stretched evenly before connecting the hog - ring clips (A).
• Replace the hog-ring clips with new ones using special tool (C) (09880 - 4F000).
Rear Seat Cushion Cover
1. Rear seat cushion cover


• Use a plastic panel removal tool to remove interior trim pieces without marring the surface.
• Take care not to bend or scratch the trim and panels.
1.Remove the seat assembly.(Refer to Rear Seat - "Rear Seat Assembly")
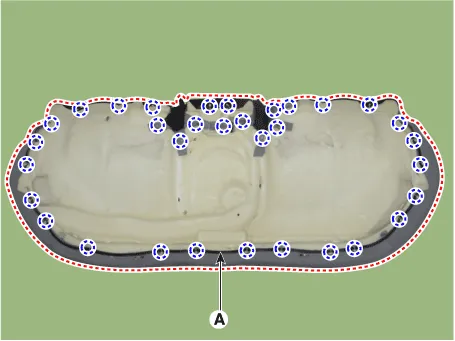
2.Remove the rear seat cushion cover (A) after removing the hog-ring clips on the rear of seat cushion cover.
3.Install in the reverse order of removal.

• Make sure that the connectors are plugged in properly.
• Replace any damaged clips.
• To prevent wrinkles, make sure that the material is stretched evenly over the cover (B) before securing the hog-ring clips (A).
• Replace the hog-ring clips with new ones using special tool (C) (09880-4F000).


Other information:
Hyundai Accent (HC) (2017 - 2022) Service Manual: Specifications
- Specifications DescriptionSpecificationsLimit General TypeIn-line, DOHC   Number of cylinders4   Bore75.60 mm (2.9764 in)   Stroke89.0 mm (3.5039 in.)  Total displacement1,598 cc (97.52 cu.in)  Compression ratio11.2 ± 0.2 : 1  Firing order1-3-4-2   Valve timing Intake valveOpensBTDC 42° - ATDC 38°   ClosesABDC 7° - ABDC 87°   Exhaust valveOpensBBDC 43° - ABDC 2°   ClosesATDC 0° - ATDC 45°   Cylinder head Flatness of gasket surfaceLess than 0.Hyundai Accent (HC) (2017 - 2022) Service Manual: Description and Operation
- Description Burglar Alarm State [B/A State] B/A StateDescription DISARM1) In "DISARM" state, no vehicle start inhibition. So, when door, hood, or Tailgate is opened, there is no alarm sound and flashing. 2) If the battery is disconnected while the state is not "ARM/ARMWAIT/ALARM/REARM", B/A state is set to "DISARM" state. 3)In "DISARM" state, security indicator keeps blinking.
Contents
Categories
- Manuals Home
- Hyundai Accent Owners Manual
- Hyundai Accent Service Manual
- Questions & Answers
- Video Guides
- Useful Resources
- New on site
- Most important about car
- Privacy Policy

0.011