
Hyundai Accent (HC): Body (Interior and Exterior) / Rear Seat
Contents:
Components and Components Location
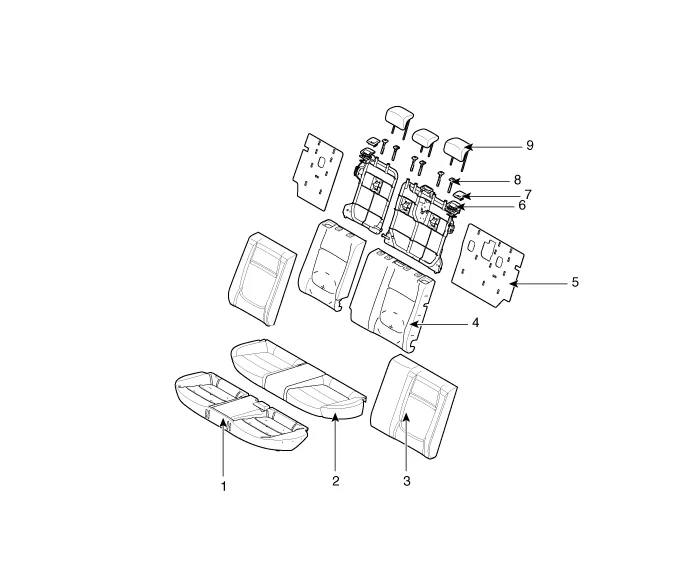
1. Rear seat cushion pad
2. Rear seat cushion covering
3. Rear seat back covering
4. Rear seat back pad
5. Rear seat back board
6. Rear seat back frame
7. Rear seat back bezel
8. Rear seat headrest guide
9. Rear seat headrest
Rear Seat Assembly
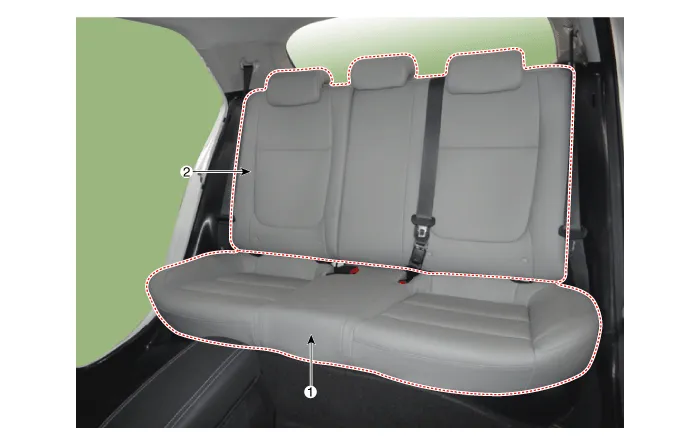
1. Rear seat cushion assembly
2. Rear seat back assembly
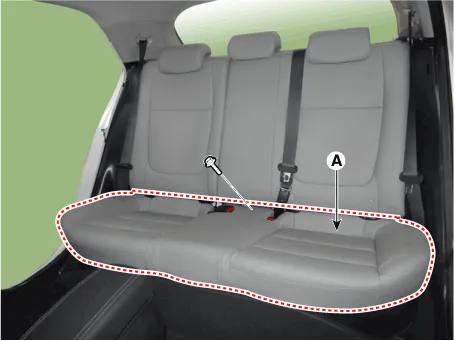
1.Remove the rear seat cushion assembly (A) after loosening the bolt.
Tightening torque : 21.6 - 31.4 N·m (2.2 - 3.2 kgf·m, 15.9 - 23.1 lb·ft)
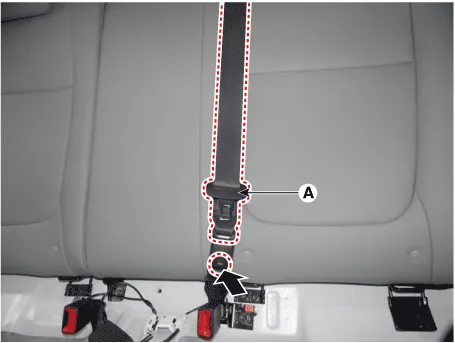
2.Disconnect the rear center seat belt (A).
3.Open the rear seat center hinge (A) after loosening the mounting bolt.
Tightening torque : 21.6 - 31.4 N·m (2.2 - 3.2 kgf·m, 15.9 - 23.1 lb·ft)
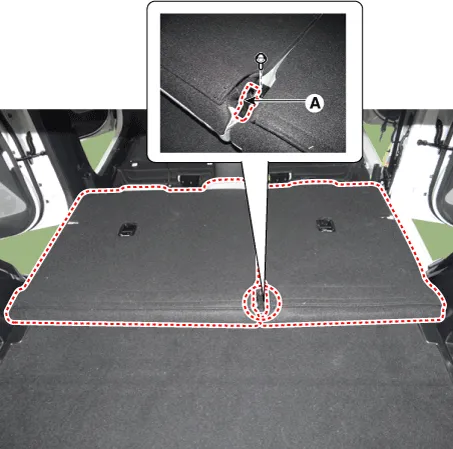
4.Remove the rear seat back assembly (A).
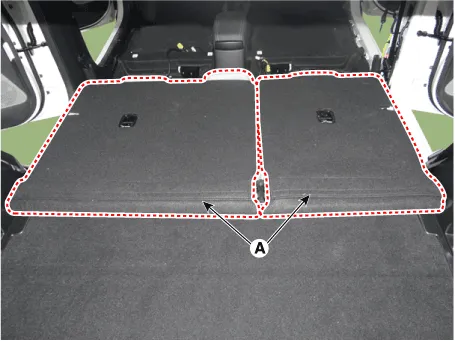
5.Install in the reverse order of removal.
Rear Seat Back Cover
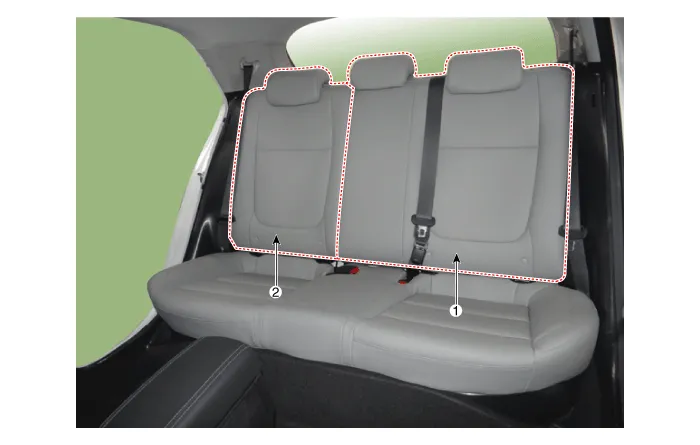
1. Rear seat back cover [LH]
2. Rear seat back cover [RH]


• Use a plastic panel removal tool to remove interior trim pieces without marring the surface.
• Be careful not to bend or scratch the trim and panels.
1.Remove the rear seat assembly. (Refer to Rear Seat - "Rear Seat Assembly")
2.Push the lock pin and remove the rear seat headrest (A).
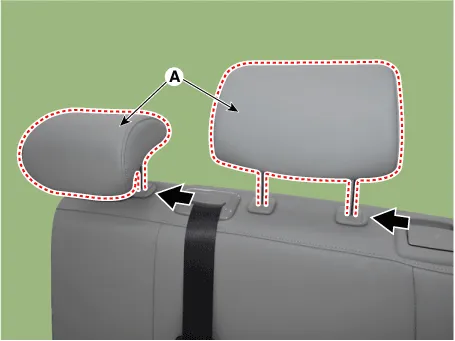
3.Remove the rear seat back webbing guide (A) by using a remover.
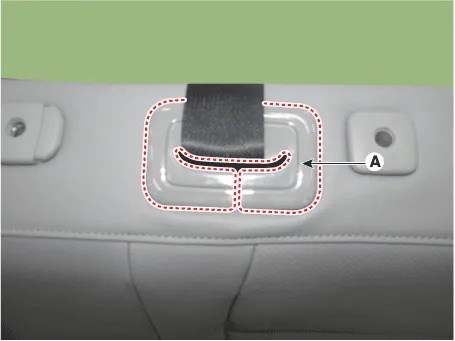
4.Remove the bezel upper cover (A) by using a remover.
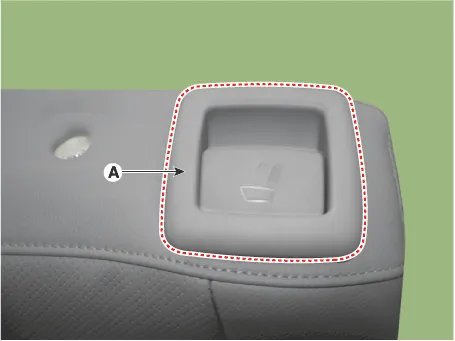
5.Remove the child anchor cover (A) by using a remover.
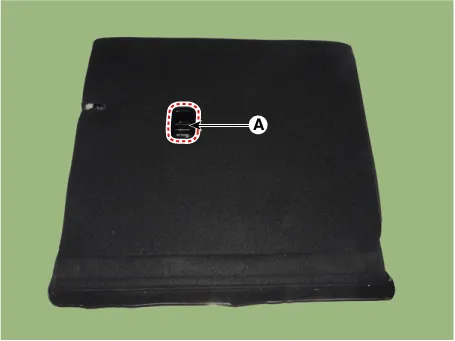
6.Disconnect the rear seat back dust cover (A).
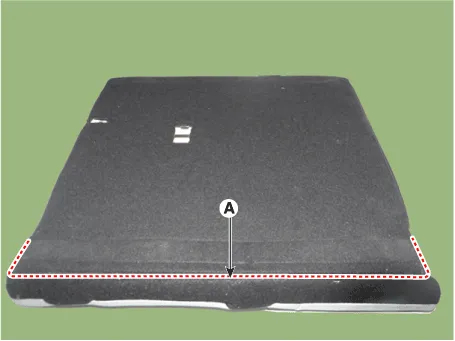
7.Remove the hog-ring clips (A).
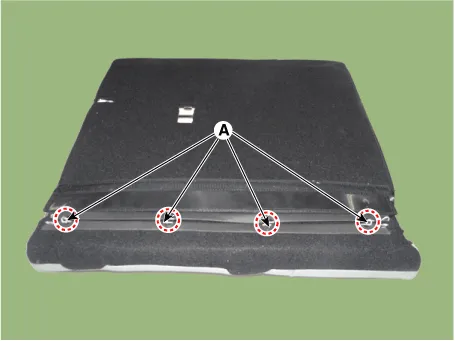
8.Open the seat back side zipper (A).
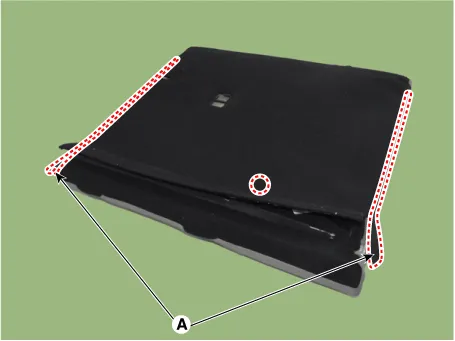
9.Remove the back board (A) after removing the hog-ring clips.
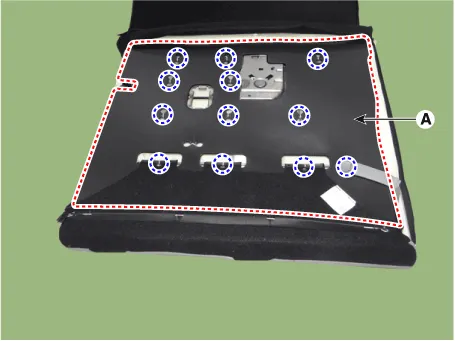
10.Remove the back cover mounting clips (A).
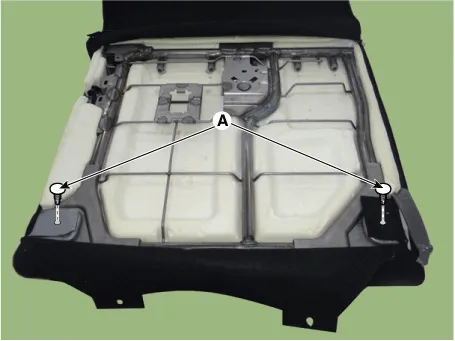
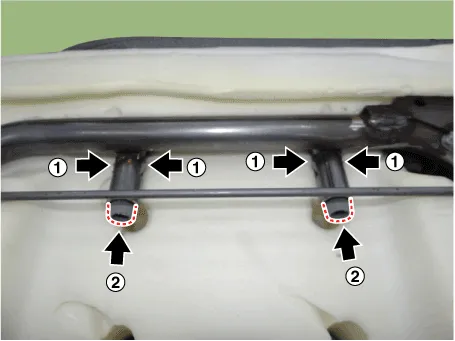
11.Push the rear seat headrest guides (A) while pinching both sides of the lower part of the guides, and remove them.
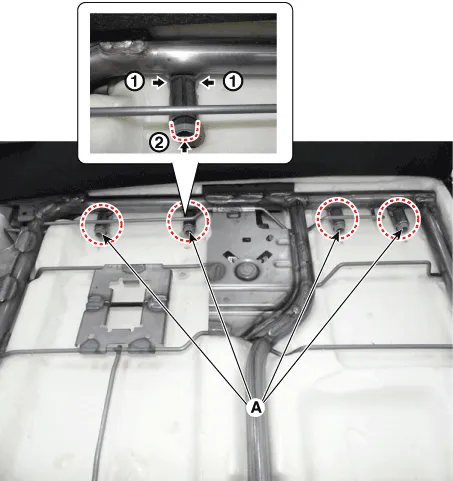
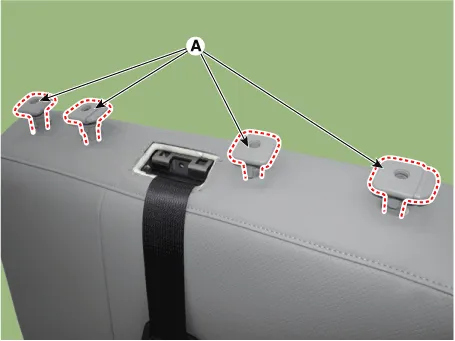
12.Remove the rear seat back cover from the frame.
13.Remove the front seat back covering (C) after removing the velcro tape (A) and hog-ring clip (B).
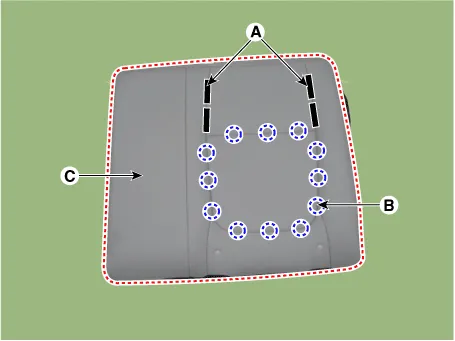
14.Install in the reverse order of removal.

• Make sure that the connectors are connected completely
• Replace any damaged clips (or pin - type retainers).
• To prevent wrinkles, make sure that the cover (B) is stretched evenly before connecting the hog - ring clips (A).
• Replace the hog-ring clips with new ones using special tool (C) (09880 - 4F000).
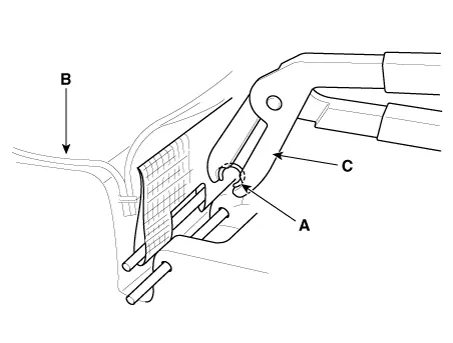
1.Remove the rear seat assembly. (Refer to Rear Seat - "Rear Seat Assembly")
2.Push the lock pin and remove the rear seat headrest (A).
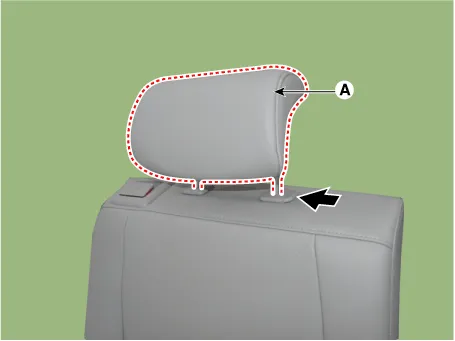
3.Remove the bezel upper cover (A) by using a remover.

4.Remove the child anchor cover (A) by using a remover.
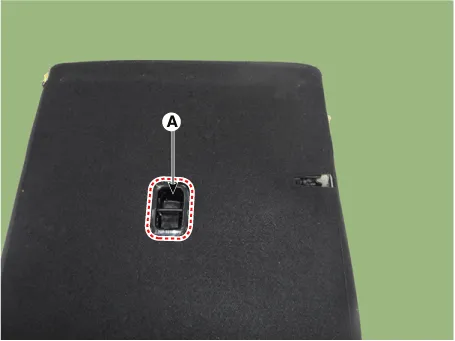
5.Disconnect the rear seat back dust cover (A).
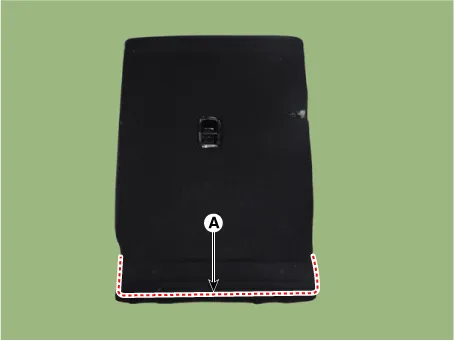
6.Remove the hog-ring clips (A).
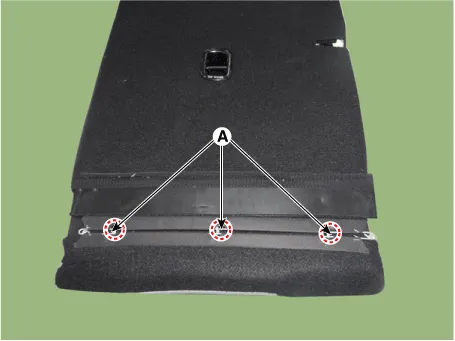
7.Open the seat back side zipper (A).
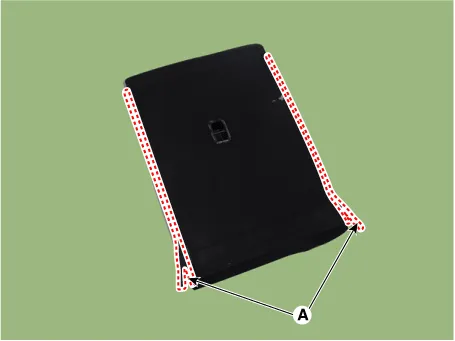
8.Remove the back board (A) after removing the hog-ring clips.
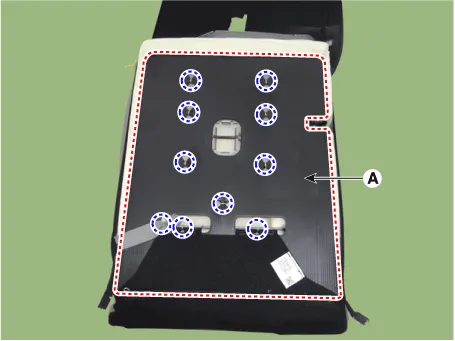
9.Remove the back cover mounting clips (A).

10.Push the rear seat headrest guides (A) while pinching both sides of the lower part of the guides, and remove them.
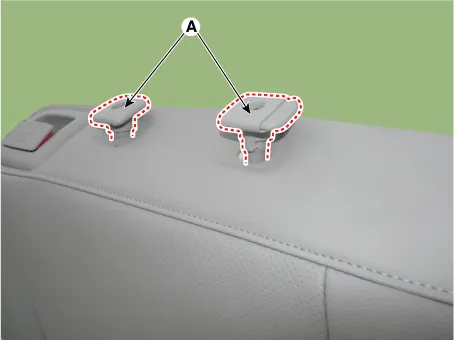
11.Remove the rear seat back cover from the frame.
12.Remove the front seat back covering (C) after removing the velcro tape (A) and hog-ring clip (B).
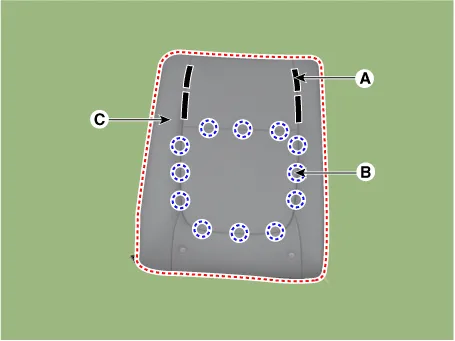
13.Install in the reverse order of removal.

• Make sure that the connectors are connected completely.
• Replace any damaged clips (or pin - type retainers).
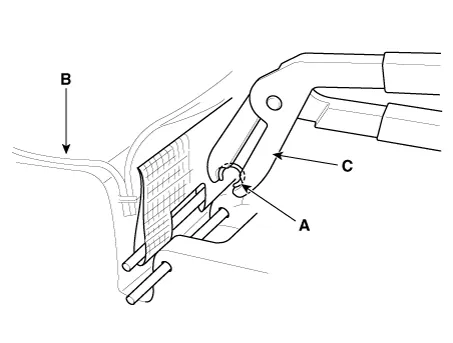
• To prevent wrinkles, make sure that the cover (B) is stretched evenly before connecting the hog - ring clips (A).
• Replace the hog-ring clips with new ones using special tool (C) (09880 - 4F000).
Rear Seat Cushion Cover
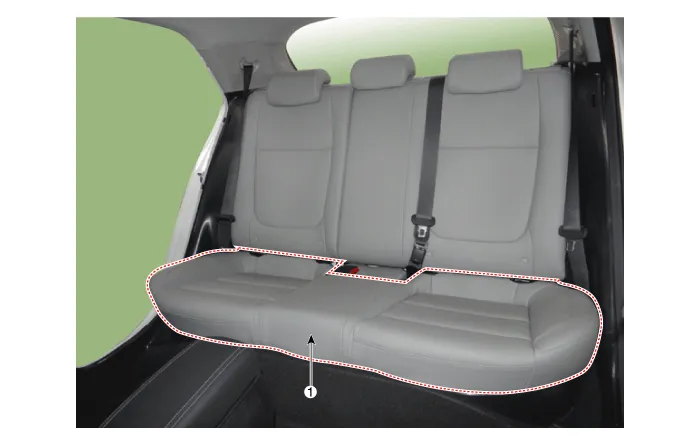
1. Rear seat cushion cover


• Use a plastic panel removal tool to remove interior trim pieces without marring the surface.
• Take care not to bend or scratch the trim and panels.
1.Remove the seat assembly.(Refer to Rear Seat - "Rear Seat Assembly")
2.Remove the rear seat cushion cover (A) after removing the hog-ring clips on the rear of seat cushion cover.
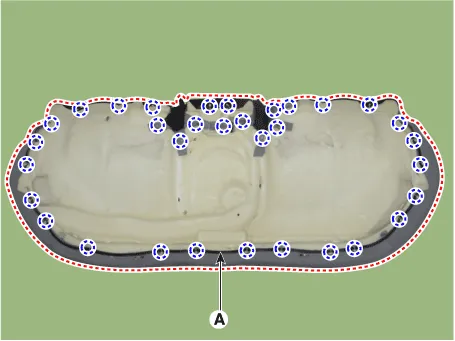
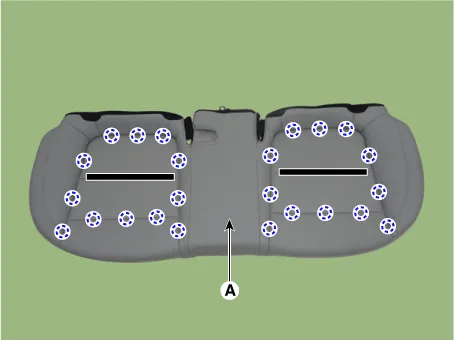
3.Install in the reverse order of removal.

• Make sure that the connectors are plugged in properly.
• Replace any damaged clips.
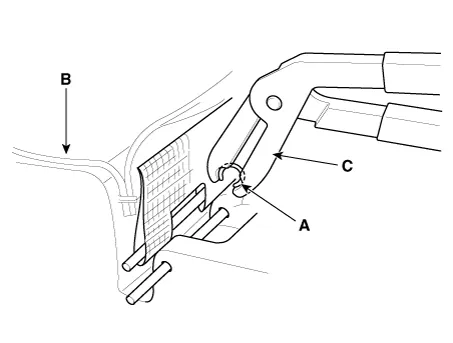
• To prevent wrinkles, make sure that the material is stretched evenly over the cover (B) before securing the hog-ring clips (A).
• Replace the hog-ring clips with new ones using special tool (C) (09880-4F000).


Other information:
Hyundai Accent (HC) (2017 - 2022) Service Manual: Tires and wheels
WARNING Tire failure may cause loss of vehicle control resulting in an accident. To reduce risk of SERIOUS INJURY or DEATH, take the following precautions: Inspect your tires monthly for proper inflation as well as wear and damage. The recommended cold tire pressure for your vehicle can be found in this manual and on the tire label located on the driver's side center pillar.Hyundai Accent (HC) (2017 - 2022) Service Manual: Explanation of scheduled maintenance items
Engine Oil and Filter The engine oil and filter should be changed at the intervals specified in the maintenance schedule. If the Hyundai Accent is being driven in severe conditions, more frequent oil and filter changes are required to protect the engine from accelerated wear and sludge buildup. Drive Belts Inspect all drive belts for evidence of cuts, cracks, excessive wear or oil saturation and replace if necessary.
Contents
Categories
- Manuals Home
- Hyundai Accent Owners Manual
- Hyundai Accent Service Manual
- Questions & Answers
- Video Guides
- Useful Resources
- New on site
- Most important about car
- Privacy Policy

0.0093