Hyundai Accent (HC): Body (Interior and Exterior) / Windshield Glass
Contents:
Components and Components Location

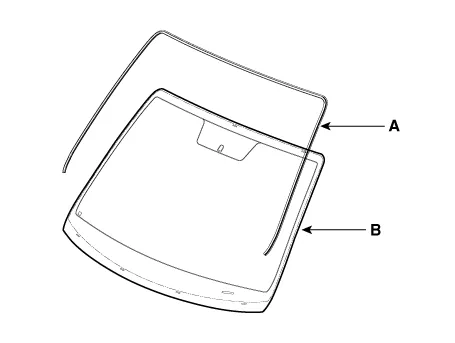
1. Windshield glass
2. Windshield glass weatherstrip
Repair procedures

• Put on gloves to prevent hand injuries.

• Use seat covers to avoid damaging any surfaces.
1.Remove the roof garnish.(Refer to Body Side Molding - "Roof Garnish")
2.Remove the front pillar trim.(Rear to Interior Trim - "Front Pillar Trim")
3.Remove the inside rear view mirror assembly. (Refer to Mirror - "Inside Rear View Mirror")
4.Remove the cowl top cover.(Refer to "Cowl Top Cover")
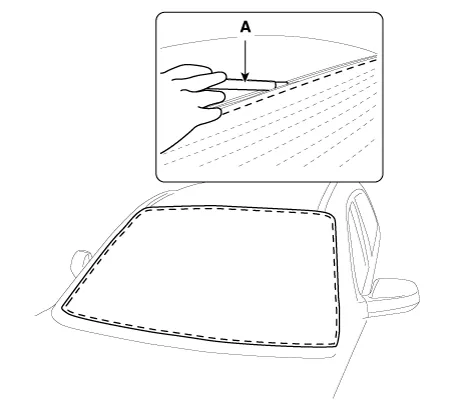
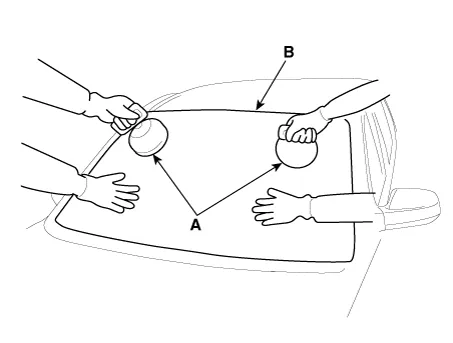
5.Using a cutter (A) knife, carefully remove the windshield glass molding.

• Use the cutter with a 20 to 30 cm - long blade.
6.Cut off the sealant on the edge (B) while pulling the piano wire (A) to the left and right.

• Put on gloves to protect your hands.
• Heat may occur when working on the wires.
• Be careful not to burn your hands.
• Be careful not to disconnect the piano wire.
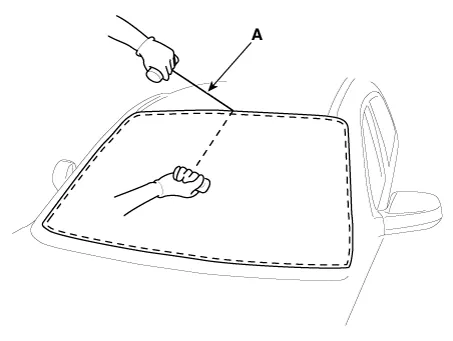
7.Put in a piano wire (A) through the corner of the windshield glass and insert wire grips into both ends of the wire.
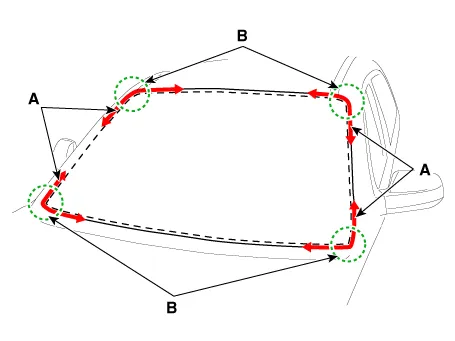
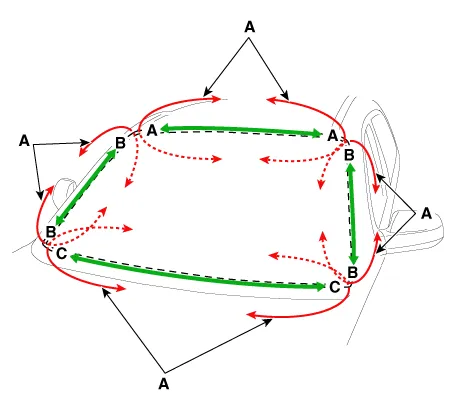
8.Cut off the sealant on (A - A), (B - B), (C - C), while pulling a piano wire (A) to the left and right.

• Put on gloves to protect your hands.
• Heat may occur when working on the wires. Be careful not to burn your hands.
• Be careful not to disconnect the piano wire.
9.Remove the windshield glass (B) carefully using the glass holder (A).
1.Using a knife, scrape the remaining sealant around the body panel leaving about 2mm - thick sealant (0.0079 in.) on the bonding surface. If installing a new windshield glass, make alignment marks on the windshield glass and the body.

• Be careful not to damage the painted surface of the body.

• If the surface is damaged, apply paint or rust inhibitor for maintenance.
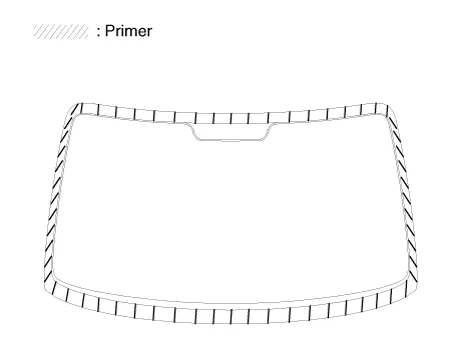
2.Clean the edges of body panel and windshield glass with alcohol. Apply glass primer to the edges of windshield glass and attach the molding onto the edges.
3.Peel off the tape from the windshield glass molding (A) and install the molding on the windshield glass (B).
4.Apply the body primer to the bonding surface of body panel.

• Be careful not to touch the surface covered with the primer because touching it may lead to water leaks after installing the windshield glass.
• Do not apply the body primer to the glass.
• Remove any foreign materials from the primer - covered surface.
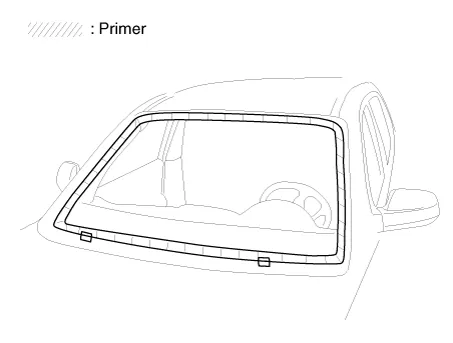
5.Apply the glass primer to the outer edge of windshield glass.

• Be careful not to touch the surface covered with the primer because touching it may lead to water leaks after installing the windshield glass.
• Do not apply the body primer to the glass.
• Remove any foreign materials from the primer-covered surface.
• Apply the sealant within 5 minutes of applying the primer.
6.Apply a bead of sealant (B) around the windshield glass (A).

7.Using the glass holder (A), adjust the windshield glass (B) to fit the alignment marks (C) on the body and lightly push the windshield glass to make the edges fully seated on the bonding surface of body.

8. To make sure that the applied sealant is completely hardened, leave the car on a flat surface for at least 4 hours after installing the windshield glass.

• If driving the car is inevitable, drive at a low speed for at least 8 hours.
• Advise the driver to avoid aggressive driving or driving on rough roads for 2 - 3 days after installing the windshield glass.
9.Conduct a leak testing.
• The leak testing shall be conducted at least 4 hours after the windshield glass installation is completed.
• Do not directly spray the high - pressure water to the joint area.
10.Install the cowl top cover.(Refer to "Cowl Top Cover")
11.Install the inside rear view mirror assembly. (Refer to Mirror - "Inside Rear View Mirror")
12.Install the front pillar trim.(Rear to Interior Trim - "Front Pillar Trim")
13.Install the roof garnish.(Refer to Body Side Molding - "Roof Garnish")


Other information:
Hyundai Accent (HC) (2017 - 2022) Service Manual: Exterior Lights
Lighting control To operate exterior lighting on the Hyundai Accent, rotate the knob at the end of the control lever to one of the positions listed below. The available positions may differ by type and equipment. â– Type A â– Type B â– Type C Type A (1) OFF position (2) Parking lamp position (3) Headlamp position Type B (1) OFF position (2) AUTO light position (3) Parking lamp position (4) Headlamp position Type C (1) DRL OFF position (2) AUTO position (3) Parking lamp position (4) Headlamp position Daytime running light (DRL) The Daytime Running Lights (DRL) help other road users notice the front of your Hyundai Accent during daytime driving, particularly in low-angle light after dawn and before sunset.Hyundai Accent (HC) (2017 - 2022) Service Manual: Description and Operation
- Description System Overview The System offers the following features: – Human machine interface through a 1-stage button, for terminal switching and engine start. – Control of external relays for ACC / IGN1 / IGN2 terminal switching and STARTER, without use of mechanical ignition switch. – Steering column locking with an ESCL device; Monitoring of the vehicle status to insure safe activation of the ESCL.
Contents
Categories
- Manuals Home
- Hyundai Accent Owners Manual
- Hyundai Accent Service Manual
- Questions & Answers
- Video Guides
- Useful Resources
- New on site
- Most important about car
- Privacy Policy

0.0088