Hyundai Accent: Intake And Exhaust System / Muffler
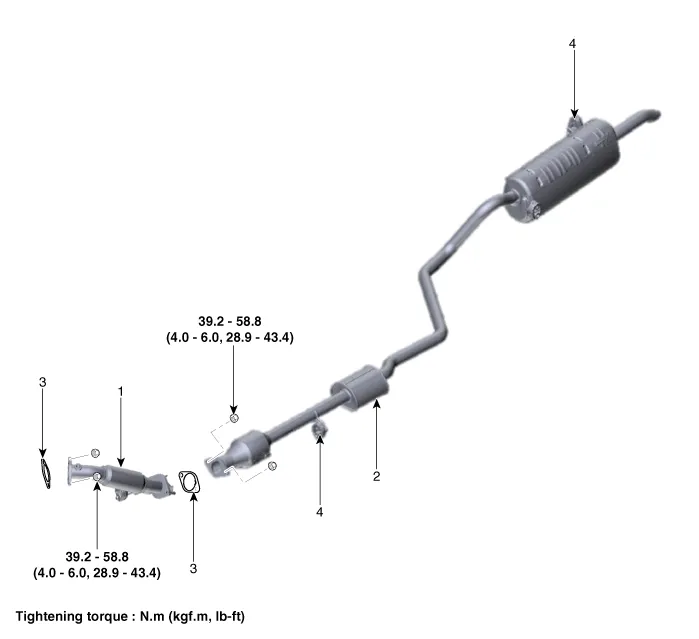
1. Front muffler
2. Center muffler & Rear muffler
3. Gasket
4. Hanger
1.Disconnect the battery negative terminal.
2.Disconnect the oxygen sensor connector (A) and then disconnect from bracket.
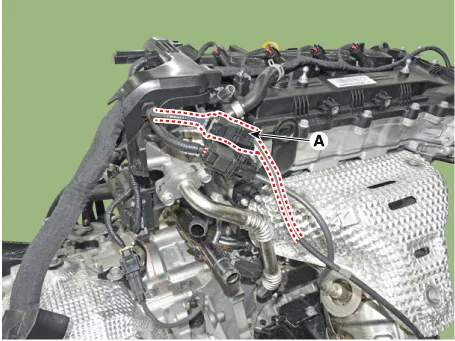
3.Remove the front muffler (A).
Tightening torque :39.2 - 58.8 N.m (4.0 - 6.0 kgf.m, 28.9 - 43.4 lb-ft)
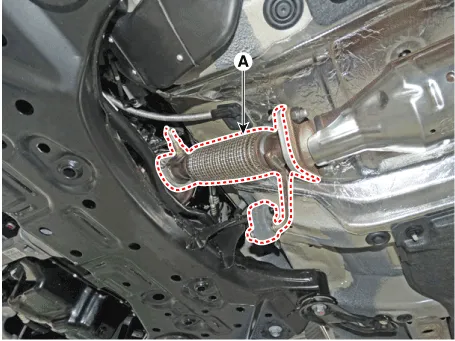
4.Install in the reverse order of removal.

• When installing, replace with new gaskets.
1.Check that the clamping part of the main muffler assembly is damaged or deformed.
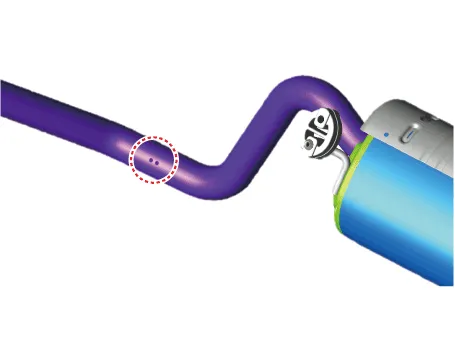
2.Record the gap (A) between the tail pipe and the rear bumper.

3.Cut the main muffler as indicated below.

• Cut the part where the clamp is to be tightened while the muffler is installed in the vehicle.
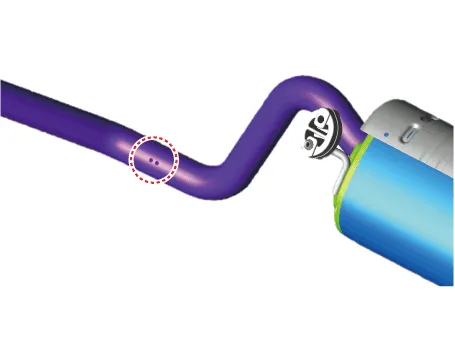
– Cut the muffler pipe marked with the rear dent.
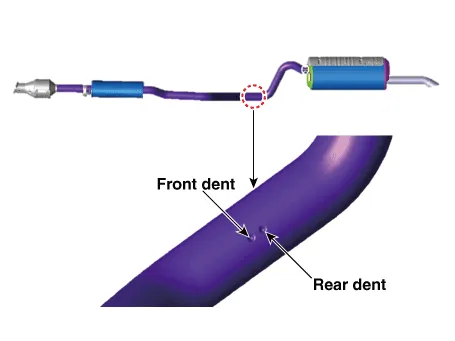

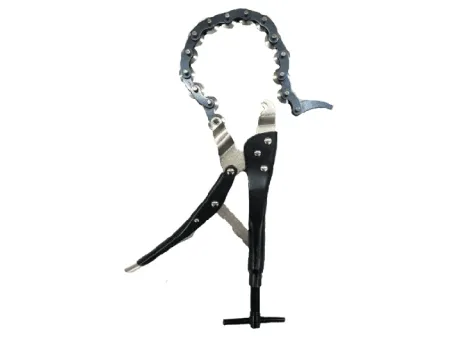
• Use a pipe cutter or chain pipe cutter to make sure the cutting surface is smooth and even.
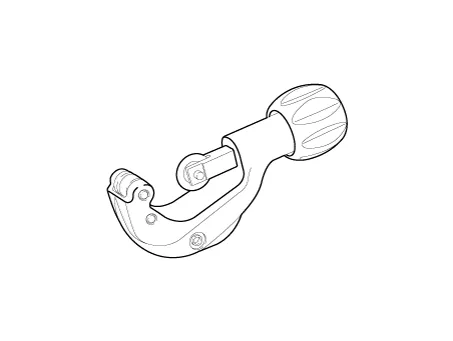
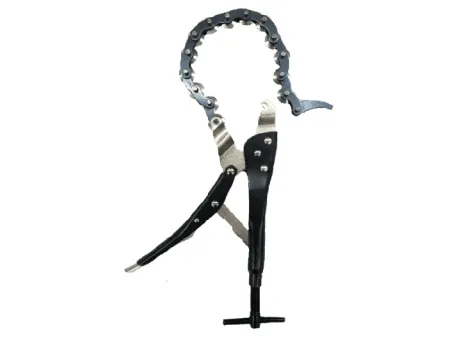
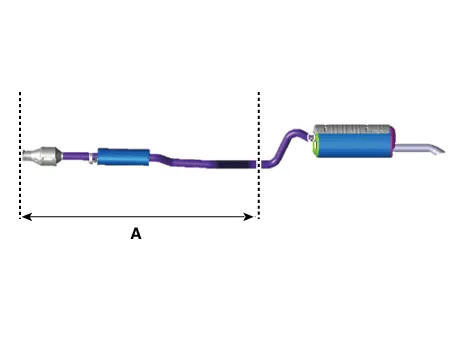
4.Replace the catalytic converter and center muffler (A) as shown in the image below.(Refer to the clamp installation procedures)
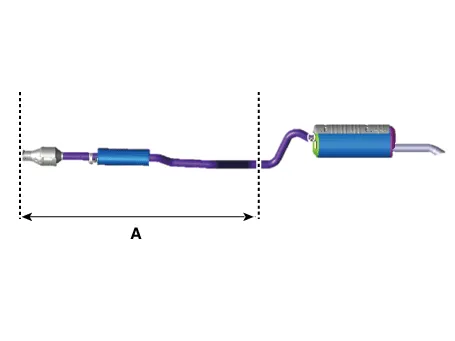
1.Check that the clamping part of the main muffler assembly is damaged or deformed.
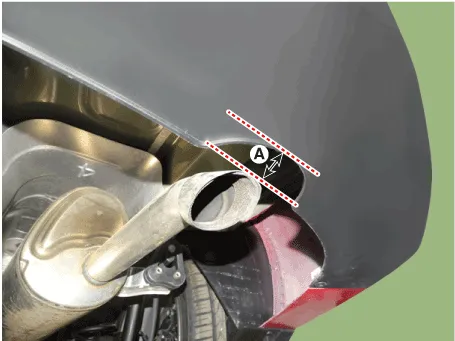
2.Record the gap (A) between the tail pipe and the rear bumper.
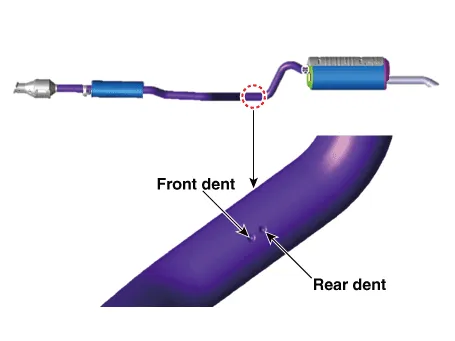
3.Cut the main muffler as the indicated below.

• Cut the part where the clamp is to be tightened while the muffler is installed in the vehicle.
– Cut the muffler pipe marked with the rear dent.

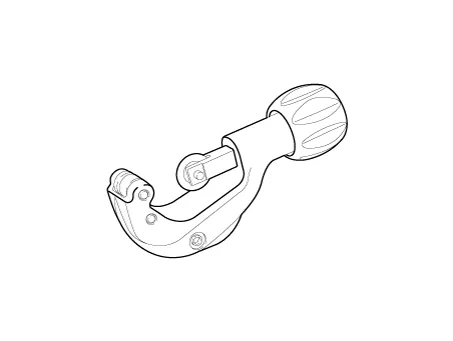
• Use a pipe cutter or chain pipe cutter to make sure the cutting surface is smooth and even.
4.Replace the catalytic converter and center muffler (A) as shown in the image below.(Refer to the clamp installation procedures)
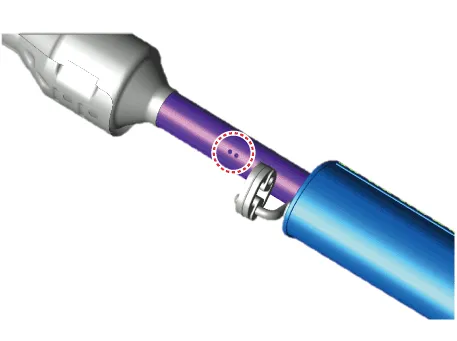
1.Check that the clamping part of the main muffler assembly is damaged or deformed.
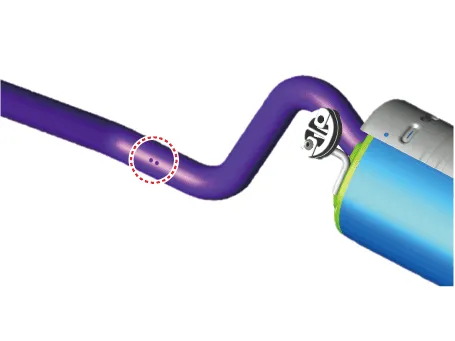
2.Record the gap (A) between the tail pipe and the rear bumper.
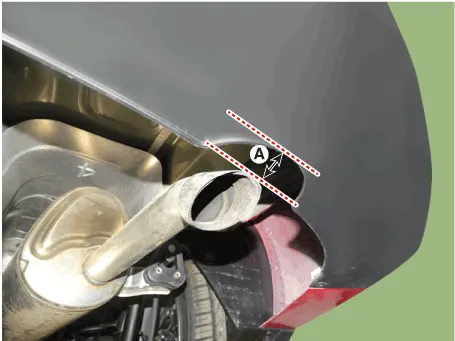
3.Cut the main muffler as indicated below.

• Cut the part where the clamp is to be tightened while the muffler is installed in the vehicle.
– Cut the muffler pipe marked with the rear dent.
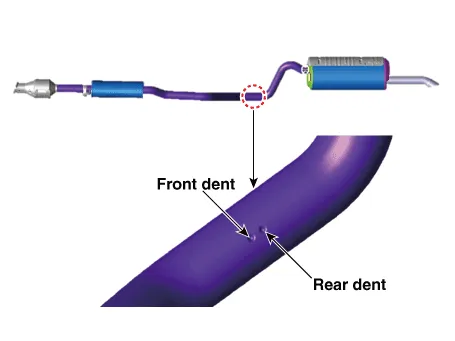
4.Cut the center muffler as indicated below.

• Cut the part where the clamp is to be tightened while the muffler is installed in the vehicle.
– Cut the muffler pipe marked with the front dent.
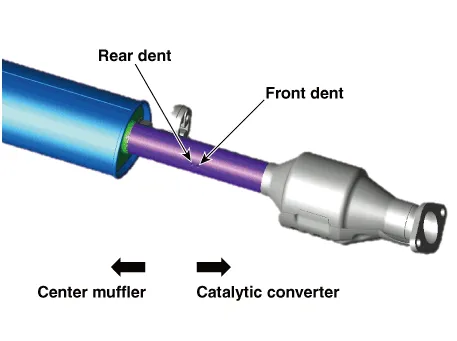
– Cut the A/S muffler marked with the rear dent.
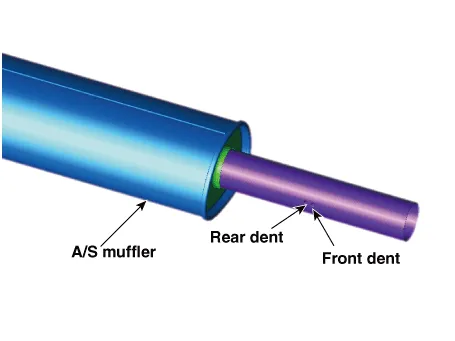

• To prevent leaks, remove the rust on the clamping part or the burr on the cutting part.
• Cut the pipe vertically.

• Use a pipe cutter or chain pipe cutter to make sure the cutting surface is smooth and even.
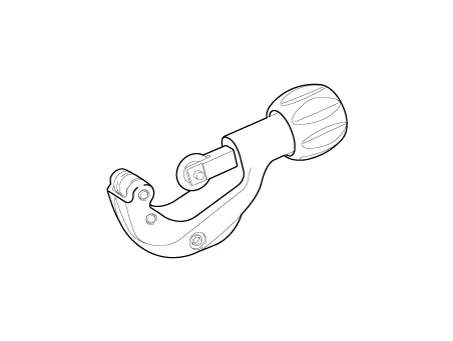
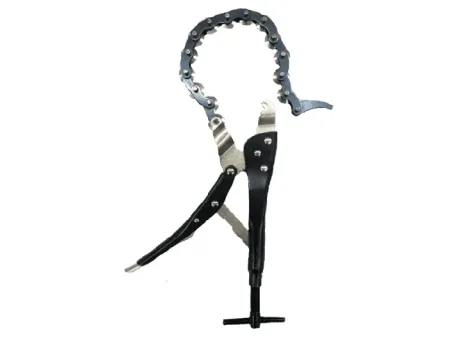
5.Replace the center muffler (A) as shown in the image below.(Refer to the clamp installation procedures)
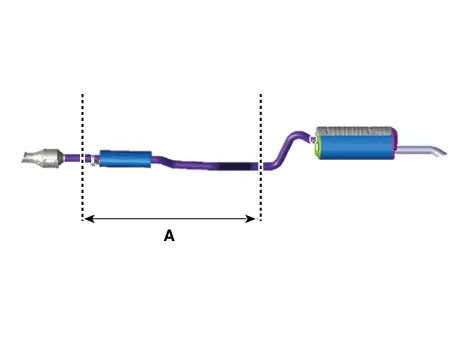
1.Check that the clamping part of the main muffler assembly is damaged or deformed.
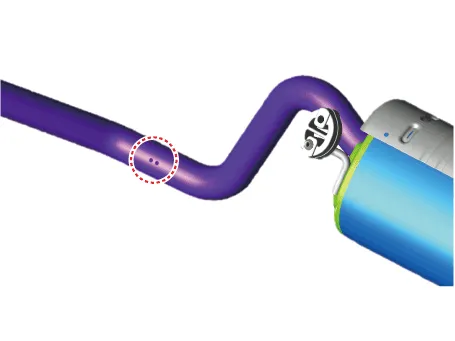
2.Record the gap (A) between the tail pipe and the rear bumper.
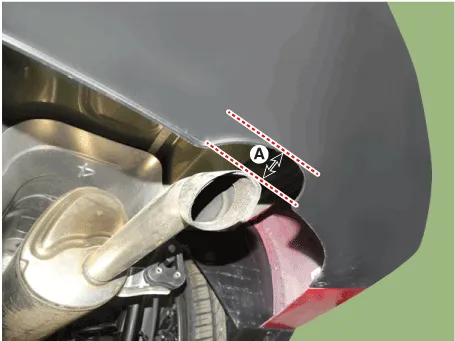
3.Cut the main muffler as indicated below.

• Cut the part where the clamp is to be tightened while the muffler is installed in the vehicle.
– Cut the muffler pipe marked with the front dent.
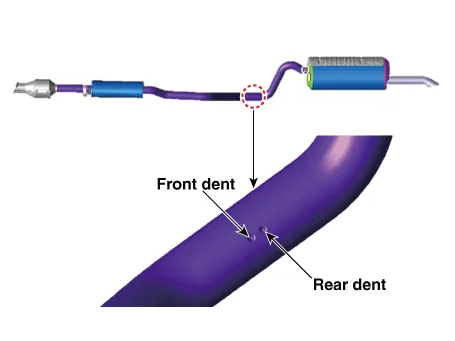

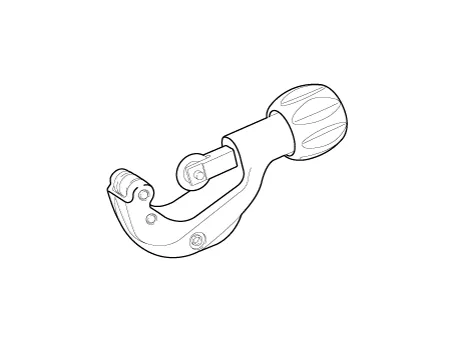
• Use a pipe cutter or chain pipe cutter to make sure the cutting surface is smooth and even.

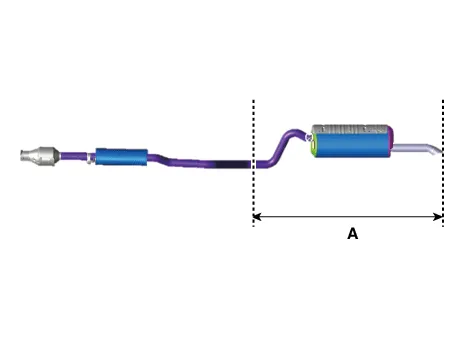
4.Replace the main muffler (A) as shown in the image below.(Refer to the clamp installation procedures)
1.Put the clamp (A) between the cutting parts of the pipse and tighten the clamp lightly, not completely.
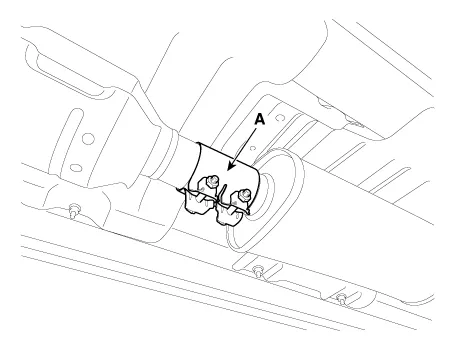
2.Tighten the catalytic converter and the center muffler with specified torque.
Tightening torque :40.0 - 60.0 N.m (4.1 - 6.1 kgf.m, 29.5 - 44.3 lb-ft)
3.Compare the gap between the tail pipe(or tail trim) and the rear bumper with the record measured before removing the center muffler assembly.

• If the tail pipe position is different from the initial position, the bumper may be damaged by the pipe noise and heat which arise from the interference between the tail pipe and the rear bumper.
4.Do not tighten the clamp by turning it once. Tighten the clamp nuts with the specified torque by alternately turning them a couple of times.
Tightening torque :18.0 - 24.0 N.m (1.8 - 2.5 kgf.m, 13.3 - 17.7 lb-ft)
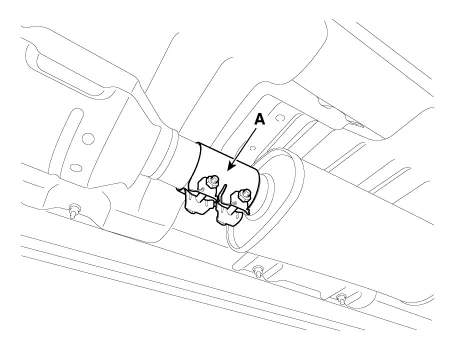

• Do not reuse the clamp that was tightened completely. If reused, the clamp may cause leaks.
1.Tighten the main muffler and the center muffler with specified torque.
Tightening torque :40.0 - 60.0 N.m (4.1 - 6.1 kgf.m, 29.5 - 44.3 lb-ft)

• If the tail pipe position is different from the initial position, the bumper may be damaged by the pipe noise and heat which arise from the interference between the tail pipe and the rear bumper.
2.Do not tighten the clamp by turning it once. Tighten the clamp nuts with the specified torque by alternately turning them a couple of times.
Tightening torque :18.0 - 24.0 N.m (1.8 - 2.5 kgf.m, 13.3 - 17.7 lb-ft)

• The gap between the head of the clamp bolt and the fuel tank shall range from 35 mm (1.3780 in) to 40 mm (1.5748 in).
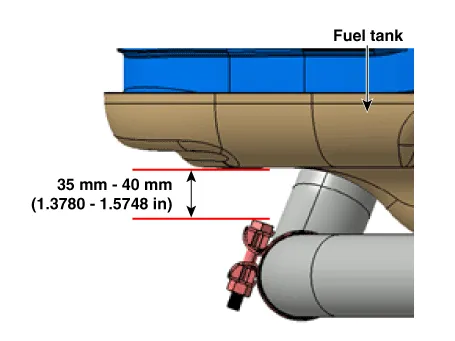
• Do not reuse the clamp that was tightened completely. If reused, the clamp may cause leaks.
Other information:
Hyundai Accent (HC) (2017 - 2022) Service Manual: Troubleshooting
- Basic Troubleshooting Basic Troubleshooting Guide Customer Problem Analysis Sheet Basic Inspection Procedure Measuring Condition Of Electronic Parts' Resistance The measured resistance at high temperature after vehicle running may be high or low. So all resistance must be measured at ambient temperature (20°C, 68°F), unless stated otherwise. - Components Location 1. Intelligent Variable Transmission (IVT)2. Drain plug gasket3. Drain plug4. Intelligent Variable Transmission Fluid (IVTF) level check plug5. IVTF injection plug - Inspection • Be sure to use the genuine IVTF (SP-IVT1). • When replacing with non-genuine IVTF, bad shift and vibration may occur, causing damage to the IVT.
Categories
- Manuals Home
- Hyundai Accent Owners Manual
- Hyundai Accent Service Manual
- New on site
- Most important about car


