Hyundai Accent (HC): Body (Interior and Exterior) / Liftgate
Contents:
Repair procedures
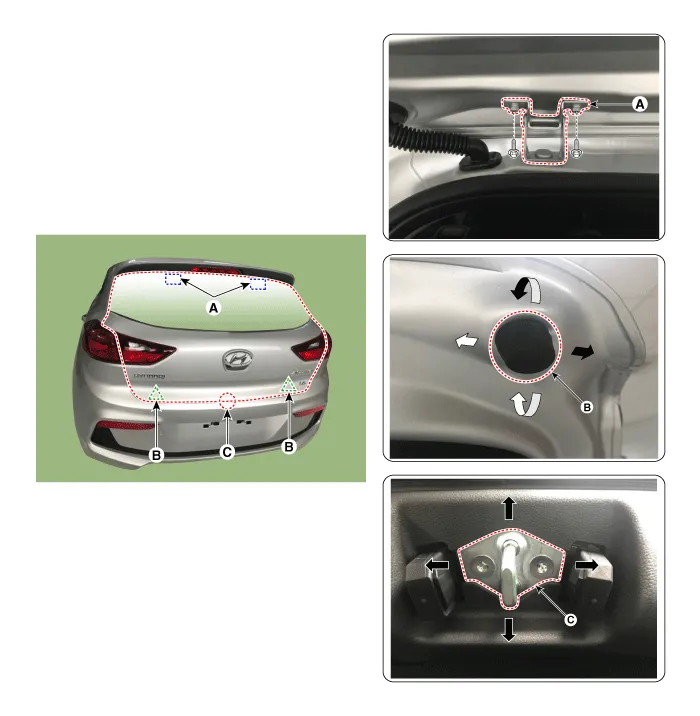
1.Place the car on a flat surface and check whether the body and trunk lid are well-aligned.
2.After loosening the liftgate hinge (A) mounting bolt, adjust the liftgate by moving it up and down or from side to side.
3.Adjust the gap between the liftgate and body by turning the liftgate overslam bumpers (B).
4.After loosening the liftgate striker (C) mounting bolts, adjust the striker by moving it back and forth or from side to side and then tighten the mounting bolts.
5.Make sure the liftgate opens or closes properly.
Liftgate Assembly
1. Liftgate assembly

• Wear gloves to protect hands from injury.

• When removing and installing the liftgate, an assistant is needed.
1.Remove the liftgate trim.(Refer to Liftgate - "Liftgate Trim")
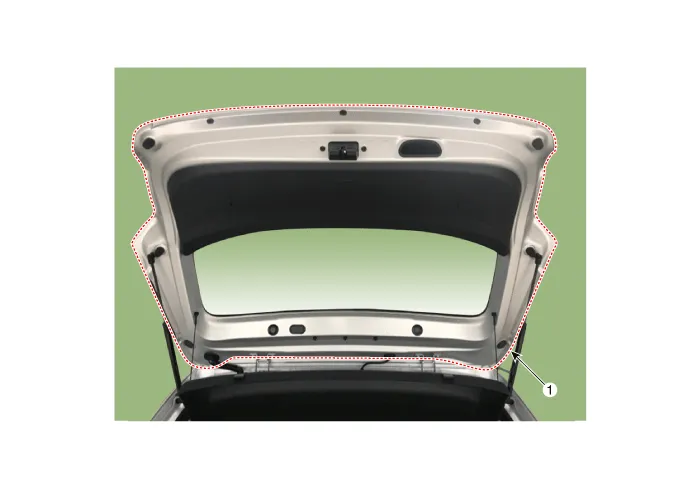
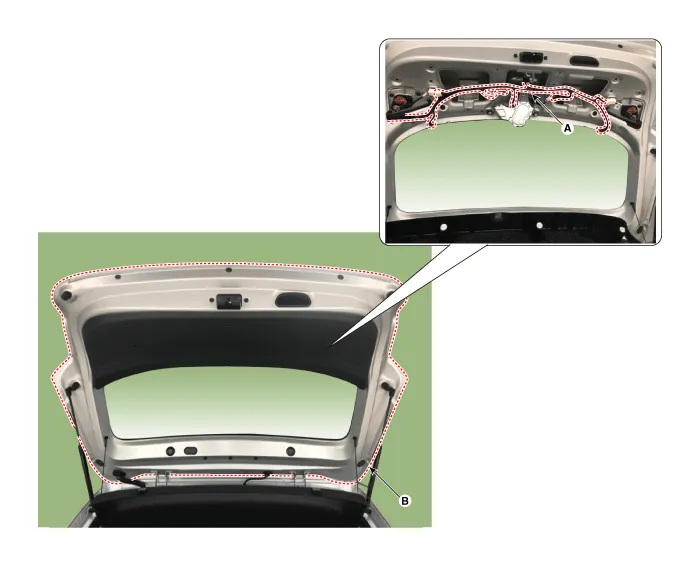
2.Using a screwdriver, lift the socket clips (A) up slightly on both ends of the liftgate lifter (B).

3.Disconnect the connectors and liftgate main wiring harness (A) and washer nozzle.
4.After loosening the mounting bolts, then remove the liftgate assembly (B).
Tightening torque :21.6 - 26.5 N.m (2.2 - 2.7 kgf.m, 15.9 - 19.5 lb-ft)
5.To install, reverse removal procedure.

• Make sure the liftgate locks / unlocks and opens / closes properly.
• Adjust the liftgate alignment.
• Make sure the connectors are connected in properly.
• Replace any damaged clips (or pin-type retainers).
Liftgate Trim
1.Using a flat-tip screwdriver and remove the liftgate trim (A).
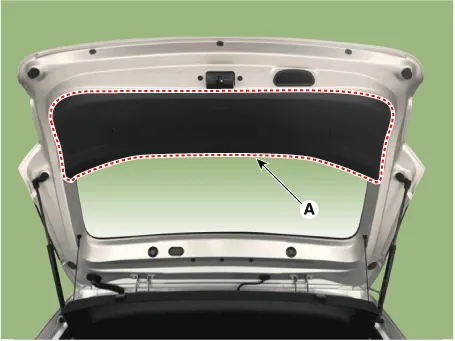
2.To install, reverse removal procedure.

• Replace any damaged clips.
Liftgate Latch
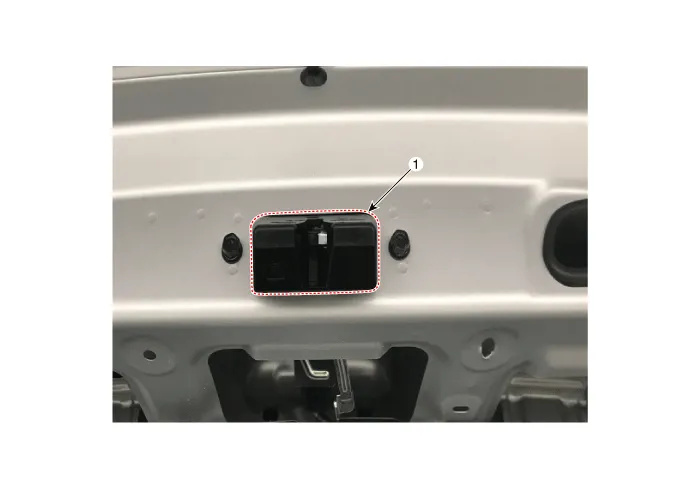
1. Liftgate latch

• Put on gloves to prevent hand injuries.

• When removing with a flat-tip screwdriver or remover, wrap protective tape around the tools to prevent damage to components.
• Take care not to scratch the body surface.
1.Remove the liftgate trim.(Refer to Liftgate - "Liftgate Trim")
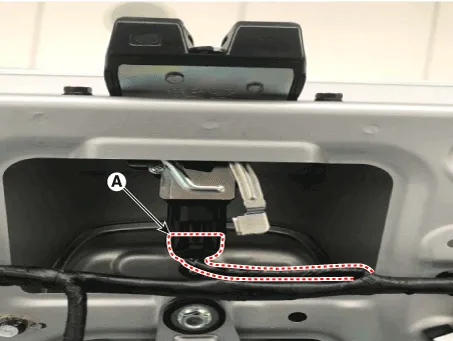
2.Press the lock pin and separate the liftgate latch connector (A).
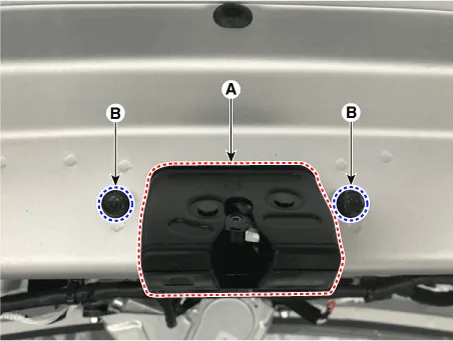
3.Loosen the mounting bolts (B) and remove the liftgate latch assembly (A).
Tightening torque : (B) 6.9 - 10.8 N.m (0.7 - 1.1 kgf.m, 5.1 - 8.0 lb-ft)
4.To install, reverse removal procedure.

• Make sure the liftgate locks / unlocks and opens / closes properly.
• Adjust the liftgate alignment.
• Make sure the connectors are connected in properly.
Liftgate Lift

• Take care to not let the liftgate fall on you as the lifts are removed. Have a helper hold the liftgate open, or use a secure method to hold it open.
1.Using a screwdriver, lift the socket clips (A) up slightly on both ends of the liftgate lifter (B).

2.Push the socket of the lifter into the bracket for installation.

• Make sure the liftgate locks and opens properly and locks securely.
Liftgate Weatherstrip
1.Remove the liftgate weatherstrip (A).

• Do not apply sealant to the body.
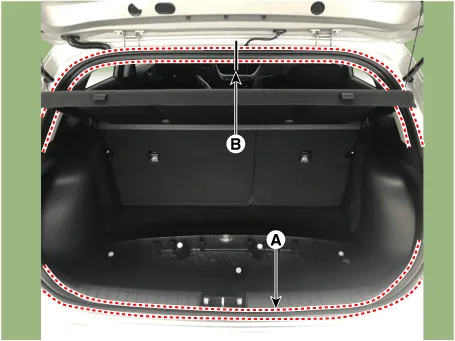
2.To install, reverse removal procedure.

• When installing the liftgate weatherstrip, check the center-marking line (B).


Other information:
Hyundai Accent (HC) (2017 - 2022) Service Manual: Windshield defrosting and defogging
WARNING Windshield heating Do not use the or position during cooling operation in extremely humid weather. The difference between the temperature of the outside air and that of the windshield could cause the outer surface of the windshield to fog up, causing loss of visibility could cause an accident resulting in serious injury or death. In this case, set the mode selection knob or button to the position and fan speed control knob or button to a lower speed.Hyundai Accent (HC) (2017 - 2022) Service Manual: Repair procedures
- Refrigerant System Service Basics Refrigerant Identification • Do not mix R-1234yf in the vehicle with other refrigerant, such as R-134a and etc. • Use only service equipment that is U.L-listed and is certified to meet the requirements of SAE standards to recover and recycle R-1234yf from the air conditioning system. Do not use service equipment for the other refrigerant, such as R-134a and etc.
Contents
Categories
- Manuals Home
- Hyundai Accent Owners Manual
- Hyundai Accent Service Manual
- Questions & Answers
- Video Guides
- Useful Resources
- New on site
- Most important about car
- Privacy Policy

0.0055