Hyundai Accent (HC): Body (Interior and Exterior) / Trunk Lid
Contents:
Repair procedures
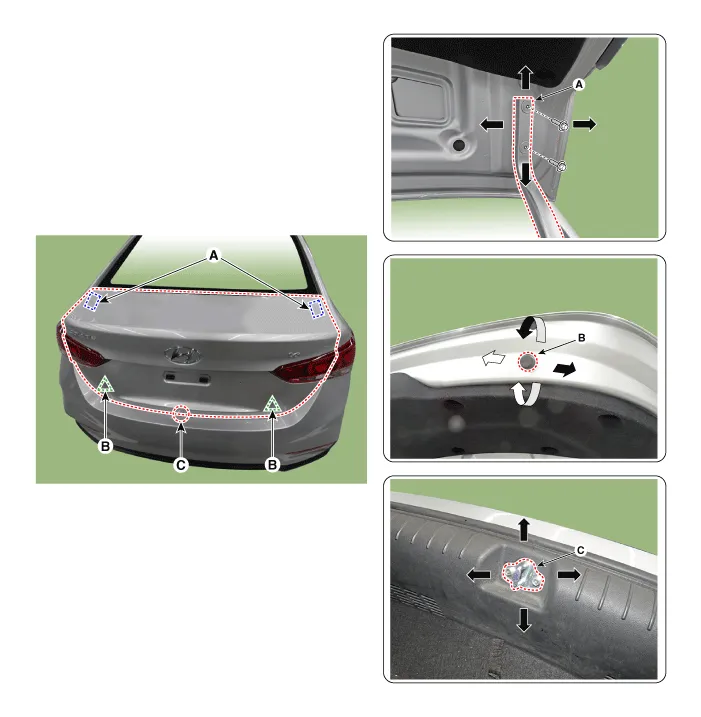
1.Place the car on a flat surface and check whether the body and trunk lid are well - aligned.
2.After loosening the trunk lid hinge (A) mounting bolt, adjust the trunk lid by moving it up and down or from side to side.
3.Adjust the gap between the trunk lid and body by turning the trunk lid overslam bumpers (B).
4.After loosening the trunk lid striker (C) mounting bolts, adjust the striker by moving it back and forth or from side to side and then tighten the mounting bolts.
5.Make sure the trunk lid opens or closes properly.
Trunk Lid Assembly
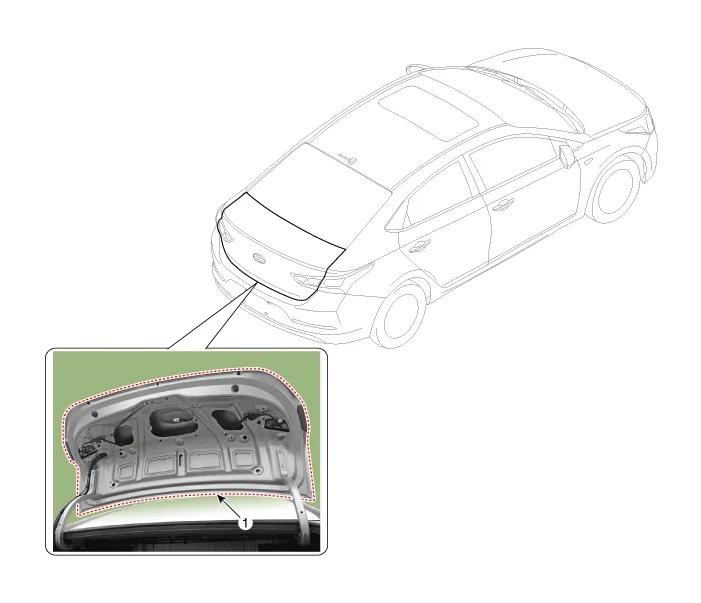
1. Trunk lid assembly

• Put on gloves to prevent hand injuries.

• When removing and installing the trunk lid, an assistant is necessary.
• Be careful not to damage the trunk lid and body surface.
1.Remove the trunk lid trim.(Refer to Trunk Lid - "Trunk Lid Trim")
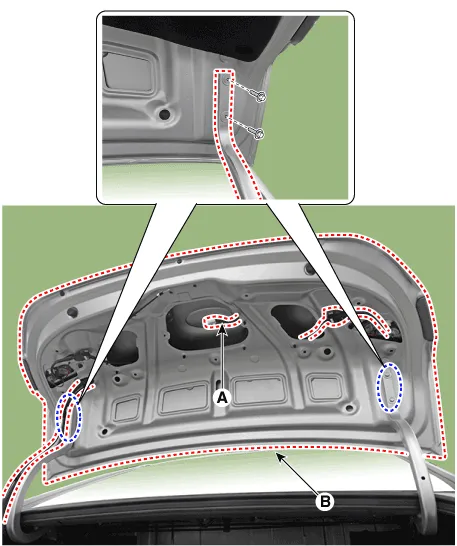
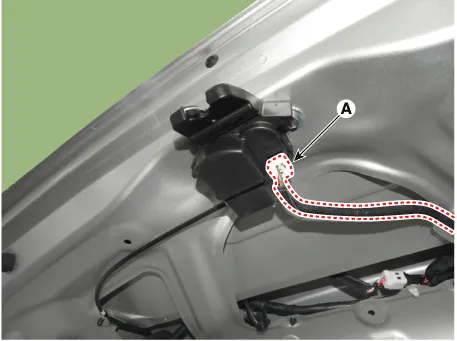
2.Disconnect the connectors and trunk lid wiring harness (A).
3.After loosening the mounting bolts, remove the trunk lid assembly (B).
Tightening torque :21.6 - 26.5 N.m (2.2 - 2.7 kgf.m, 15.9 - 19.5 lb-ft)
4.To install, reverse the removal procedure.

• Make sure the trunk lid locks / unlocks and opens / closes properly.
• Adjust the trunk lid as necessary.
• Make sure the connectors are connected in properly.
• Replace any damaged clips.
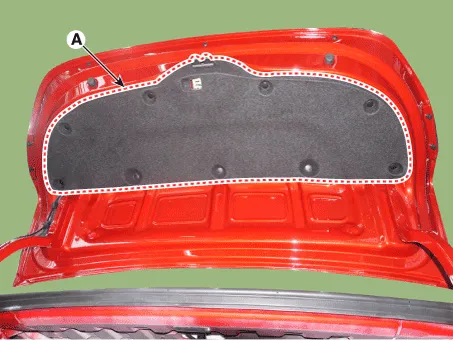
Trunk Lid Trim
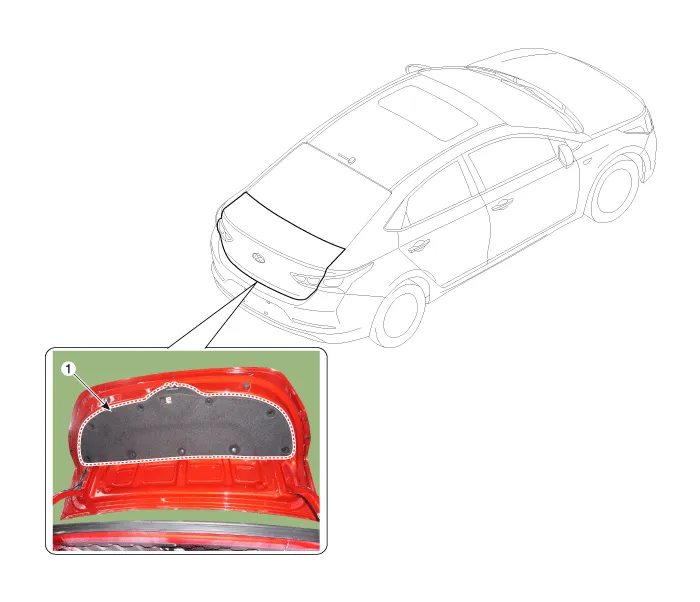
1. Trunk lid trim

• Put on gloves to prevent hand injuries.

• When removing with a flat - tip screwdriver or remover, wrap protective tape around the tools to prevent damage to components.
• Take care not to scratch the body surface.
1.After loosening the mounting clips, then remove the trunk lid trim (A).
2.To install, reverse the removal procedure.

• Replace any damaged clips.
Trunk Lid Latch

• Put on gloves to prevent hand injuries.

• When removing with a flat - tip screwdriver or remover, wrap protective tape around the tools to prevent damage to components.
• Take care not to scratch the body surface.
1.Remove the tail trunk lid trim.(Refer to Trunk Lid - "Trunk Lid Trim")
2.Disconnect the trunk lid latch connector (A).
3.After loosening the mounting bolts, then remove the trunk lid latch assembly (A).
Tightening torque : 6.9 - 10.8 N.m (0.7 - 1.1 kgf.m, 5.1 - 8.0 lb-ft)

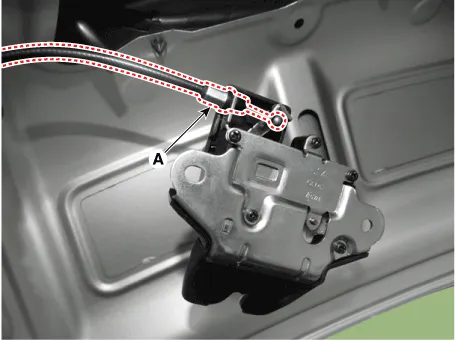
4.Disconnect the trunk lid release cable (A).
5.To install, reverse the removal procedure.

• Make sure the trunk lid locks / unlocks and opens / closes properly.
• Adjust the alignment.
• Make sure the connectors are connected in properly.
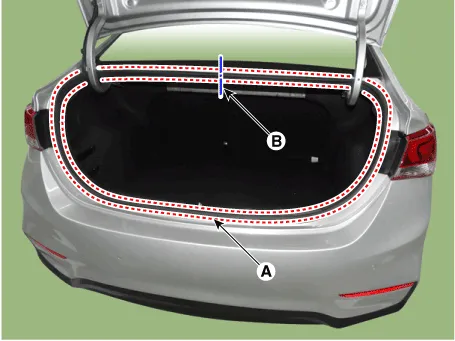
Trunk Lid Weatherstrip
1.Remove the trunk lid weatherstrip (A).

• Do not apply sealant to the body.
2.To install, reverse the removal procedure.

• When installing the trunk lid weatherstrip, check the center - marking point (B).


Other information:
Hyundai Accent (HC) (2017 - 2022) Service Manual: Changing Tires
WARNING A vehicle can slip or roll off of a jack causing serious injury or death to you or those nearby. Take the following safety precautions: Never place any portion of your body under a vehicle that is supported by a jack. Your Hyundai Accent must be supported only at the correct jacking points and must never be relied on as a “stand.” NEVER attempt to change a tire in the lane of traffic.Hyundai Accent (HC) (2017 - 2022) Service Manual: Maintenance services
You should exercise the utmost care to prevent damage to your Hyundai Accent and injury to yourself whenever performing any maintenance or inspection procedures. Use proper tools, keep the engine compartment clean, and never work near moving parts with the engine running. Have your vehicle maintained and repaired by an authorized HYUNDAI dealer. An authorized HYUNDAI dealer meets HYUNDAI's high service quality standards and receives technical support from HYUNDAI in order to provide you with a high level of service satisfaction.
Contents
Categories
- Manuals Home
- Hyundai Accent Owners Manual
- Hyundai Accent Service Manual
- Questions & Answers
- Video Guides
- Useful Resources
- New on site
- Most important about car
- Privacy Policy

0.0082