Hyundai Accent: Smart Key System / Smart Key Unit
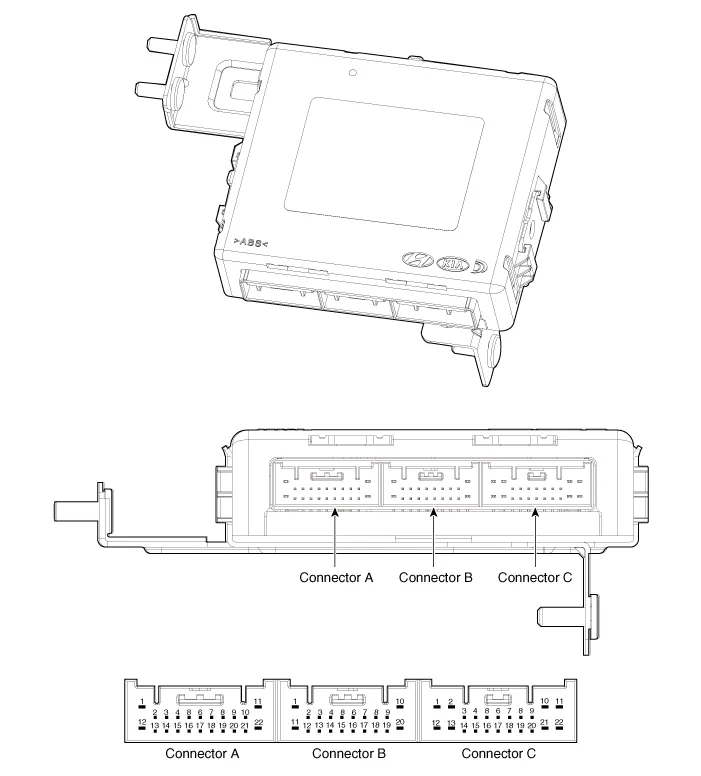
| No | Connector A | Connector B | Connector C |
| 1 | - | IGN 2 Relay output | Battery (+) |
| 2 | SSB Switch 1 input | P CAN Low | - |
| 3 | Driver outside handle switch input | P CAN High | Immobilizer antenna power output |
| 4 | - | B CAN High | Outside handle antenna driver power output |
| 5 | - | B CAN Low | Outside handle antenna assist power output |
| 6 | - | SSB Illumination (amber) output | Bumper antenna power output |
| 7 | RPM input | - | Interior antenna 1 power output |
| 8 | Start feedback input | SSB Illumination (+) output | Interior antenna 2 power output |
| 9 | IGN 2 | ESCL Enable output | Interior antenna 3 power output |
| 10 | - | Battery (+) power | - |
| 11 | Starter relay output | IGN 1 Relay output | - |
| 12 | Power1 ground | ESCL COM | - |
| 13 | SSB Switch 2 input | EMS COM | ESCL (-) Output |
| 14 | Assist outside handle switch input | - | Immobilzer antenna ground output |
| 15 | - | SSB Illumination (-)output | Outside handle antenna drvier ground output |
| 16 | P Position input / Clutch switch input | SSB Illumination (Blue) output SSB Illumination (Red) output | Outside handle antenna assist ground output |
| 17 | ESCL Unlock switch input | - | Bumper antenna ground output |
| 18 | Wheel speed sensor input | Exterior buzzer output | Interior antenna 1 groud output |
| 19 | ACC input | - | Interior antenna 2 groud output |
| 20 | IGN 2 | ESCL (+) output | Interior antenna 3 groud output |
| 21 | Brake switch input | - | |
| 22 | ACC Relay output | Ground power 2 |
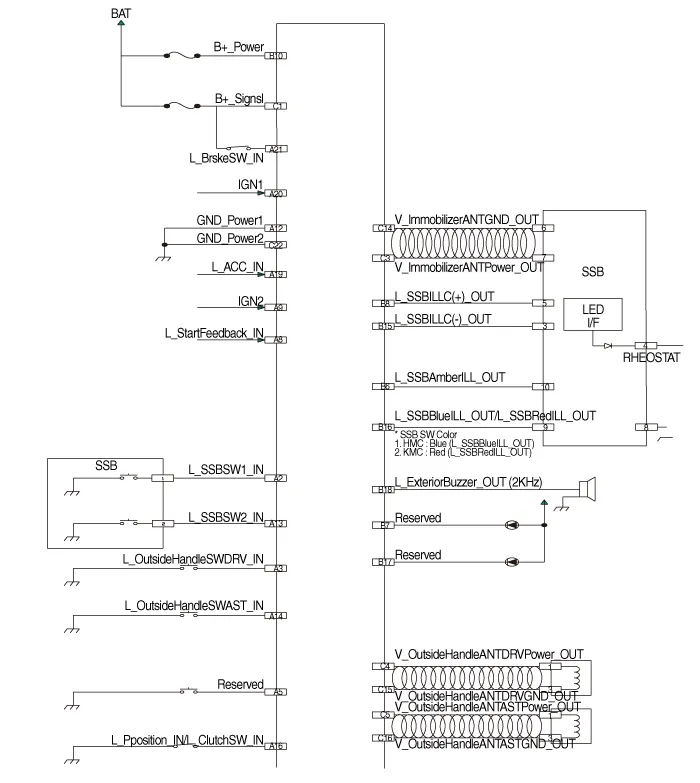
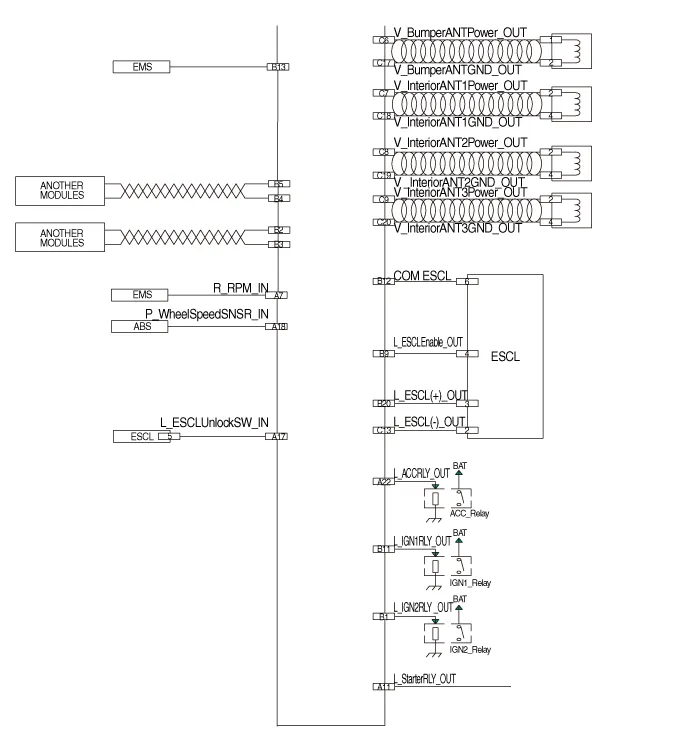
1.Disconnect the negative (-) battery terminal.
2.Remove the glove box.(Refer to Body - "Glove Box Housing")
3.Remove the smart key unit (A) after loosening the nuts and disconnecting the connectors (B).
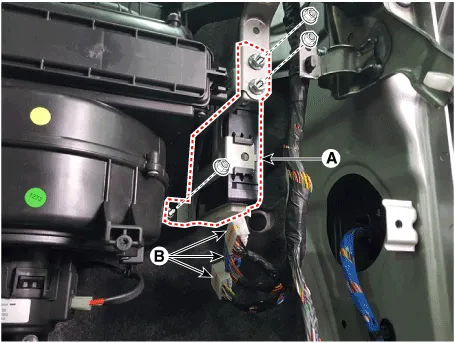
1.Disconnect the negative (-) battery terminal.
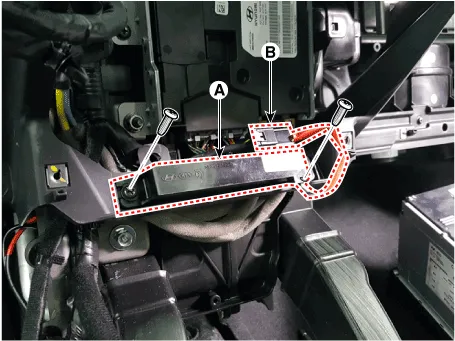
2.Remove the glove box upper cover.(Refer to Body - "Glove Box Upper Cover Assembly")
3.Remove the interior 1 antenna (A) after loosening the mounting screws (2EA) and disconnecting the connector (B).
1.Disconnect the negative (-) battery terminal.
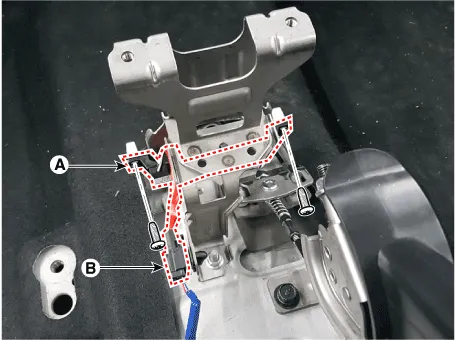
2.Remove the console rear complete assembly.(Refer to Body - "Floor Console Assembly")
3.Remove the interior 2 antenna (A) after loosening the mounting screws (2EA) and disconnecting the connector (B).
1.Disconnect the negative (-) battery terminal.
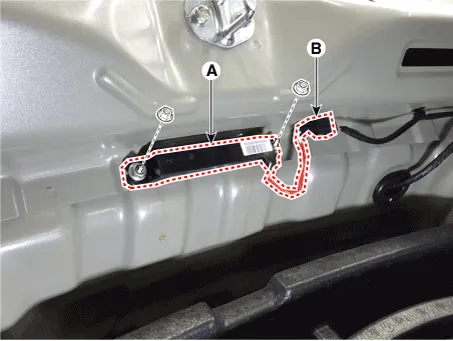
2.Remove the rear transvers trim.(Refer to Body - "Trunk Trim")
3.Remove the interior 3 antenna (A) after loosening the mounting nuts(2EA) and disconnecting the connector (B).
1.Disconnect the negative (-) battery terminal.
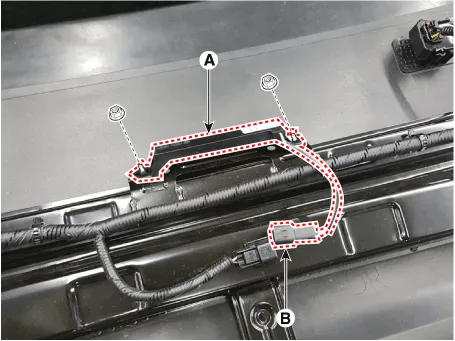
2.Remove the rear bumper cover.(Refer to Body - "Rear Bumper Cover")
3.Remove the exterior bumper antenna (A) after loosening the mounting nuts and disconnecting the antenna connector (B).
1.Disconnect the negative (-) battery terminal.
2.Remove the front bumper cover.(Refer to Body - "Front Bumper Cover")
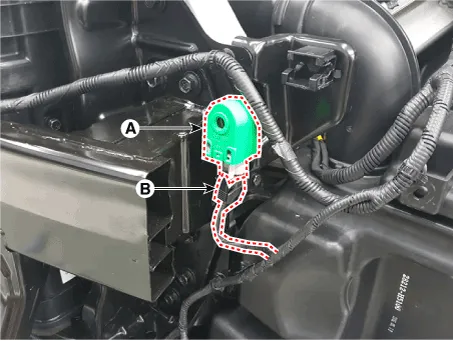
3.Remove the buzzer (A) after disconnecting the connector (B).
1.Disconnect the negative (-) battery terminal.
2.Remove the front door trim.(Refer to Body - "Front Door Trim")
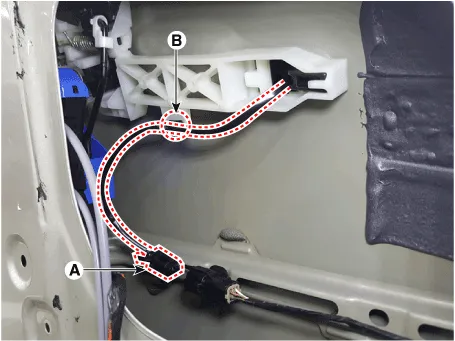
3.Disconnect the front door outside handle connector (A) and then remove the wiring mounting clip (B).
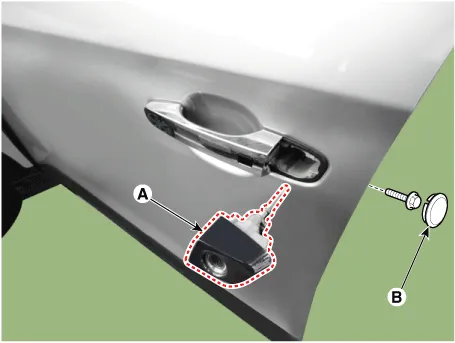
4.Remove the door outside handle cover (A) after seperating the plug hole from the door and loosening the mounting bolt.
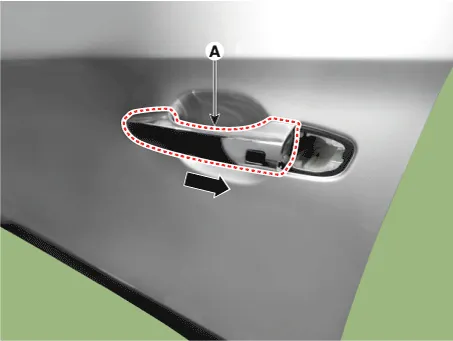
5.Remove the outside handle (A) by sliding it rearward.
1.Disconnect the front door outside handle connector (A).
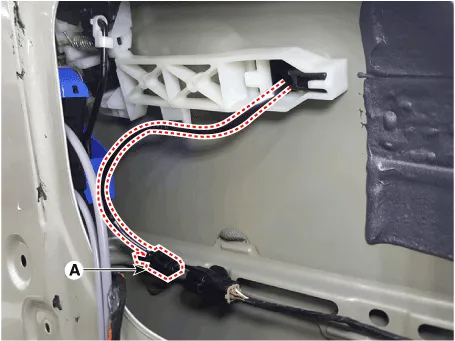
2.Check for continuity between terminals No 2 and No 4.
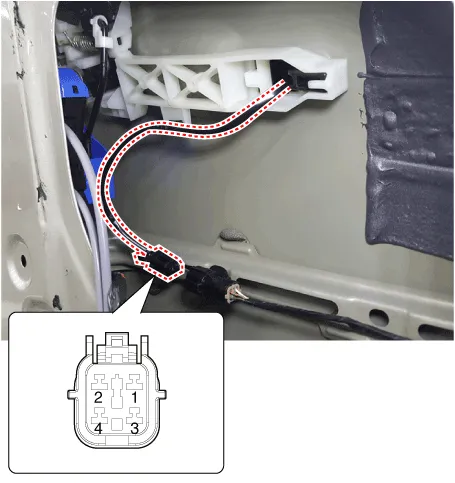
| No | Description |
| 1 | Door antenna 1 |
| 2 | Door lock/unlock button 1 |
| 3 | Door antenna 2 |
| 4 | Door lock/unlock button 2 |
1.Install the smart key unit.
2.Install the smart key unit mounting bolts and connect the connector.
3.Install the driver side crash pad lower panel.
4.Install the negative (-) battery terminal and check the smart key system.
1.Install the interior 1 antenna.
2.Install the crash pad center fascia panel.
3.Install the negative (-) battery terminal and check the smart key system.
1.Install the interior 2 antenna.
2.Install the console rear complete assembly.
3.Install the negative (-) battery terminal and check the smart key system.
1.Install the interior 3 antenna.
2.Install the rear transvers trim.
3.Install the negative (-) battery terminal and check the smart key system.
1.Install the exterior bumper antenna.
2.Install the rear bumper cover.
3.Install the negative (-) battery terminal and check the smart key system.
1.Install the buzzer.
2.Install the front left wheel guide.
3.Install the negative (-) battery terminal and check the smart key system.
1.Install the outside handle.
2.Install the door trim.
3.Install the negative (-) battery terminal and check the smart key system.
Other information:
Hyundai Accent (HC) (2017 - 2022) Service Manual: Ambient Temperature Sensor
- Description The ambient temperature sensor is located at the front of the condenser and detects ambient air temperature. It is a negative type thermistor; resistance will increase with lower temperature, and decrease with higher temperature.The sensor output will be used for discharge temperature control, temperature regulation door control, blower motor level control, mix mode control and in-car humidity control.Hyundai Accent (HC) (2017 - 2022) Service Manual: Schematic Diagrams
- Schematic Diagrams - Terminal Function Wire NoDesignationCurrent MaxMin 13Ground for recirculation pump39A10A 1Voltage supply for pump motor39A10A 25Voltage supply for solenoid valves15A2A 38Ground for solenoid valves andECU15A2A 22Signal wheel speed sensor (FL)16.8 mA5.9 mA 33Voltage supply for the active wheel speed sensor (RL)16.
Categories
- Manuals Home
- Hyundai Accent Owners Manual
- Hyundai Accent Service Manual
- New on site
- Most important about car


