Hyundai Accent: Lubrication System / Engine Oil

• Prolonged and repeated contact with mineral oil will result in the removal of natural fats from the skin, leading to dryness, irritation and dermatitis. In addition, used engine oil contains potentially harmful contaminants which may cause skin cancer.
• Exercise caution in order to minimize the length and frequency of contact of your skin to used oil. Wear protective clothing and gloves. Wash your skin thoroughly with soap and water, or use water-less hand cleaner, to remove any used engine oil. Do not use gasoline, thinners, or solvents.
• In order to preserve the environment, used oil and used oil filter must be disposed of only at designated disposal sites.
1.Drain the engine oil.
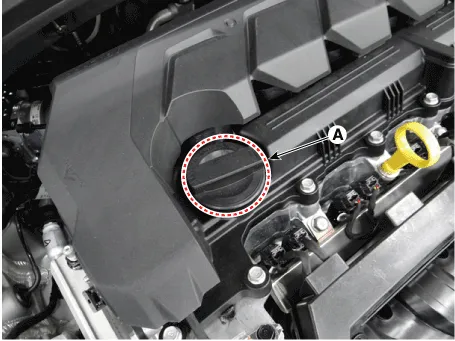
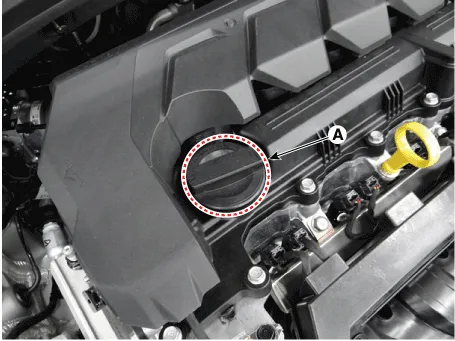
(1)Remove the oil filler cap (A).
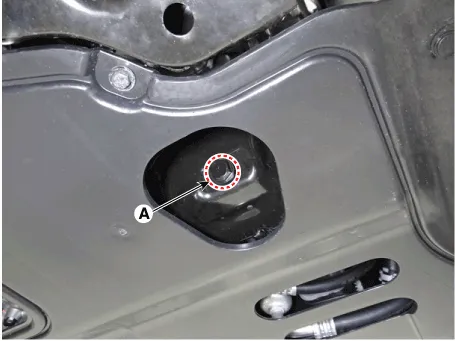
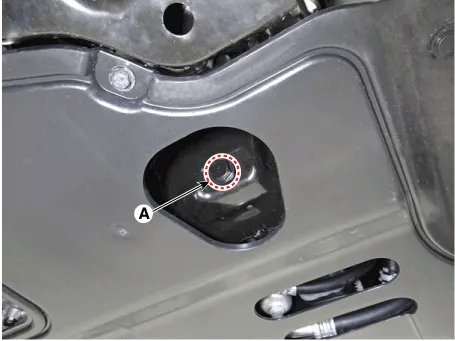
(2)Remove the oil drain plug (A), and drain the oil into a container.
2.Replace the oil filter.
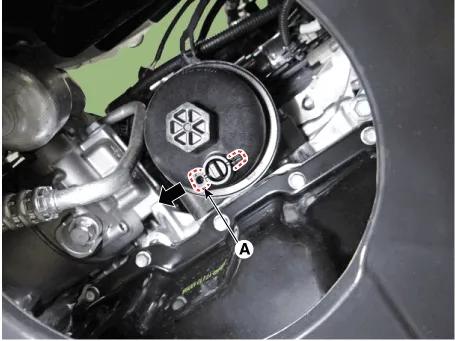
(1)Remove the safety pin (A).
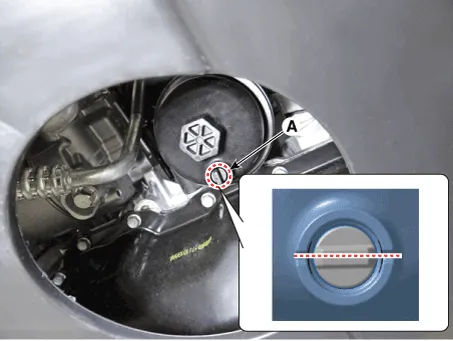
(2)Remove the pre-drain plug (A) by rotating it by 90° and then drain the engine oil in the oil filter.
(3)Using the socket wrench, remove the oil filter cap (A).
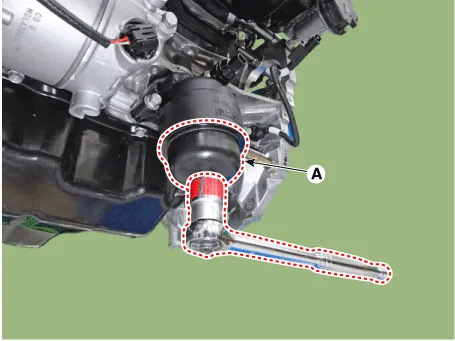
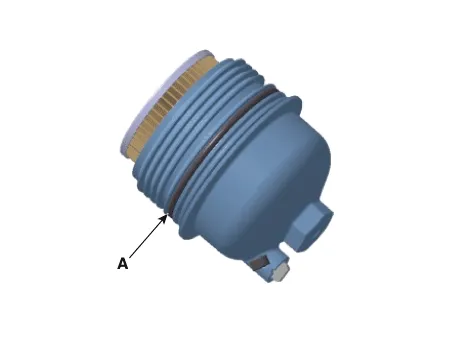
(4)Install the new o-ring (A) on the oil filter cap.
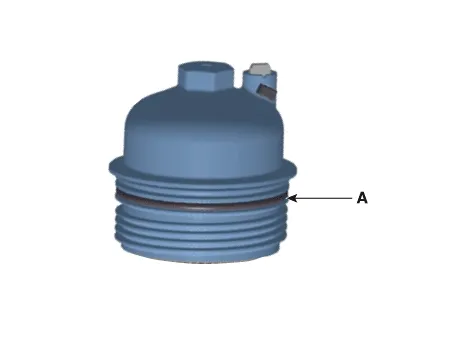

• Always use a new O-ring.
(5)Install the new oil filter (A).
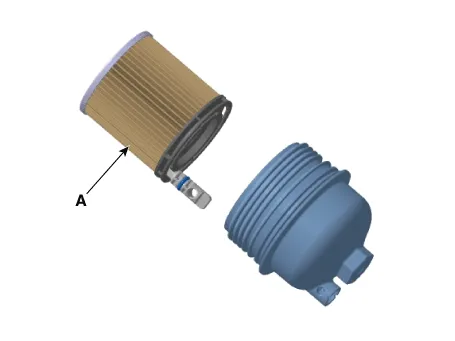

• When install the oil filter, apply engine oil to the drain plug O-ring (A).
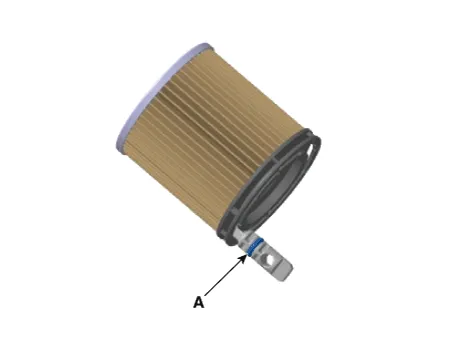
• Must use the drain plug (A) that is installed in a new oil filter.
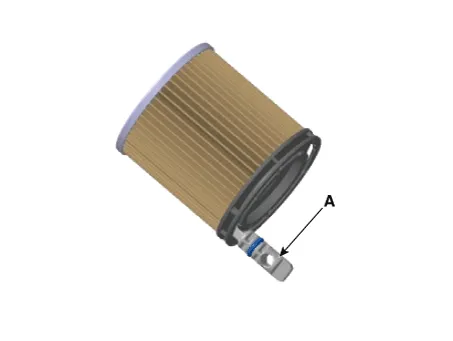
(6)Rotate the free drain plug (A) by 90° so that the drain pin is in the locked position.
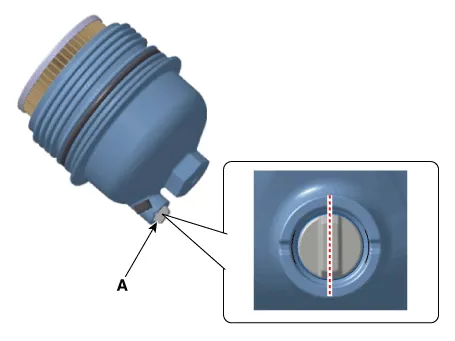
(7)Install the new safety pin (A).
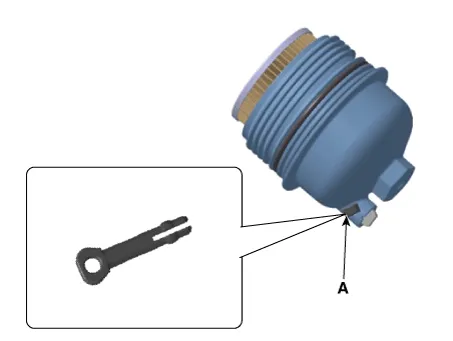

• Always use a safety pin.
(8)Lightly tighten the O-ring of the oil filter cap until it contacts with the installed surface, then tighten the oil filter cap (A) to the specified torque using a socket wrench..
Tightening torque :34.3 N.m (3.5 kgf.m, 25.3 lb-ft)
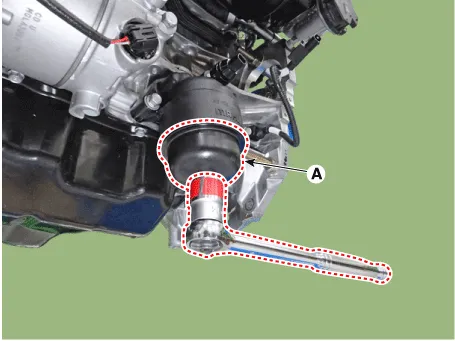

• When install the oil filter cap, Check if the new o-ring (A) is installed correctly the cap.
• When install the oil filter cap, apply engine oil to the new O-ring (A).
3.Refill with engine oil.
(1)Install the oil drain plug (A) with a new gasket.
Tightening torque :34.3 - 44.1 N.m (3.5 - 4.5 kgf.m, 25.3 - 32.5 lb-ft)
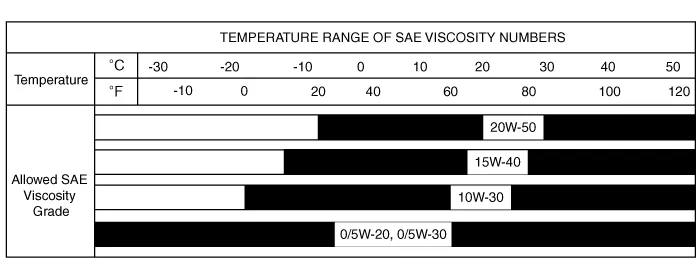
(2)Fill with fresh engine oil.
CapacityTotal : 4.0 L (4.23 US qt, 3.52 lmp.qt., 1.06 US gal.)Oil pan : 3.6 L (3.8 U.S qt., 3.17 lmp.qt., 0.95 U.S gal.)Drain and refill including oil filter : 3.8 L (4.02 U.S qt., 3.34 lmp.qt., 1.00 U.S gal.)
(3)Intall the oil filler cap (A).
4.Start engine and check for oil leaks.
5.Recheck the engine oil level.
1.Check the engine oil quality.Check the oil deterioration, entry of water, discoloring of thinning.If the quality is visibly poor, replace the oil.
2.Check the engine oil level.After warning up the engine and then 5 minutes after the engine stop, oil level should be between the "L" and "F" marks in the dipstick.If low, check for leakage and add oil up to the "F" mark.

• Do not fill with engine oil above the "F" mark.
• Check the oil level gauge, based on a condition in which the engine oil temperature is a room temperature (20°C – 25°C).
• Make sure the tire pressure falls within the normal range.
• When measuring engine oil, make sure the road surface is even.
• After draining engine oil, make sure you check the total amount of drained oil before injection.
Other information:
Hyundai Accent (HC) (2017 - 2022) Service Manual: Variable Intake Solenoid (VIS) Valve
- Description Variable Intake manifold Solenoid (VIS) valve is installed on the intake manifold. The VIS valve controls the vacuum modulator which activates a valve in the intake manifold. The ECM opens or closes this valve according to engine condition (Refer to below table). Engine conditionVIS valveOperation Medium speedClosedIncreasing engine performance in low engine speed by reducing intake interference among cylinders Low / High speedOpenMinimizing intake resistance by shortening intake manifold length and increasing area of air entrance - Specification ItemSpecification Coil resistance (Ω)30.Hyundai Accent (HC) (2017 - 2022) Service Manual: Repair procedures
- Replacement [Removal] • Put on gloves to prevent hand injuries. • Use seat covers to avoid damaging any surfaces. 1.Remove the roof garnish.(Refer to Body Side Molding - "Roof Garnish") 2.Remove the front pillar trim.(Rear to Interior Trim - "Front Pillar Trim") 3.Remove the inside rear view mirror assembly.
Categories
- Manuals Home
- Hyundai Accent Owners Manual
- Hyundai Accent Service Manual
- New on site
- Most important about car


