Hyundai Accent: Engine Mechanical System / Lubrication System
Flow Diagram
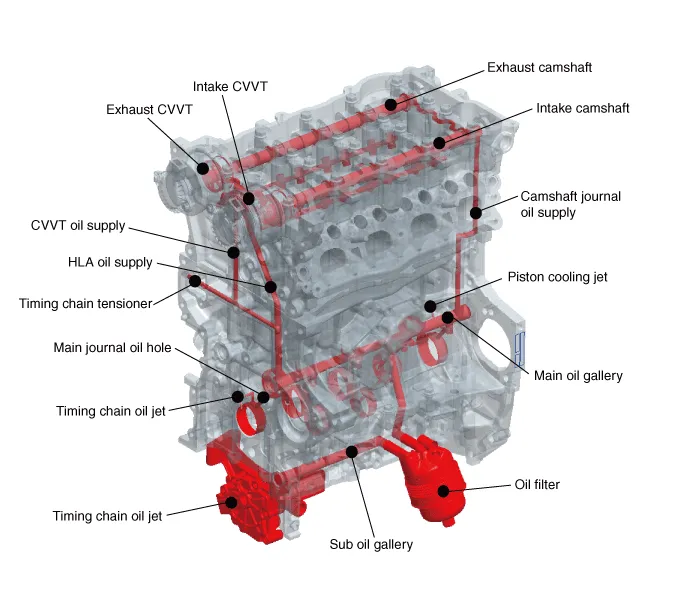
Engine Oil ➤
Oil Filter Body
1.Disconnect the battery negative terminal.
2.Remove the engine room under cover.(Refer to Engine and Transaxle Assembly - "Engine Room Under Cover")
3.Drain the engine oil.(Refer to Lubrication System - "Engine Oil")
4.Disconnect the oil pressure switch connector (A).
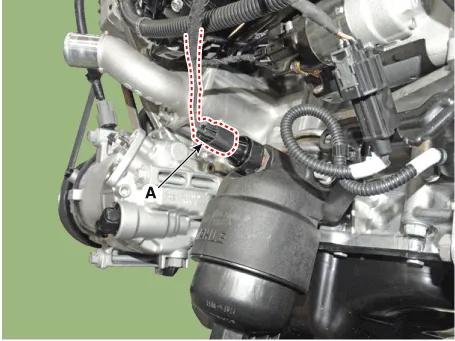
5.Remove the oil filter body (A).
Tightening torque :18.6 - 23.5 N.m (1.9 - 2.4 kgf.m, 13.7 - 17.4 lb-ft)
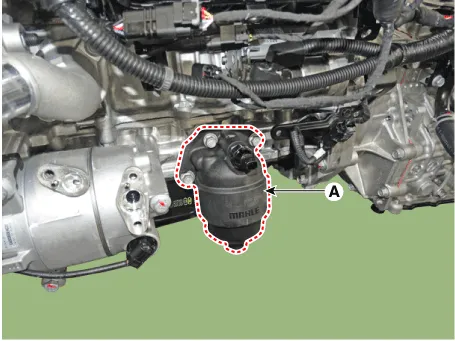
6.Install in the reverse order of removal.
7.Refill engine oil.(Refer to Lubrication System - "Engine Oil")
Oil Pan
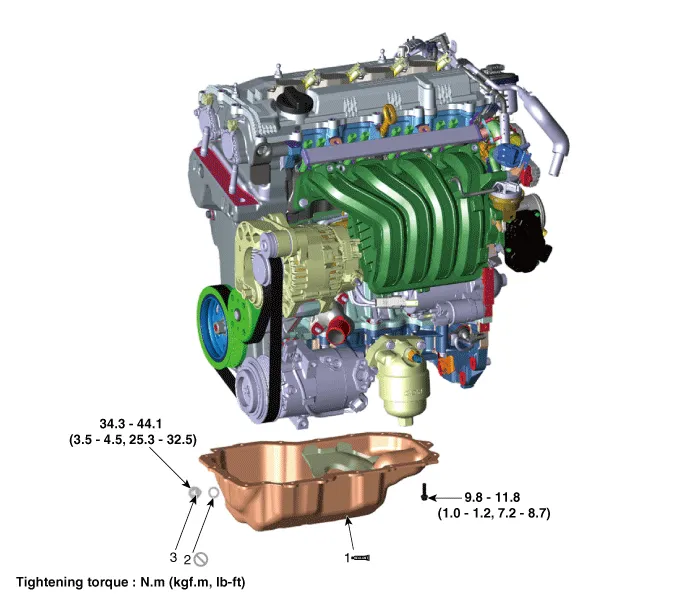
1. Oil pan
2. Oil drain plug gasket
3. Oil drain plug
1.Remove the engine room under cover.(Refer to Engine and Transaxle Assembly System - "Engine Room Under Cover")
2.Drain the engine oil. (Refer to Lubrication System - "Engine Oil")
3.Using the SST (09215-3C000) and remove the oil pan (A).
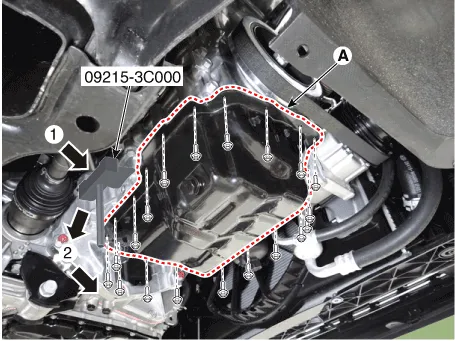

• Insert the SST between the oil pan and the ladder frame by tapping it with a plastic hammer in the direction of ① arrow.
• After tapping the SST with a plastic hammer along the direction of ② arrow around more than 2/3 edge of the oil pan, remove it from the cylinder block.

• Do not turn over the SST abruptly without tapping. It be result in damage of the SST.
1.Install the oil pan.
(1)Before assembling the oil pan, the surface where the sealant is applied to should be free from the hardened sealant, foreign matters, oil, dust, moisture and etc.
(2)After applying liquid sealant on the oil pan, assemble it within 5 minutes.
Width : 2.5 - 3.5 mm (0.0984 - 0.1378 in.)Specification : LOCTITE 5900H / THREE BOND 1217H or above.
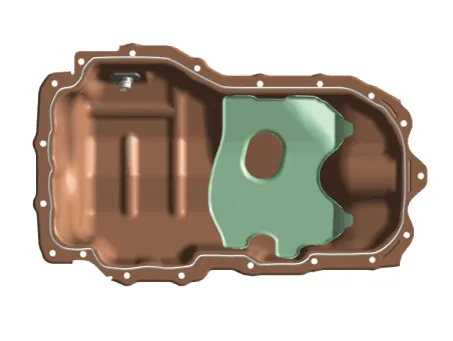

• When applying sealant gasket, sealant must not be protruded into the inside of oil pan.
• To prevent leakage of oil, apply sealant gasket to the inner threads of the bolt holes.
• If the sealant is applied to the bottom surface of the lower crankcase, it should be the same position as the oil pan.
(3)Install the oil pan (A) with the bolts.Uniformly tighten the bolts in several passes.
Tightening torque :9.8 - 11.8 N.m (1.0 - 1.2 kgf.m, 7.2 - 8.7 lb-ft)
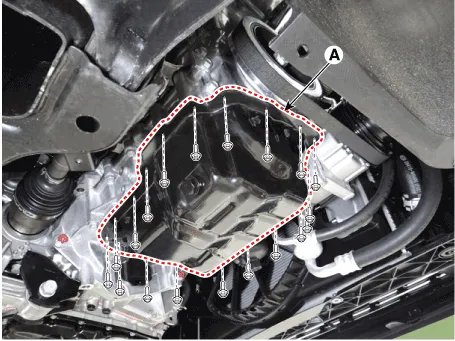

• After assembly, wait at least 30 minutes before filling the engine with oil.
2.Refill engine oil.(Refer to Lubrication System - "Engine Oil")
Oil Pump
1.Remove the engine room under cover.(Refer to Engine and Transaxle Assembly - "Engine Room Under Cover")
2.Drain the engine oil.(Refer to Lubrication System - "Engine Oil")
3.Remove the oil pan.(Refer to Lubrication System - "Oil Pan")
4.Turn the oil pump chain tensioner (A) in the direction of the arrow and remove the oil pump chain (B) from the oil pump.
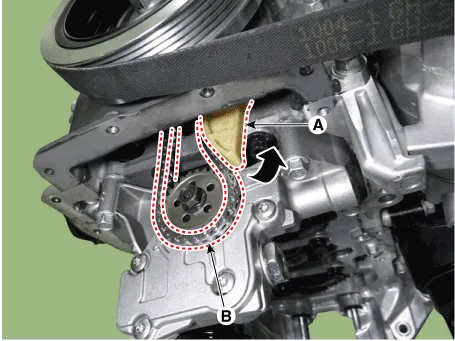
5.Remove the oil pump (A).
Tightening torque :18.6 - 23.5 N.m (1.9 - 2.4 kgf.m, 13.7 - 17.4 lb-ft)
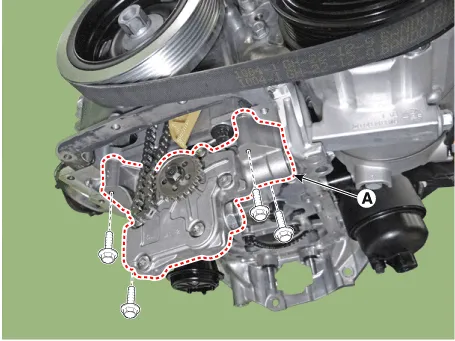
6.Install in the reverse order of removal.
7.Refill engine oil.(Refer to Lubrication System - "Engine Oil")
8.Start engine and check for oil leaks.
1.Disconnect the battery negative terminal.
2.Remove the timing chain.(Refer to Timing System - "Timing Chain")
3.Remove the oil pump chain tensioner (A).
Tightening torque :9.8 - 11.8 N.m (1.0 - 1.2 kgf.m, 7.2 - 8.7 lb-ft)
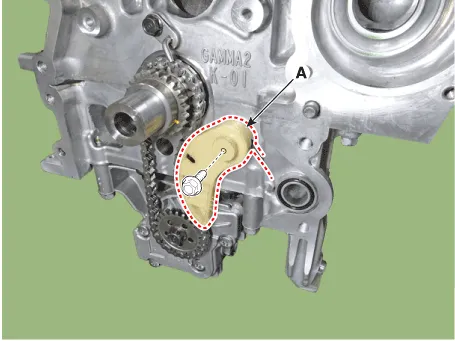
4.Remove the oil pump chain (A).
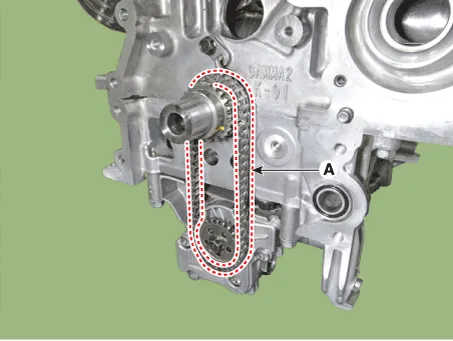
5.Install in the reverse order of removal.
6.Refill engine oil.(Refer to Lubrication System - "Engine Oil")
Oil Pressure Switch
1.Disconnect the battery negative terminal.
2.Remove the engine room under cover.(Refer to Engine and Transaxle Assembly System - "Engine Room Under Cover")
3.Drain the engine oil. (Refer to Lubrication System - "Engine Oil")
4.Disconnect the oil pressure switch connector (A).
5.Remove the oil pressure switch (B).
Tightening torque :14.7 - 21.6 N.m (1.5 - 2.2 kgf.m, 10.8 - 15.9 lb-ft)
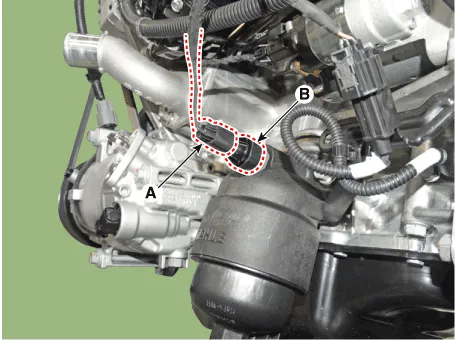
6.Installation is in the reverse order of removal.

• When installing the oil pressure switch, apply seal lock to the thread.
Seal lock : THREEBOND 2403Thickness : 0.2 - 0.4 mm (0.008 - 0.016 in)
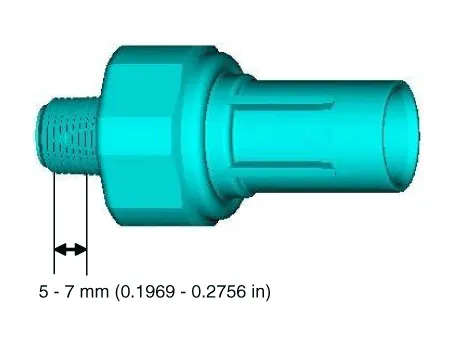
1.Check the continuity between the terminal and the body with an ohmmeter. If there is no continuity, replace the oil pressure switch.
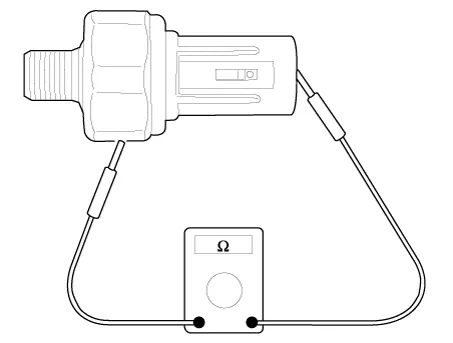
2.Check the continuity between the terminal and the body when the fine wire is pushed. If there is continuity even when the fine wire is pushed, replace the switch.
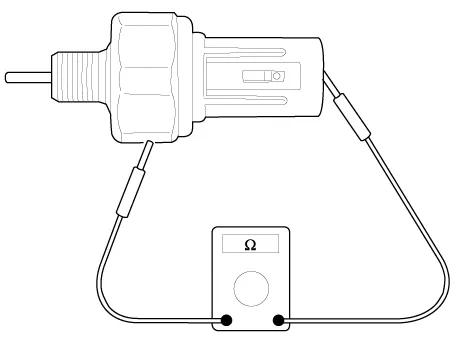
3.If there is no continuity when a 49.0kpa (0.5kg/cm², 7.1psi) vacuum is applied through the oil hole, the switch is operating properly.Check for air leakage. If air leaks, the diaphragm is broken. Replace it.
Other information:
Hyundai Accent (HC) (2017 - 2022) Service Manual: Brake Oil
- Specifications Brake oil : DOT 3 or DOT 4 Reservoir capacity (cc) MAX LEVELA + B + C + D + E409 ± 20 ON LEVEL (MIN LEVEL)(H = 23 ± 1.5 mm)B + C + D138 ± 10 PARTIAL LEVELC (PRI)28 D (SEC)31 CLUTCH LEVELE12 - Replacement 1.Disconnect the battery (-) terminal. 2.Remove the brake fluid level sensor connector. 3.Remove the reservoir cap and remove the brake fluid from the reservoir tank using the cleaner.Hyundai Accent (HC) (2017 - 2022) Service Manual: Evaporator Temperature Sensor
- Description The evaporator temperature sensor will detect the evaporator core temperature and interrupt compressor relay power in order to prevent evaporator from freezing by excessive cooling. The evaporator temperature sensor has the Negative Temperature Coefficient (NTC). Electrical resistivity of NTC will increase with decreasing temperature and decrease with increasing temperature.
Contents
Categories
- Manuals Home
- Hyundai Accent Owners Manual
- Hyundai Accent Service Manual
- New on site
- Most important about car


